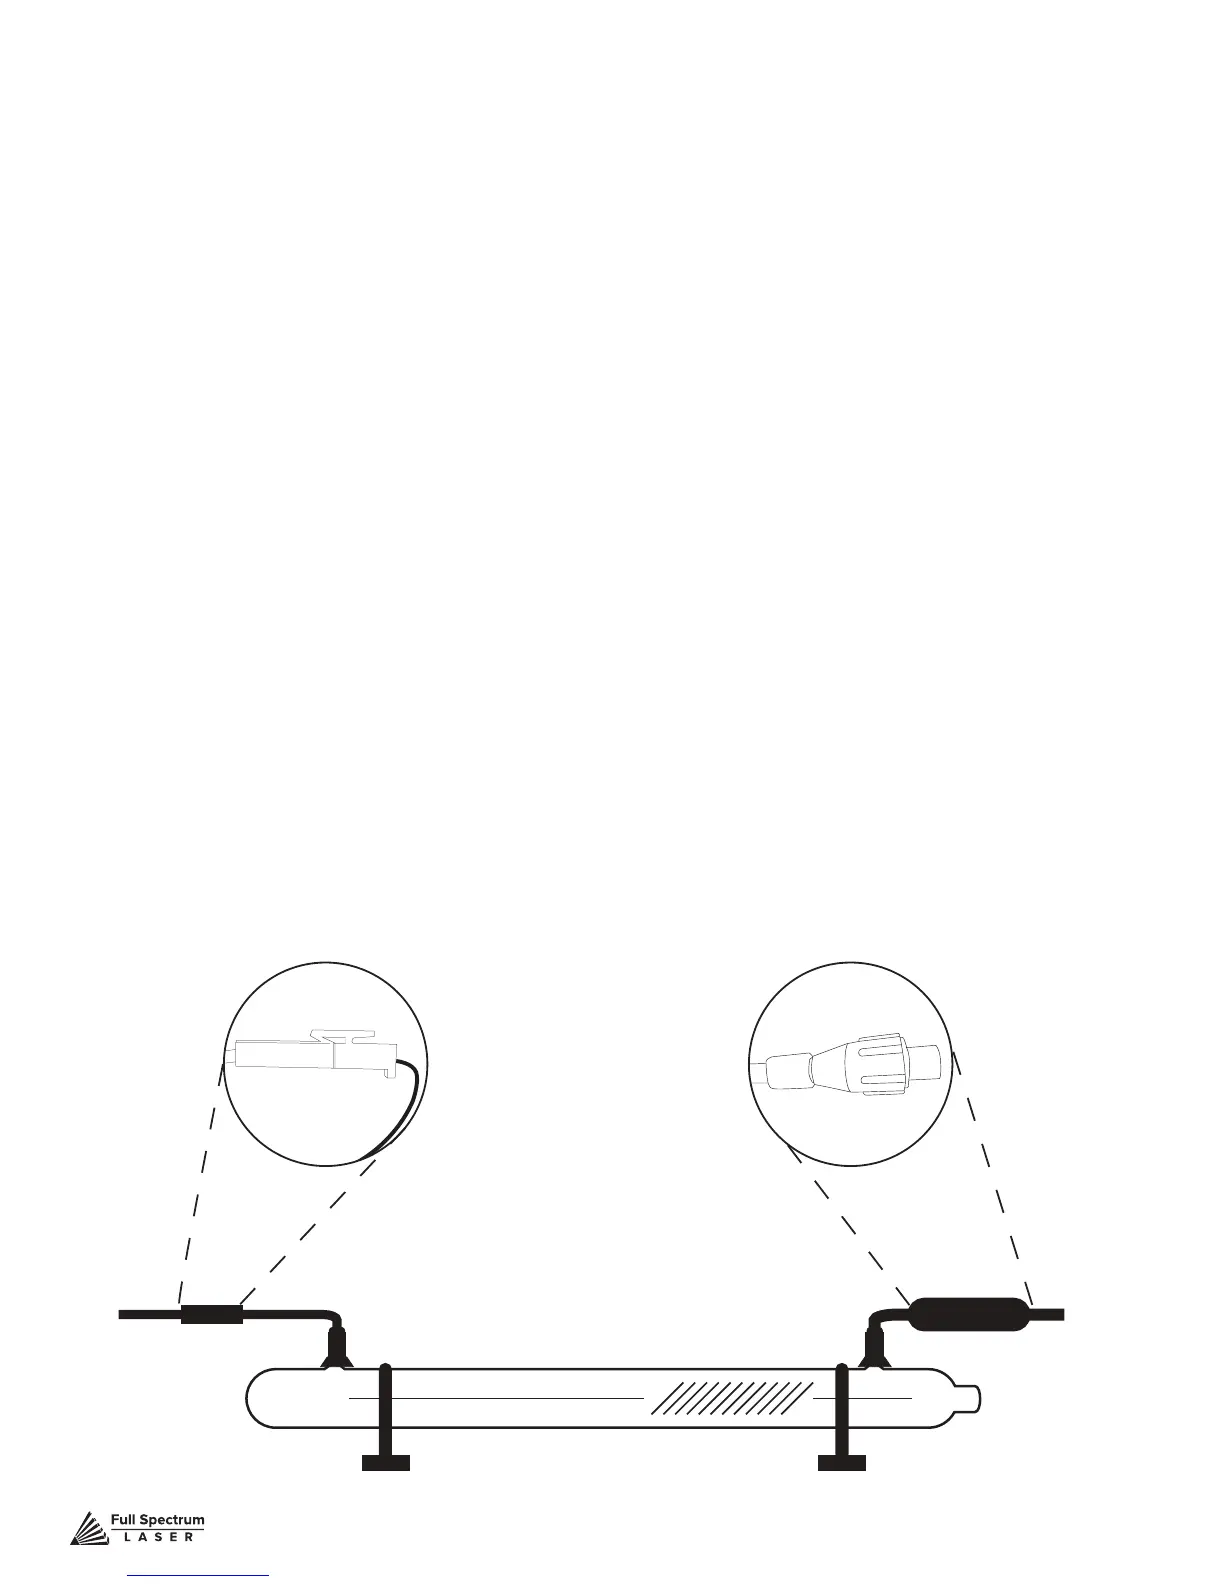
Figure 8.1
Technical Support is available from 8am to 5pm (PST) M - F at support@fslaser.com.
91
Replacing Laser Tube Steps
1. Power Off Machine: Power off and unplug your unit. Wait at least 1 hour for capacitors
to discharge.
2. Disconnect Water: Detach the water tubes from their connectors on the laser tube and drain
the water into a bucket.
3. Remove Water Tubes (Step One): Remove the two (2) water tubes from the bulkheads on
the back of the machine and carefully drain any water into a bucket. Use the small piece of tubing
that shipped with your laser to shunt the two water bulkheads in the back of the machine together.
4. Remove Water Tubes (Step Two): GENTLY remove the water tubes from the laser glass
bulkhead. Be careful not to let any excess water in the tubes spill onto the machine’s components.
5. Remove Tube Retainer Straps: Using a 2.5mm hex wrench (included with your purchase),
remove the four (4) M5 hex nuts from the two (2) tube retainer straps that hold the laser tube in the
rubber restraints.
6. Remove Old Laser Tube: Remove the tube from the rubber holders and carefully set it on
top of the machine. Be aware the laser tube is still connected to the machine’s wiring.
DO NOT pull on the wiring.
7. Remove Universal Laser Pin Connector: Carefully unscrew the universal laser pin
connector off the aperture end of the laser tube. Next unclip the connector on the other side of the
laser tube. You can now place the old laser tube aside for later disposal.
Coils to the Right