Technical Support is available from 8am to 5pm (PST) M - F at support@fslaser.com.
29
4. Close Safety Lid: Safety measures should make it impossible to re the laser with the safety
lid open. Regardless, never attempt to re the laser with safety lid open.
5. Test Fire the Laser: Press the Fire Laser Icon Button on the touch screen.
6. Repeat Test Fire in Other Three Corners: Without removing the thermal tape, repeat
ring the laser once in each of the other corners of the machine (Upper Right, Lower Right, and
Lower Left).
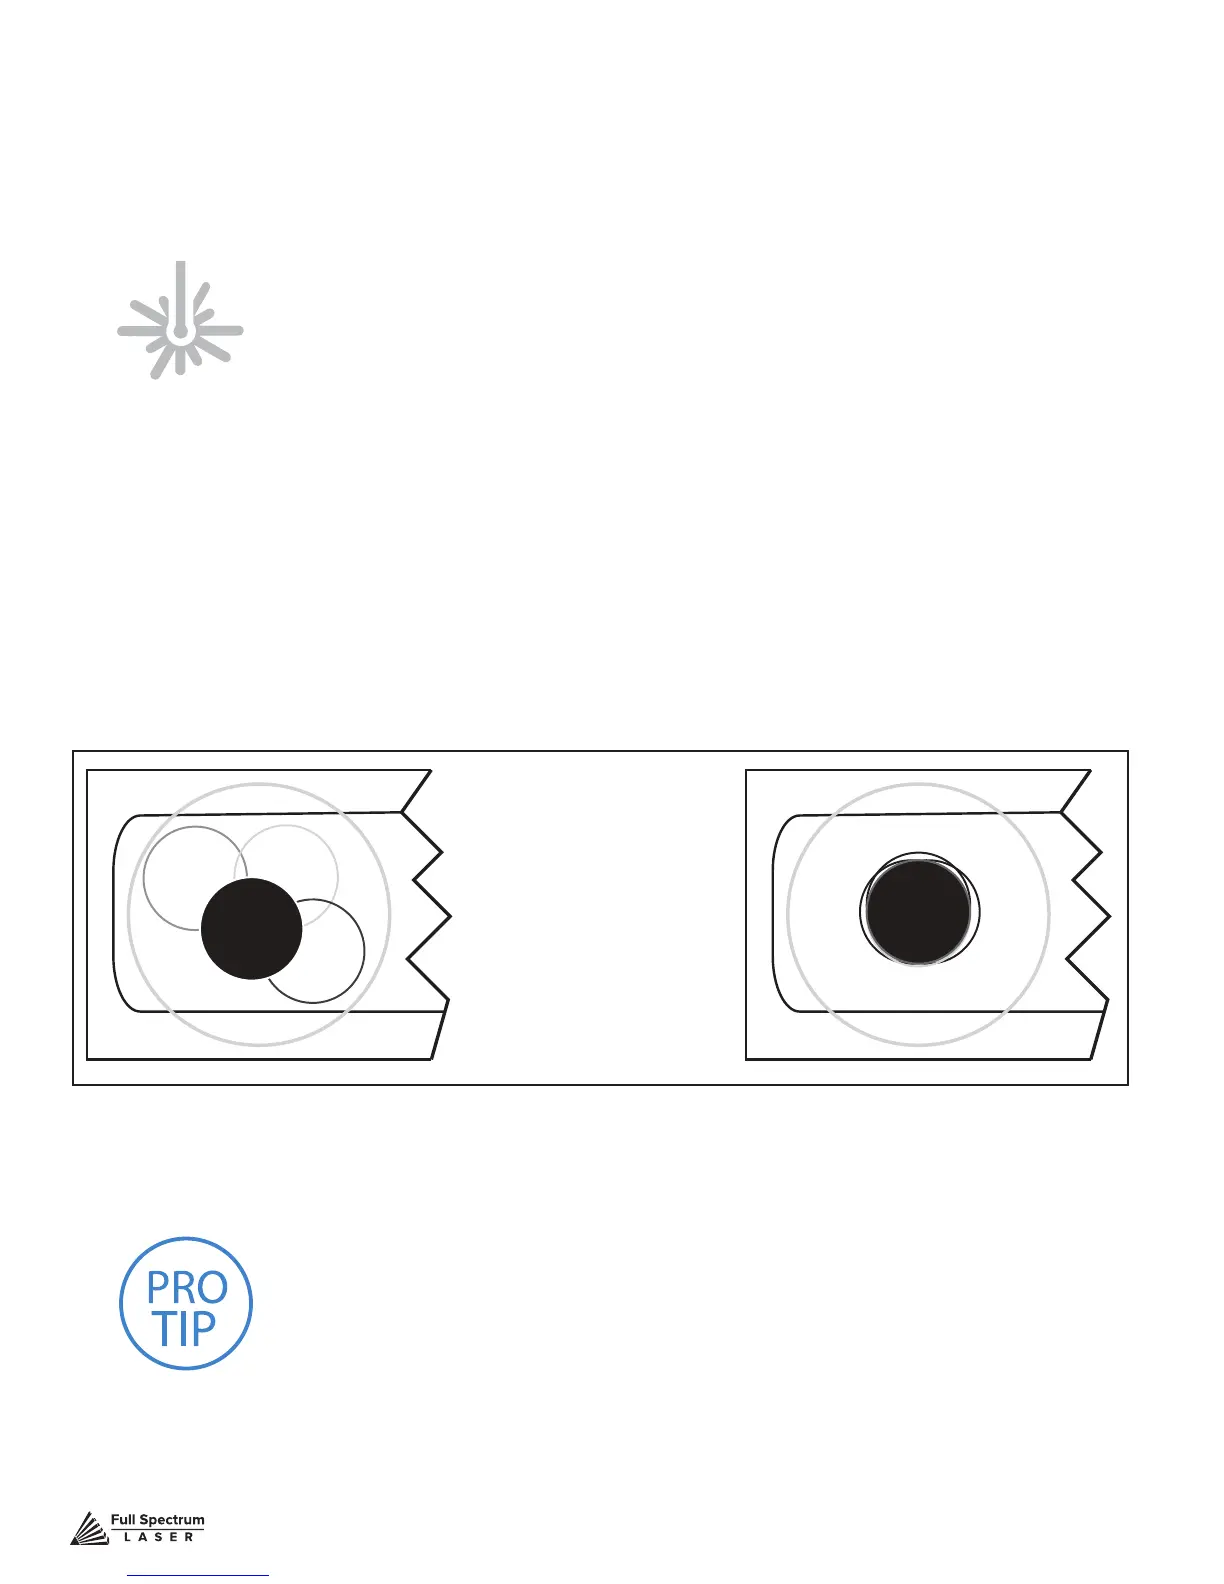
7. Check Results: With the forth corner test re complete, open the lid and remove the thermal
tape. The four burn marks should overlap each other perfectly (see illustration). If they do not overlap
perfectly, you will need to align the mirrors.
ATTENTION! Find and push this icon on your Muse touch
screen to test re the laser.
Not Aligned Aligned
PRO TIP!
The idea is that when the laser is not aligned, you
will have two black dots from the test res in the top and bottom
positions. The red laser pointer is aligned with the invisible laser
pointer so gives you immediate feedback on the mirror adjustment.
By adjusting it into the middle of the two black dots, you are splitting
the error difference. Usually after 1 or 2 iterations, the black dots will
be exactly on top and this axis is aligned. The goal is to have the two
black dots overlap exactly.
Figure 4.3