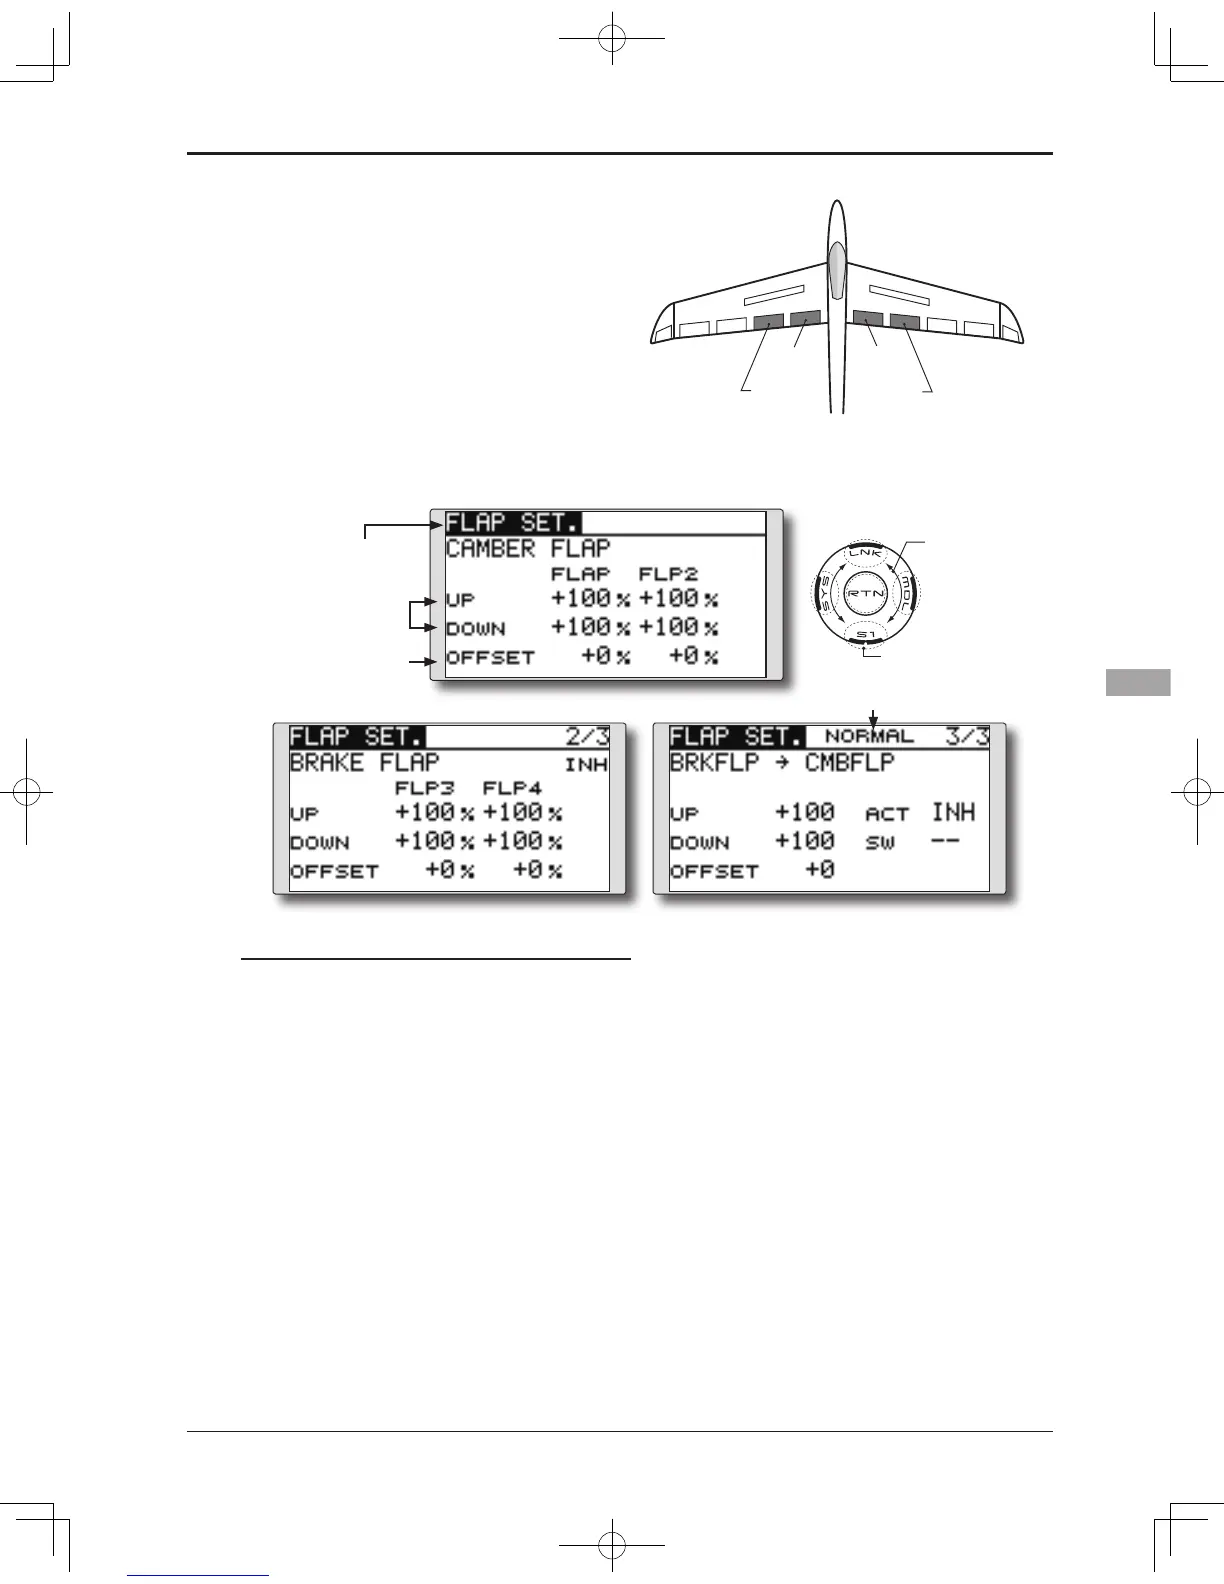
FLAP SET.
[Correspondingmodeltype]:Airplane/glider,2apsormore
The up/down travel of each ap (camber aps:
FLP1/2, brake flaps: FLP3/4) can be adjusted
independently for each servo according to the
wing type.
●Theoperationreferencepointofeachapcanbe
offset
The camber flaps of a 4-flap model can
be mixed with the brake flaps. (BRKFLP to
CMBFLP)
●AnON/OFFswitchcanbeset.
*The display screen is an example. The actual
screen depends on the model type.
Setting method
●Flap up/down adjustment
Move the cursor to the flap (FLP) 1~4 Up or
Down item according to the wing type and
touch the RTN button to switch to the data
input mode. Adjust the travel independently
by scrolling the touch sensor.
Initialvalue:+100%
Adjustmentrange:-120~+120%
*When the RTN button is touched for one second, the rate is
reset to the initial value.)
Touch the RTN button to end the adjustment
and return to the cursor mode.
●Reference point adjustment
Move the cursor to the [OFFSET] item and
touch the RTN button to switch to the data
input mode. Adjust the operation reference
point of each flap by scrolling the touch
sensor.
Initialvalue:0%
Adjustmentrange:-100~+100%
● O p e r a t i o n
reference point
offset
● U p / D o w n
adjustment
*When the RTN button is touched for one second, the
reference point is reset to the initial value.)
Touch the RTN button to end the adjustment
and return to the cursor mode.
●Activate the Brake FLP to Camber FLP mixing
Move the cursor to the [ACT] item and touch
the RTN button to switch to the data input
mode. Select the ACT mode by scrolling the
touch sensor.
*The display blinks.
Tou ch the RTN butto n t o a ctiva te the
function and return to the cursor mode. (ON
is displayed.)
To select a switch, move the cursor to the
[SW] item and touch the RTN button to call
the selection screen. Select the switch and
set its ON direction. (Always ON at "--" setting)
*For a description of the switch selection method, see the
description at the back of this manual.
●Select[FLAPSET.]attheModelmenuand
access the setup screen shown below
by touching the RTN button.
Scrolling
●Movingcursor
●Selectingmode
●Adjustingvalue
●Tonextpage
(Glider: Currently selected condition name)