GAT Access 6100 Terminal Series
Installation
www.gantner.com
HB_GAT-ACCESS6100--EN_14
29
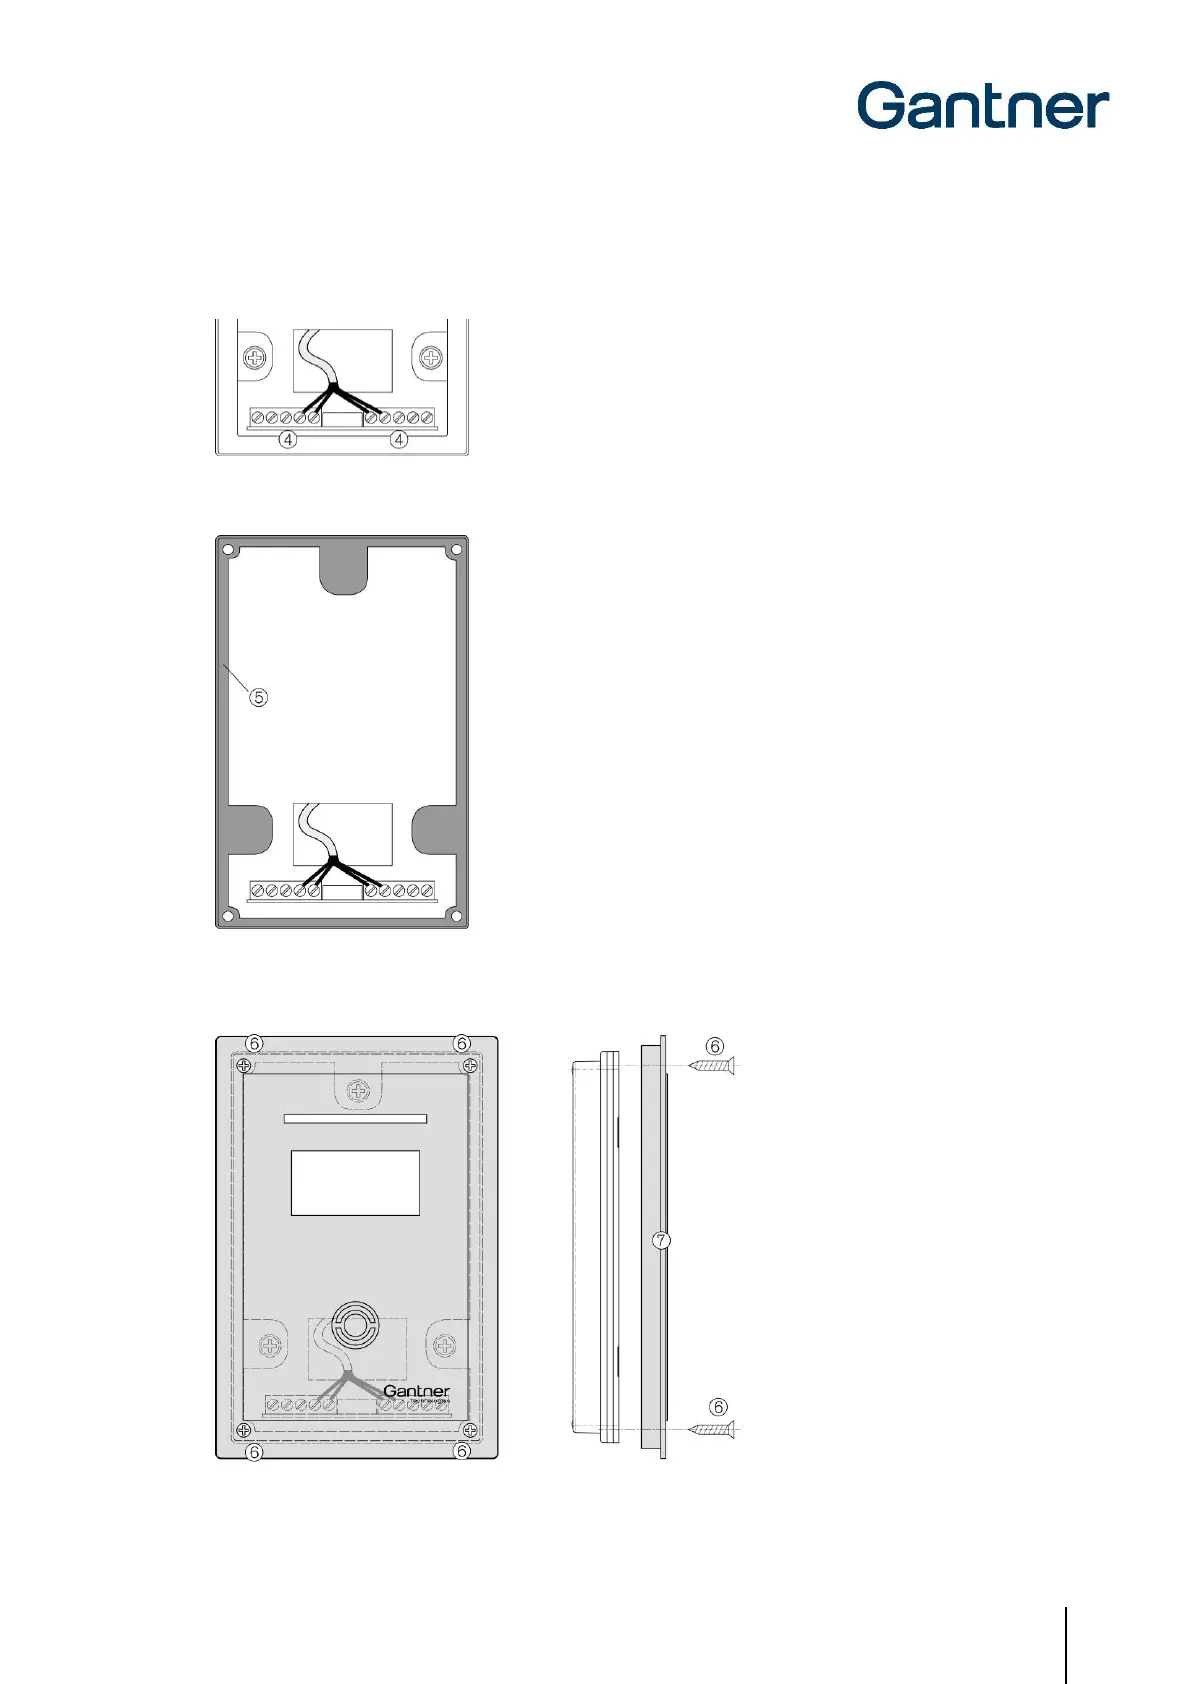
3. Connect the connection cables to the screw terminals (4) on the device rear part. See chapter "4 ELECTRICAL
CONNECTIONS" for information on the pin assignment and electrical specifications.
4. Insert the rubber seal (5) in the device rear part.
5. Attach the device front part with the front print (7) using the four screws included with the GAT TimeAxx 6150
(6). Ensure that the rubber seal is total enclosed around the housing.

 Loading...