GAT Access 6100 Terminal Series
Commissioning & Configuration
52
HB_GAT-ACCESS6100--EN_14
www.gantner.com
5.4.2 Project Configuration
Complete the following steps to configure the GAT Access 6100 via a project in GAT Config Manager.
• Click on the “Open Project” icon (1 in Figure 5.17) to find an existing project. Alternatively, click on the “Create
Project” icon (2 in Figure 5.17) to start a new project.
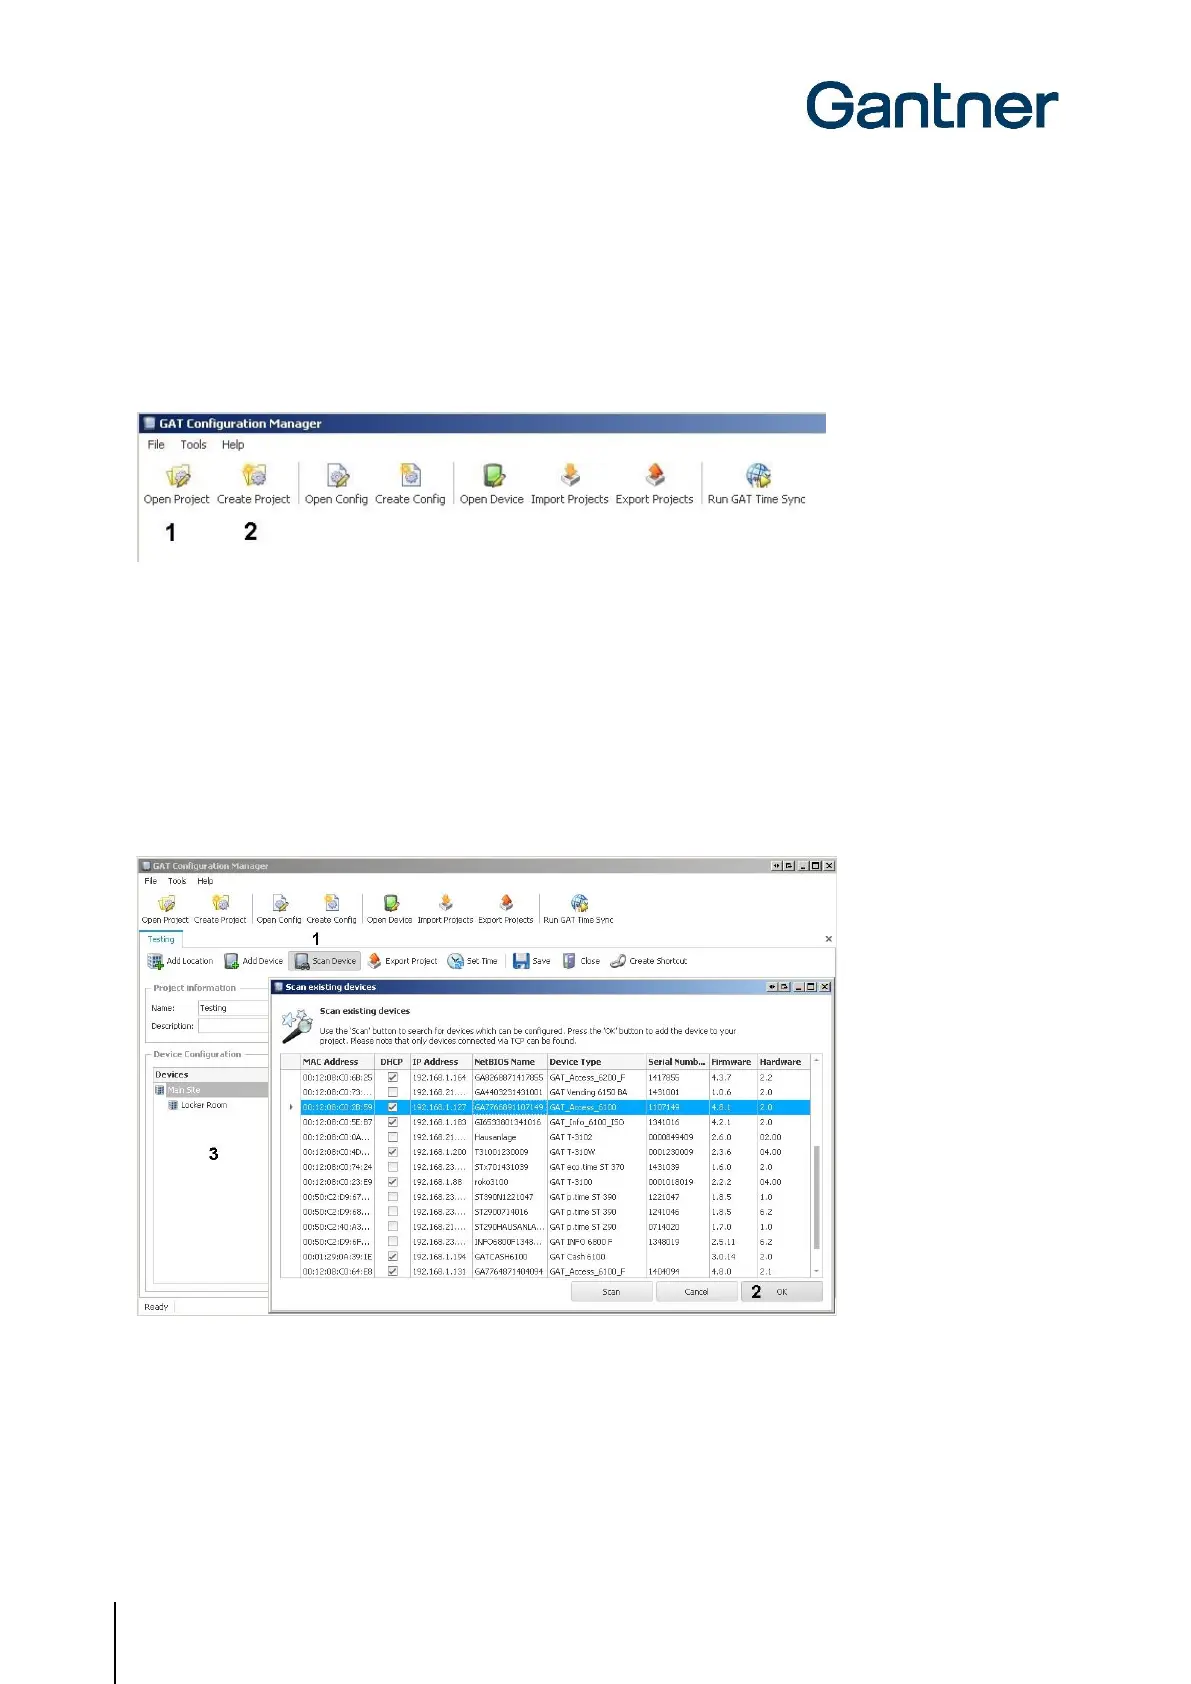
Figure 5.17 – GAT Config Manager - project setup
• Once a project is established, click on the “Scan Device” icon (1 in Figure 5.18).
o The software scans the network and displays a list of all connected GANTNER devices.
• Select your GAT Access 6100 from the list. Use device details such as the IP and MAC address to identify the
correct device.
o The selected device is highlighted in blue as shown in Figure 5.18.
• Click on “OK” (2 in Figure 5.18).
o The selected device is added to the “Devices” list (3 in Figure 5.18).
Figure 5.18 - Open a project for device configuration
The main project window displays all the project information that has been entered into GAT Config Manager. Click
on the GAT Access 6100 in the “Devices” list and information about the selected device is shown to the right of the
project tree. Here you can view the predefined device and interface settings.
 Loading...