GAT Access 6100 Terminal Series
Installation
22
HB_GAT-ACCESS6100--EN_14
www.gantner.com
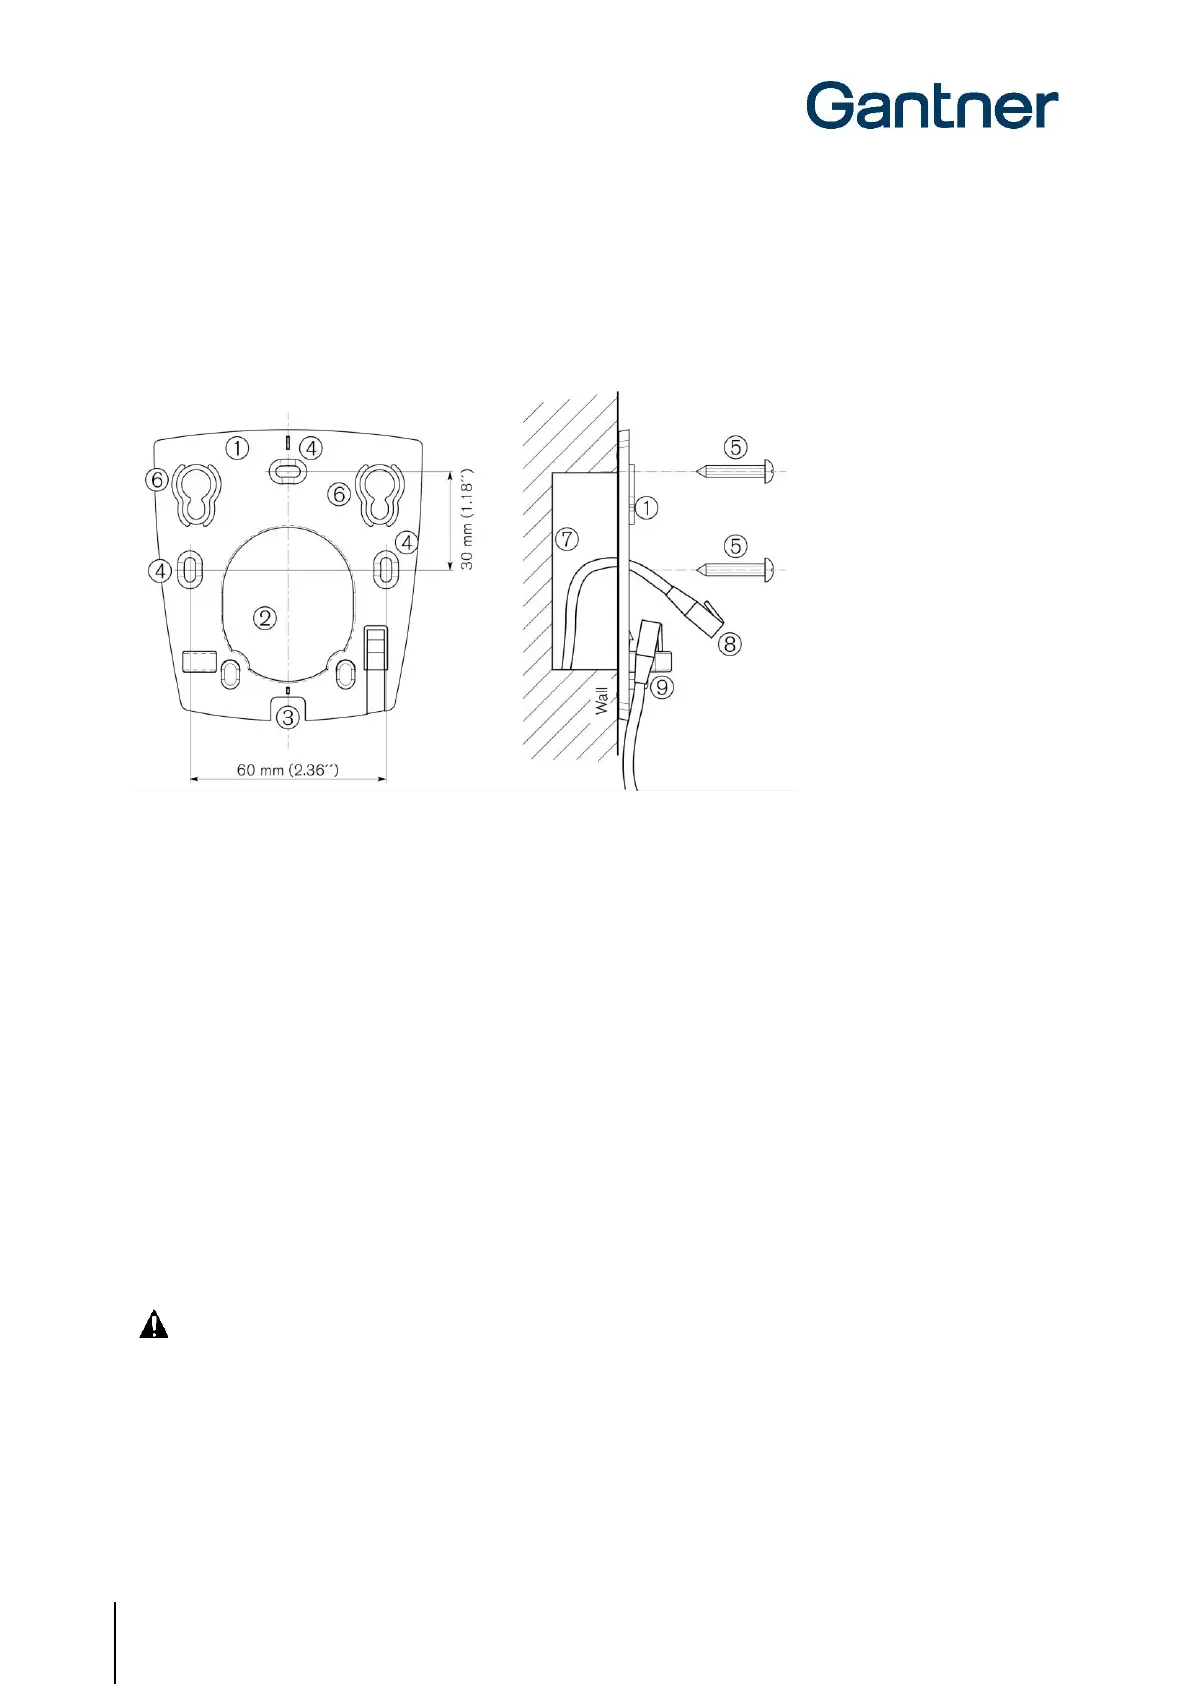
3.4 GAT Access 6100 F PoE Installation
First, the mounting plate (1) of the GAT Access 6100 F PoE is attached to a flat surface, e.g., a masonry or plaster
wall, using 3 screws (5) according to the following measurements.
1. Mounting plate
2. Access for flush-mounted cabling
3. Access for surface-mounted cabling
4. Mounting holes
5. Mounting screws
6. Terminal attachment holes
7. Back box
8. Flush-mounted cabling
9. Surface-mounted cabling
Figure 3.4 - GAT Access 6100 F PoE installation measurements
Cable Inlets
The cabling can be flush or surface-mounted. Flush-mounted cabling (8) is fed through the opening (2) in the mounting
plate. Surface-mounted cabling (9) is laid into the guide slot (3) of the mounting plate.
CAUTION! The connection of the cabling must always be performed in a powerless state. See chapter "4
ELECTRICAL CONNECTIONS" for more information.

 Loading...