AFR-24S User Manual
4.1.2 Back Creasing
In order to prevent the printed image scratching during creasing process, creasing and
cutting from the back of printed paperboard is the best solution that can keep the printed
image in a perfect condition.
The operation for setting the AAS function in cutter software for back creasing function is the
same as printing out the printed image with registration mark on the front side.
(For step-by-step instructions, please refer to the chapters: 08_A-3 CorelDraw Plug-In,
08_A-4 Illustrator Plug-In, 08_A-5 GreatCut Plug-In.)
It is unnecessary to print the registration mark again on the back side. AAS will automatically
detect the paper edge and calculate the distance from the printed image to the paper edge to
identify the location of printed image.
Please follow the instruction of the operation as below:
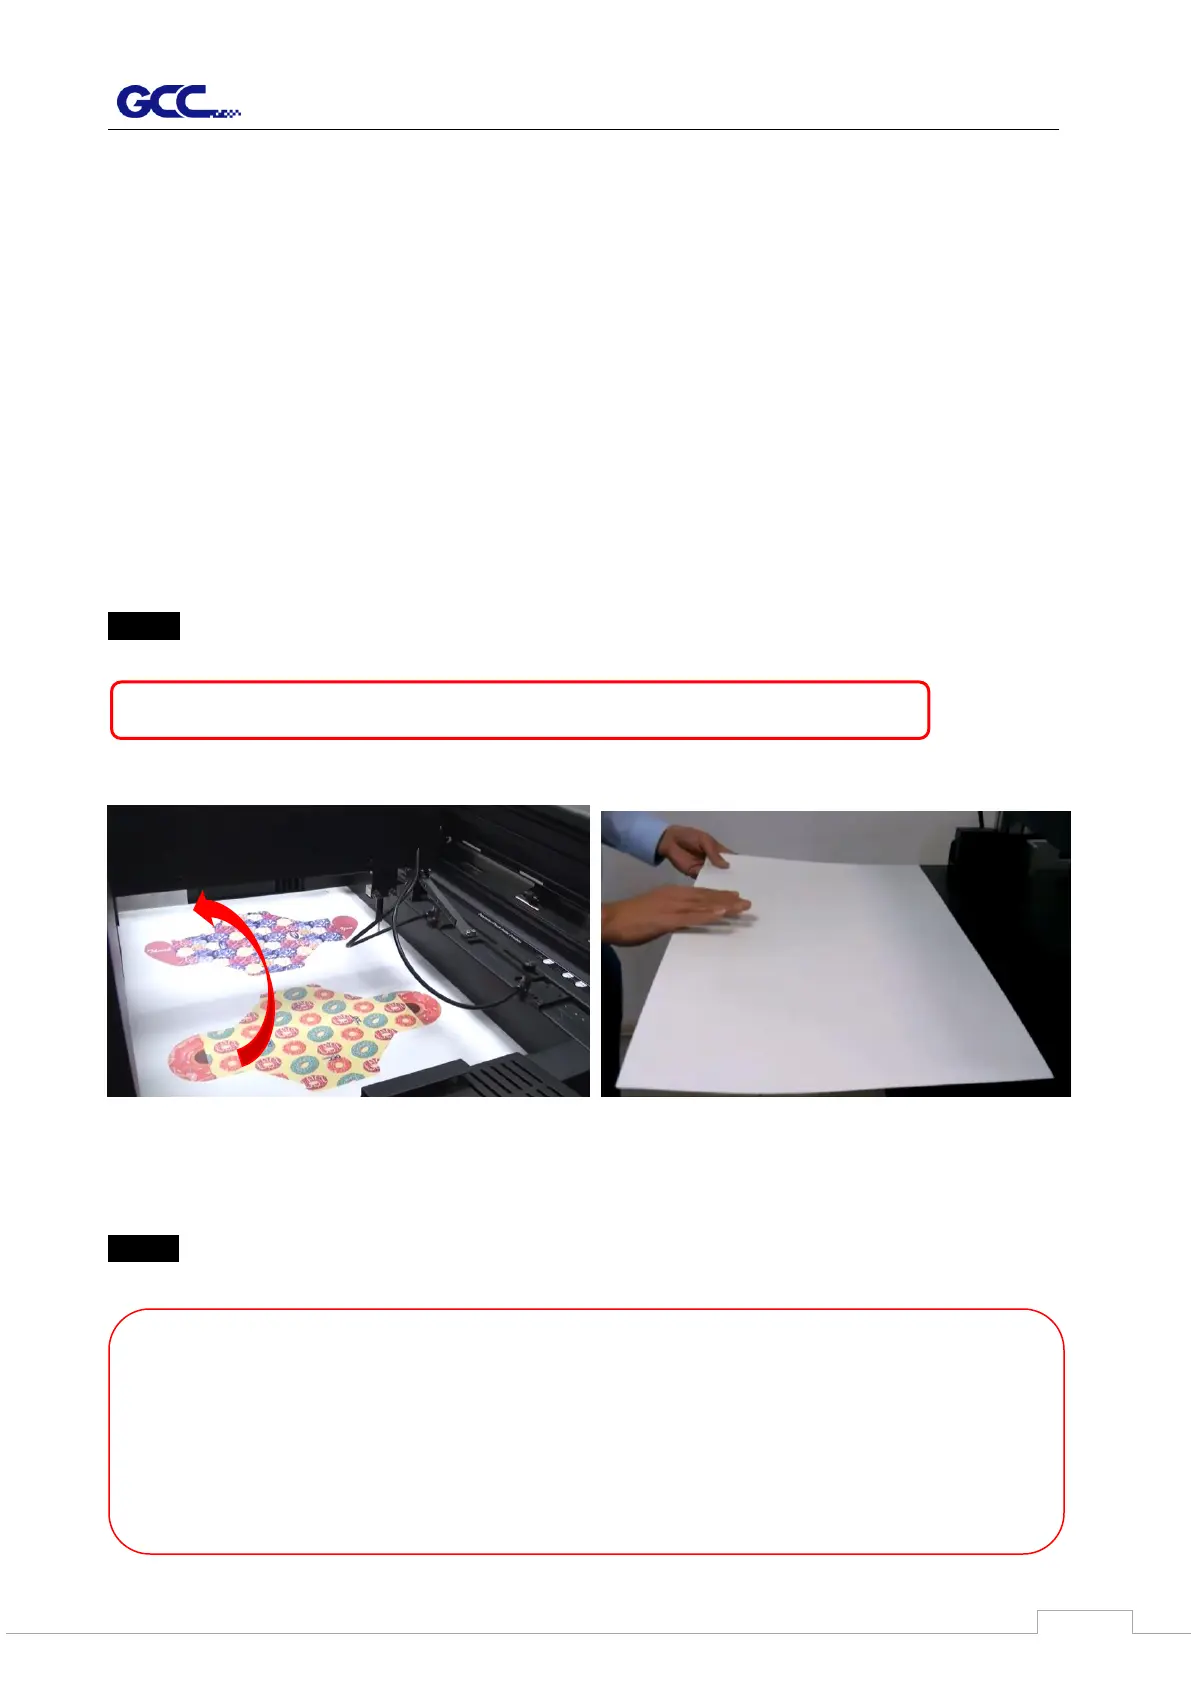
Step 1 Flip the printed paperboard in mirror direction from right to left side.
Step 2 Please go to the Paper Feeder page in GCC driver and select “Use Back Creasing”
function and adjust the “paper offset” by setting X and Y value (X = length, Y=width)
【NOTE】Please don’t flip the paperboard from front to back side.
【Note】
1. “Print Scale” function is requested to adjust when printing scale not 100%
2. If you have set AAS repeat times from Control Panel, you don’t need to set it again
from driver. Otherwise, machine will do the repeat job according to the setting in
driver.