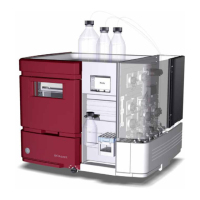
ActionStep
pH electrode:
Unscrew the plastic fastening
nut (1) on top of pressure cell
(PT-112) and pull out the dummy
from the electrode holder (2).
5 A
Release the pH cable from its
storage position by unscrewing
the lower cable connector from
the system cabinet. Do not un-
screw the upper connector!
5 B
Calibrate and sanitize the pH
electrode. See pH calibration, on
page186 for calibration instruc-
tions.
5 C
Make sure the O-ring (3) is in
place in PT-112.
5 D
Push the pH cable through the
fastening nut, and connect the
pH electrode (AE-121) to the ca-
ble.
5 E
Insert the pH electrode in its
holder. Secure the electrode
with the plastic fastening nut.
Use finger force only.
5 F
UV cell:6
The UV cell is mounted when the main part of the tubing is attached to the
system cabinet. No further actions are required to connect the UV sensor.
However, make sure that the cell has been pushed all the way in (a soft click
indicates that the cell is in correct position).
94 ÄKTA ready Operating Instructions 28960345 AD
6 Flow kit installation
6.3 Mounting the flow kit

 Loading...