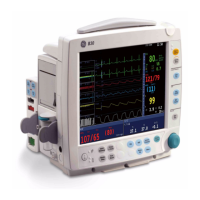
B30 Patient Monitor
9-2
Regular checks
When you start monitoring, check that:
− The module is firmly in place.
− Accessories are intact and properly connected.
− You have selected desired parameters to be displayed in the digit and waveform fields.
ECG and impedance respiration
•
Check that the message 'Leads off' disappears and the waveforms are displayed when
the cable is connected to the patient.
Pulse oximetry
•
Check that the red light is lit in the sensor.
• Check that the SpO
2
value is displayed and the message 'SpO
2
probe off' disappears
when the sensor is connected to the patient.
Temperature
•
Check that the temperature value is displayed when the probe is connected to the
patient.
InvBP
•
Check that the monitor recognizes cable connections (activates the display) for all the
pressure channels used and the pressure values are shown.
• Make sure all transducers are zeroed correctly.
NIBP
•
Ensure that you are using correct cuff size and have selected correct inflation limits. For
children and when using hoses without identification, the inflation limit must be set
manually.
• Check that the cuff hose detection works properly.
• Check that the pressure values are displayed.
• Start the Venous Stasis mode and check that the pump is not restarting during the
measurement. If it does, the cuff may be leaking.
Airway gas (CO
2
)
•
Check that the water trap is empty.
• Occlude the sampling line and check that the message ‘Sample line blocked’ appears
within 30 seconds and gas waveforms are showing zero at the same time.
Functioning of the alarms
•
Set a parameter value outside the alarm limits. For example, connect the SpO
2
sensor and
adjust the SpO
2
High limit under the measured SpO
2
values. The alarms go from medium
priority (Yellow) to high priority (red) according to sequence given in the alarm categories
table, see section ”Alarms.”
Check that the yellow and red LEDs function as indicated in the table. To check audible
alarms and alarm light, see section ”Alarms.” NOTE: Although SpO
2
may not be the best
example because it is often off by default, it is easy to use for alarm checking.
If the monitor does not work as described, see section ”Troubleshooting.”

 Loading...