GE MEDICAL SYSTEMS
D
IRECTION 2300000, REVISION 2 LOGIQ™5 SERVICE MANUAL
Chapter 8 Replacement Procedures 8-145
8-8-3 SMPS Assy, Hard Disk, CD R/W
Purpose: This is a description on how to remove and replace the Parts in the BEP Assy.
8-8-3-1 Tools
• Common pillips screwdrivers
8-8-3-2 Needed Manpower
• 1 persons, 15 minutes + travel
8-8-3-3 Preparations
• Shut Down the System and switch off the Main Breaker at the rear as described in section 4-3-2 on
page 3.
• Left Cover should be removed before proceed. Refer to section 8-5-1 on page 39.
8-8-3-4 Removal Procedure
1.) Open front base cover and front cover. Refer to section 8-5-6 on page 49, section 8-5-7 on page 51.
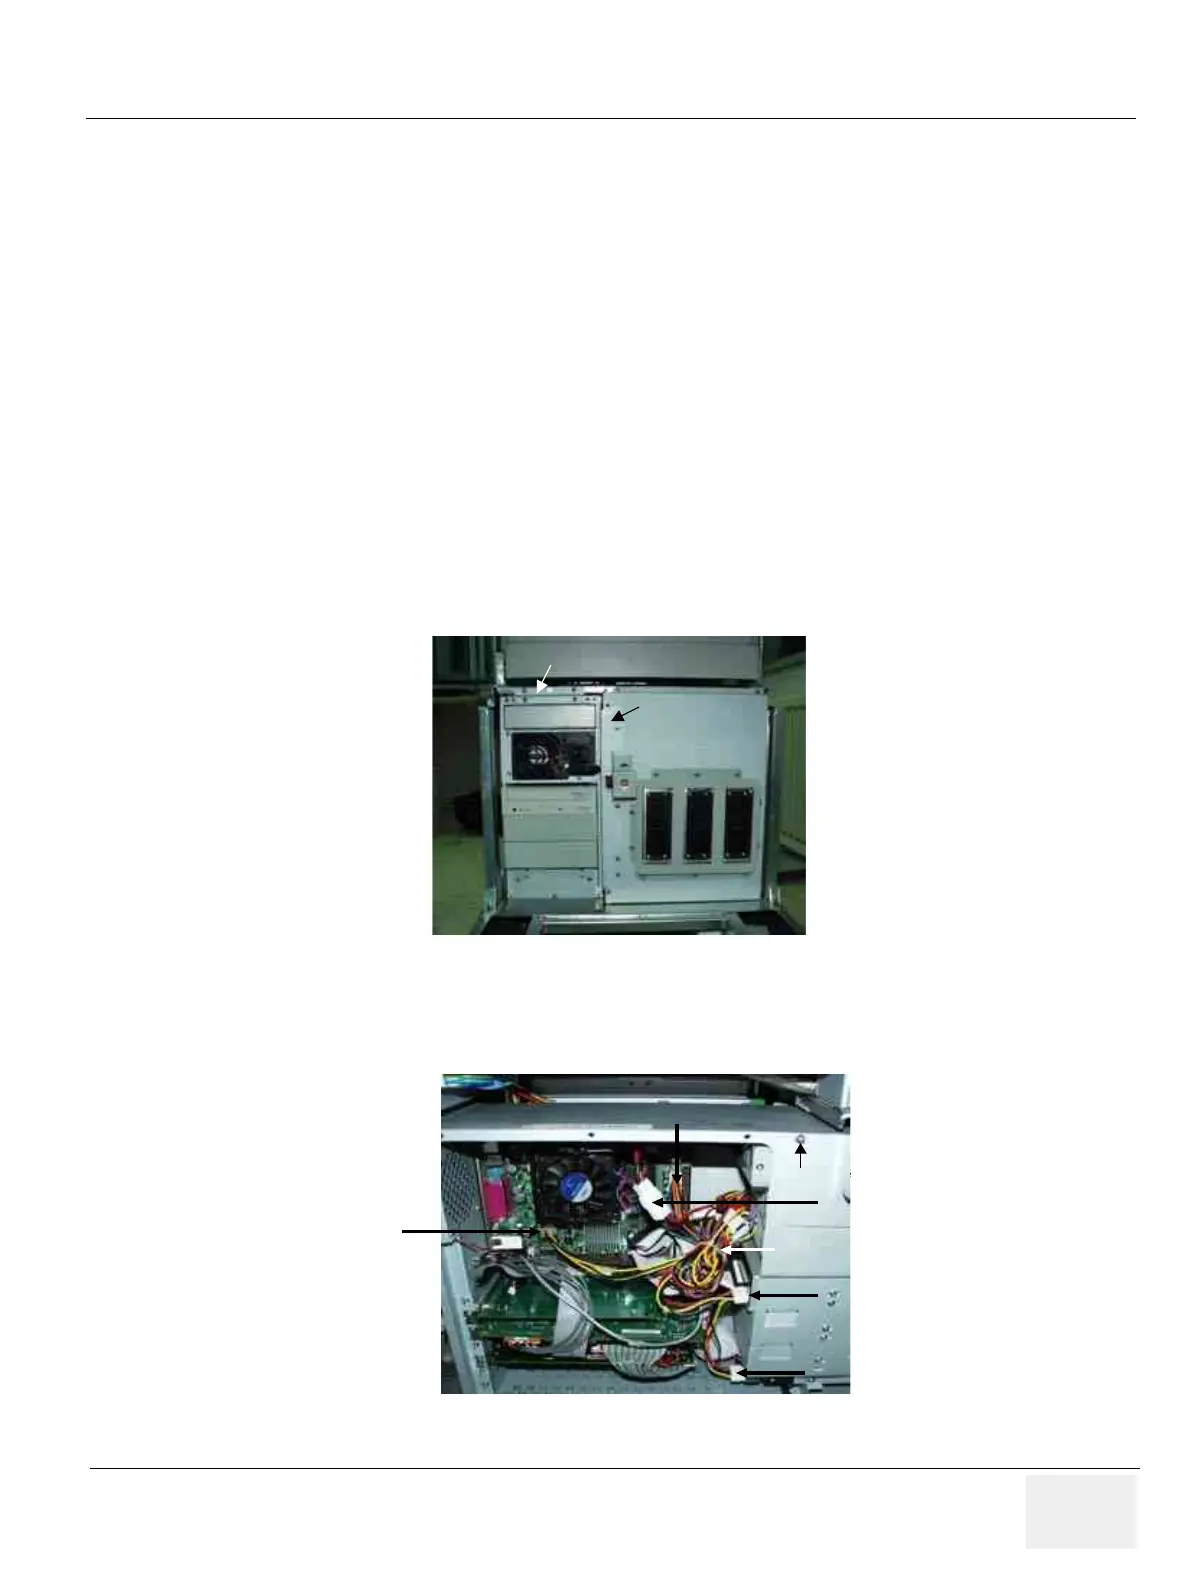
2.) Remove PC top fix bracket and scan EMC bracket. Refer to Figure 8-169.
3.) Open the BEP metal cover.
4.) Disconnect all power connector from ATX smps in motherboard and hard disk and CD RW.
Figure 8-169 ATX SMPS Replacement
Figure 8-170 Inside of BEP
Scan EMC Bracket
5
1
2
34
6
7
8
PC Top Fix Bracket
Scan EMC Bracket
5
1
2
34
6
7
8
PC Top Fix Bracket
Cable Tie
1
2
3
4
5
Power Bracket
Cable Tie
1
2
3
4
5
Cable Tie
1
2
3
4
5
Power Bracket