Section 2: Installation Operator Manual
G1900™
© Genmega 2011 2.3
Step 4
Remove the cash cassette from its packing box (removable cassette dispensers
only). Fill the cassette or cash drawer with the appropriate amount of notes, and
carefully place it in the Cash Dispensing Unit. Place the appropriate denomination
label on the front of the cassette. See page 4.9 for instruction.
Step 5
Before closing the vault, thoroughly test the combination lock by locking and
unlocking the lock several times. It is much easier to diagnose potential lock
problems before shutting the door.
Step 6
Open the top of the ATM. Place the receipt paper in the Receipt Printer. The paper
prints only on one side (shiny side) always check the roll when you install paper.
Place the roll so that the coated side (shiny side) will be facing up. See page 4.12 for
paper loading instruction.
Step 7
Connect the Power cable and the telephone cable to the appropriate outlets on the
wall. Verify that the AC power outlet is grounded (3 prong plug).
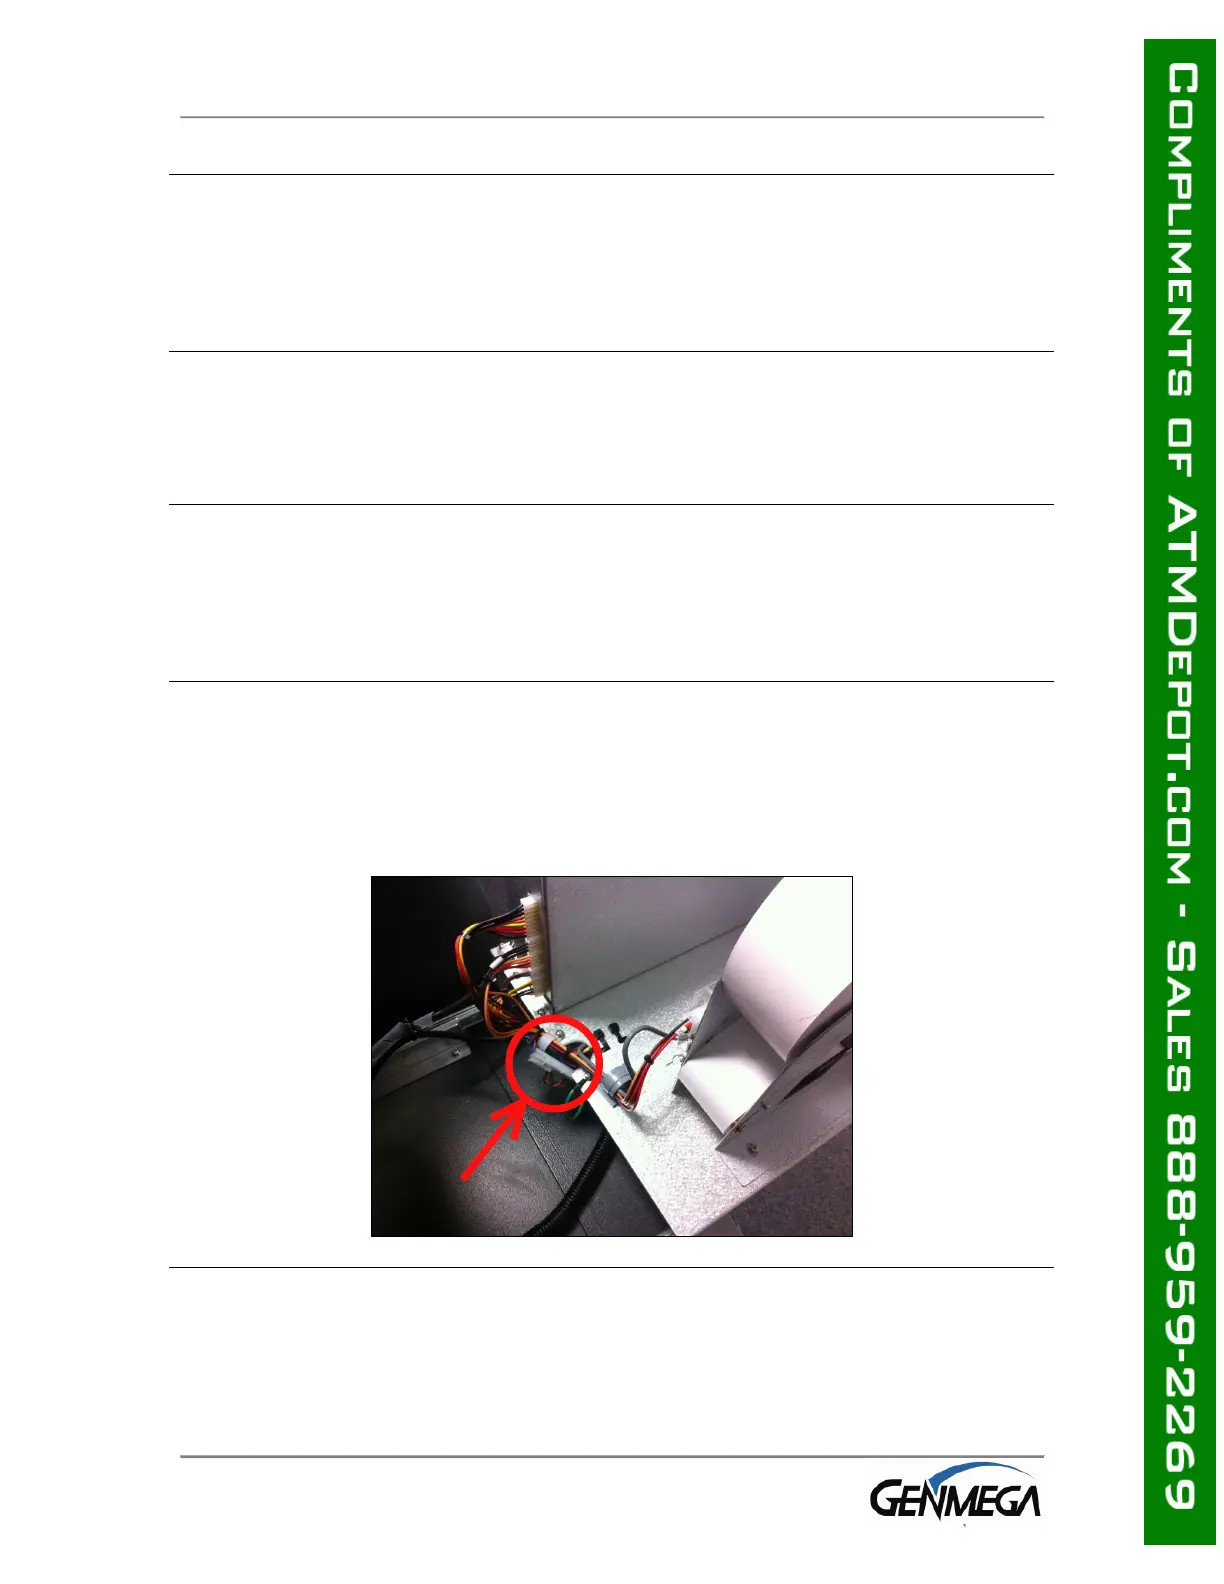
If you are installing an optional topper sign, install the power cord through the top
housing and plug the topper into the open connector (white) located on the back of
the slide tray. Make sure the cable has enough slack to allow the slide tray to open
completely.
Step 8
Turn the power on and verify that all systems are operational. If any part on the
system or its programming is not operational, an error code will be displayed along
with instructions. If the error cannot be corrected, please contact your distributor for
help. If no error code is displayed, check the Error Summary.