74 GS15
plus
5. If there is more than .003 to .005 inch of play, remove the front
cover. Lay the GS15
plus
on its left side and remove the (2) Phillips
head screws on the bottom edge closest to the front of the plotter.
Then stand the plotter upright.
CAUTION: Do not rest the plotter on its right side. Do not use the
way shaft to lift or turn the plotter.
6. Pull the front cover upwards and, at the same time, pull one side
away from the plotter frame. Be careful not to lift the cover so high
that the front panel cable disconnects. Pivot the cover to the side of
the plotter.
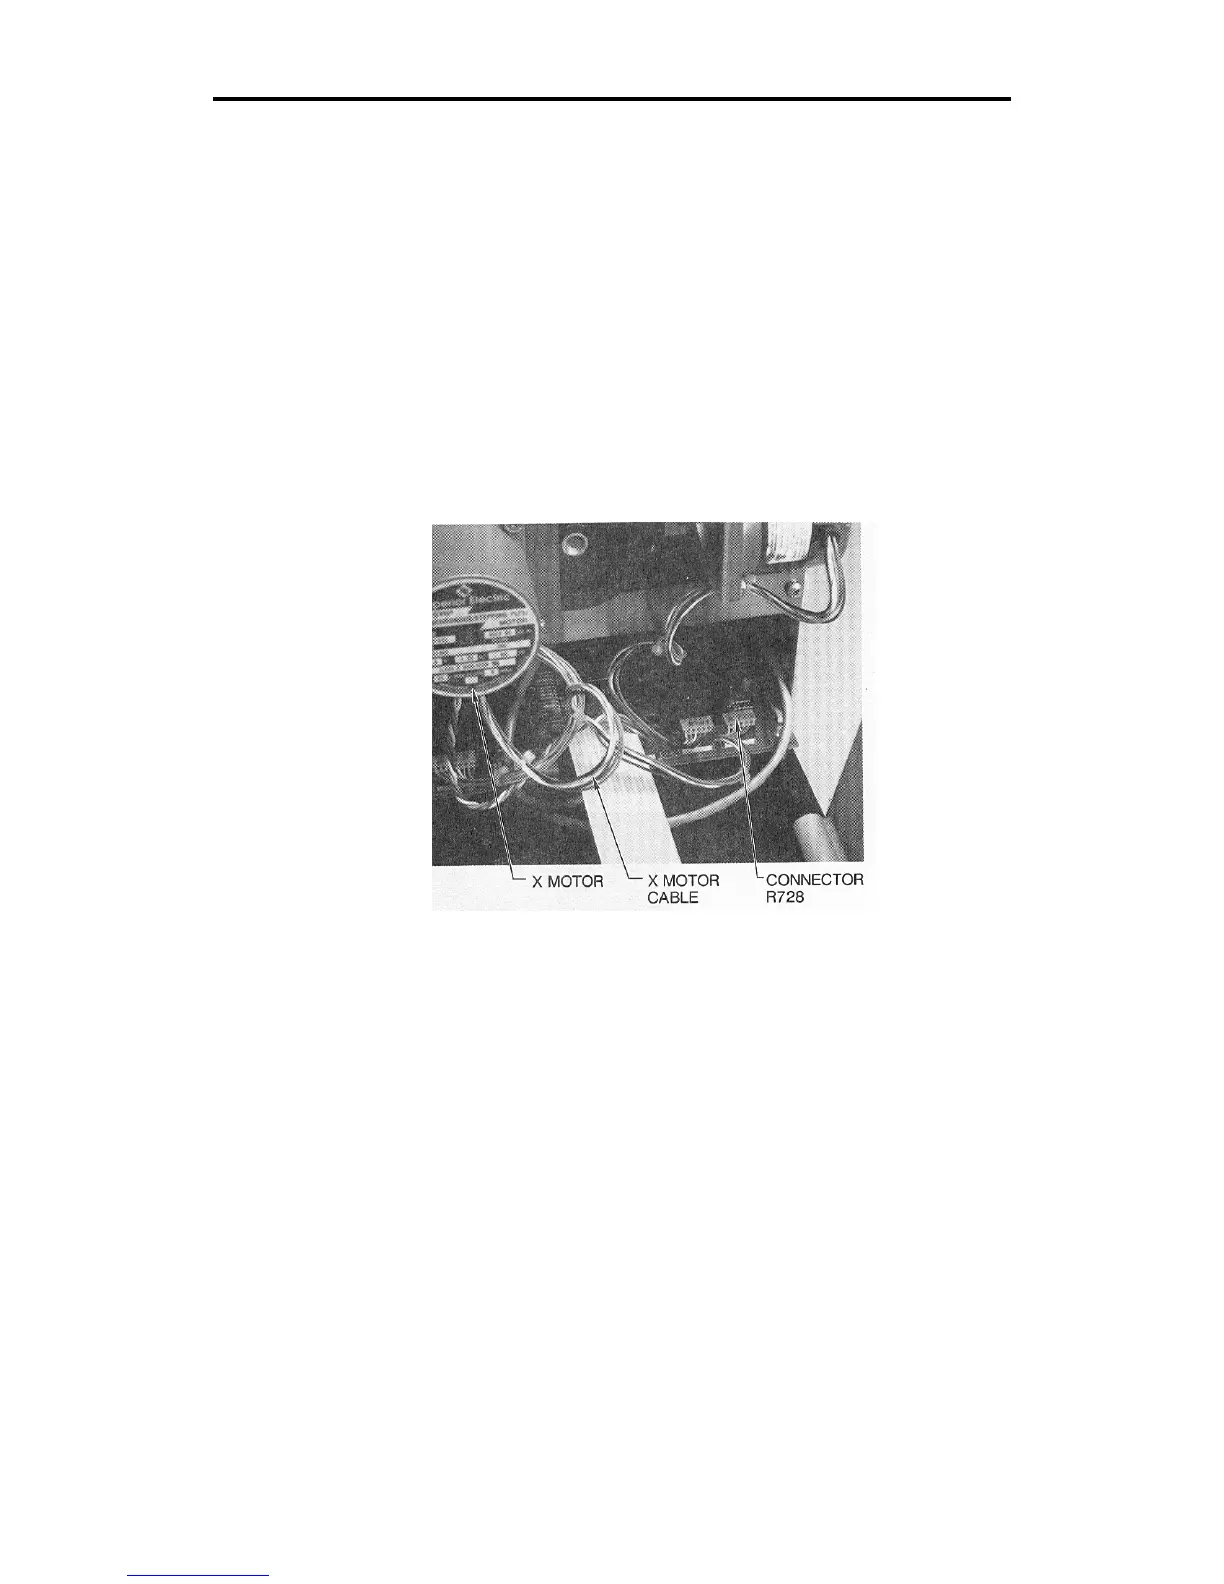
7. Locate connector R728 at the end of the X motor cable. Disconnect
connector R728.
8. Locate the three Phillips head screws which hold the X motor
bracket against the standoffs on the side plate. Remove these
screws.
9. Remove the X motor.
10. Locate the outside drum clamp on the X axis gear. Use an Allen
wrench to loosen the clamp.