40
M_M20 series V3_EN_C
Using the machine
• Engraving with a regulating nose (Function not available for the M20 PIX machine)
For engraving with a nose, adjustment is carried out according to the hardness of the material, the width of the
cutterandthestateofthesurfaceoftheplate.Ifthereisanyriskthatthenosemightscratchthesurfaceofthe
object, reduce the spindle pressure.
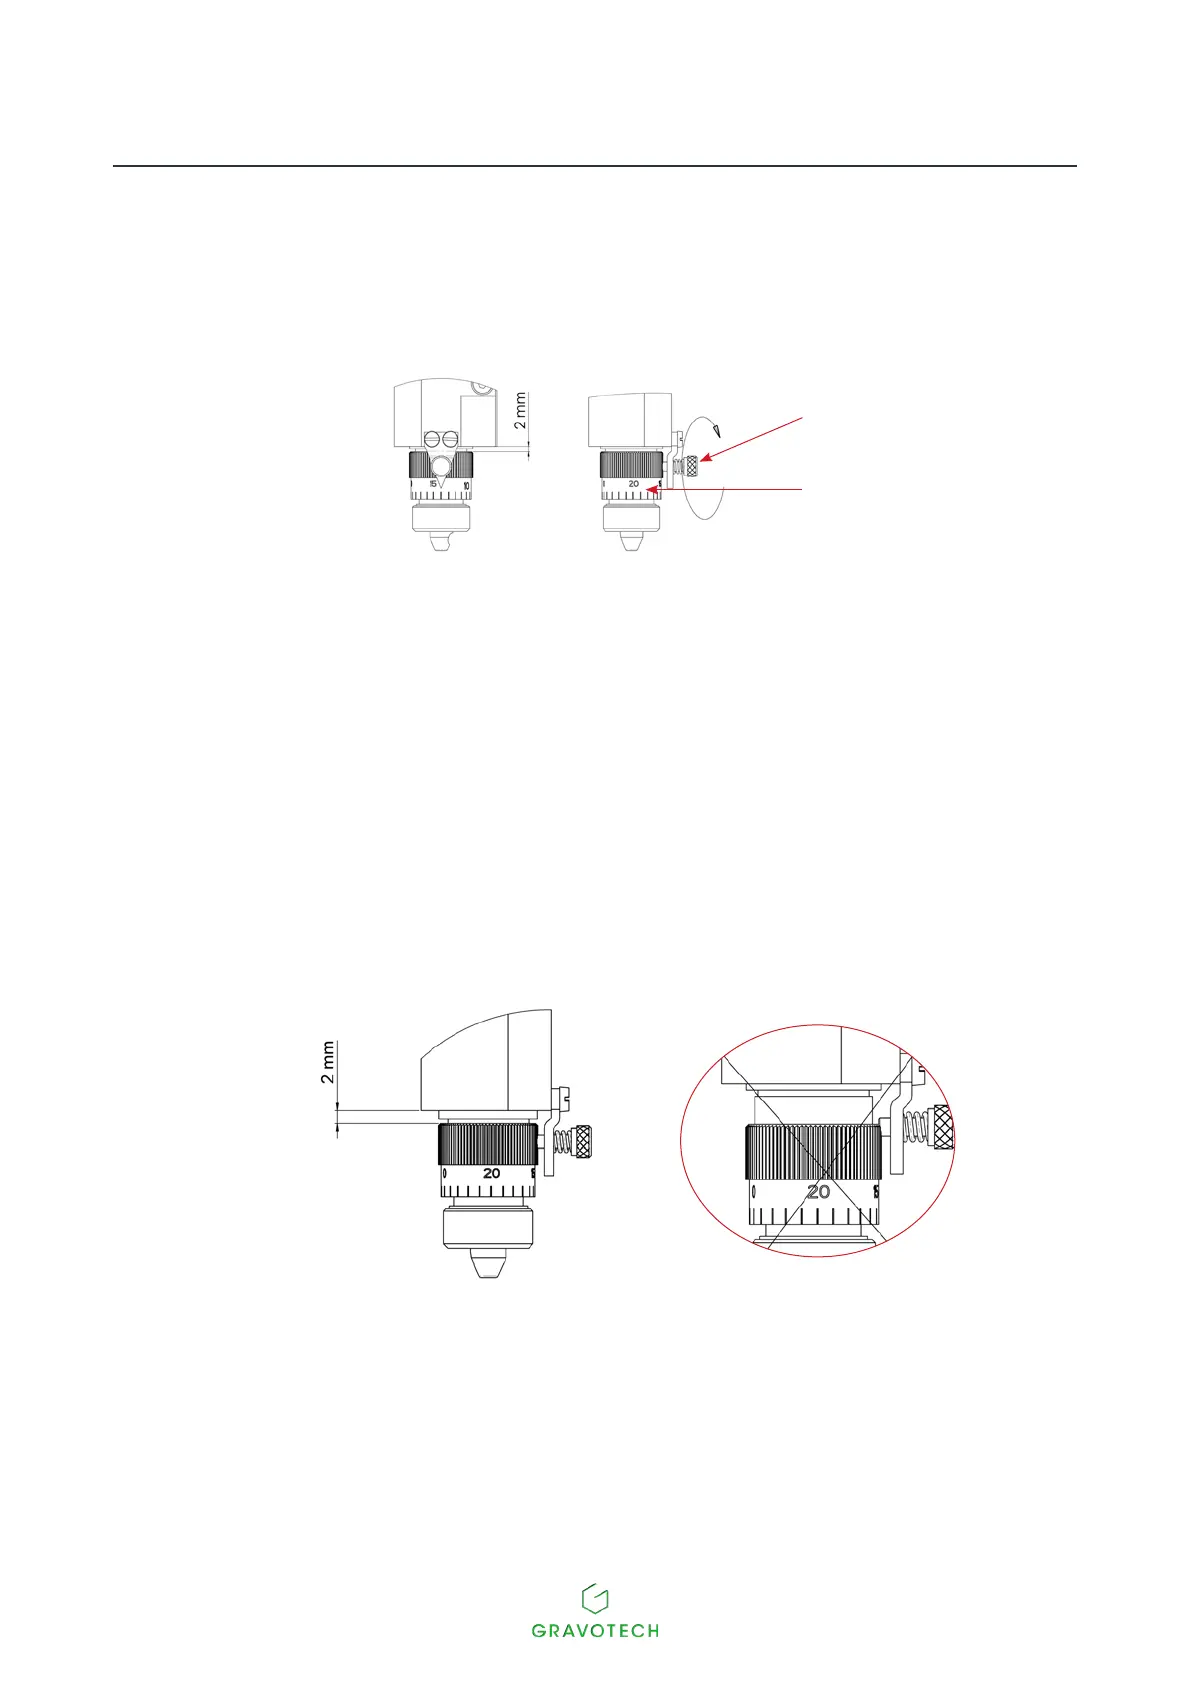
1
2
1.
Index pin
2.
Scaledknob
1. Place the regulating nose in its recess on the spindle. Tighten the nose nut.
2. Fromtheprogram,transferthecompositiontothemachine.Select:Zref:Depthregulatingnose.
Program0.5mm(0.020in)toadepthof1mm(0.039in)inordertocompensateforanyatness
defects in the plate.
3. Pressthekey:Start.Thetoolholdermovesatasafemovementspeedtotherstpointofthejob.
4. Loosen the index pin. Loosen the scaled knob.
Align the 0 of the scaled knob with the index pin.
Thescaledknobmustbeadjustedsuchthattheindexpincanlockit.
- Remove the tool.
- Pressthe"Check"key.
5. The tool holder is lowered until the depth regulating nose touches the plate to be engraved.
6. Insert the cutter into the spindle until it comes into contact with the material to be engraved. Secure
thetool.Pressthe"Check"key.