Home
GRIT
Locks
Lock
Page 51
GRIT Lock - Page 51
101 pages
Manual
Save Page as PDF
To Next Page
To Next Page
To Previous Page
To Previous Page
Loading...
T
R
I
G
G
E
R
S
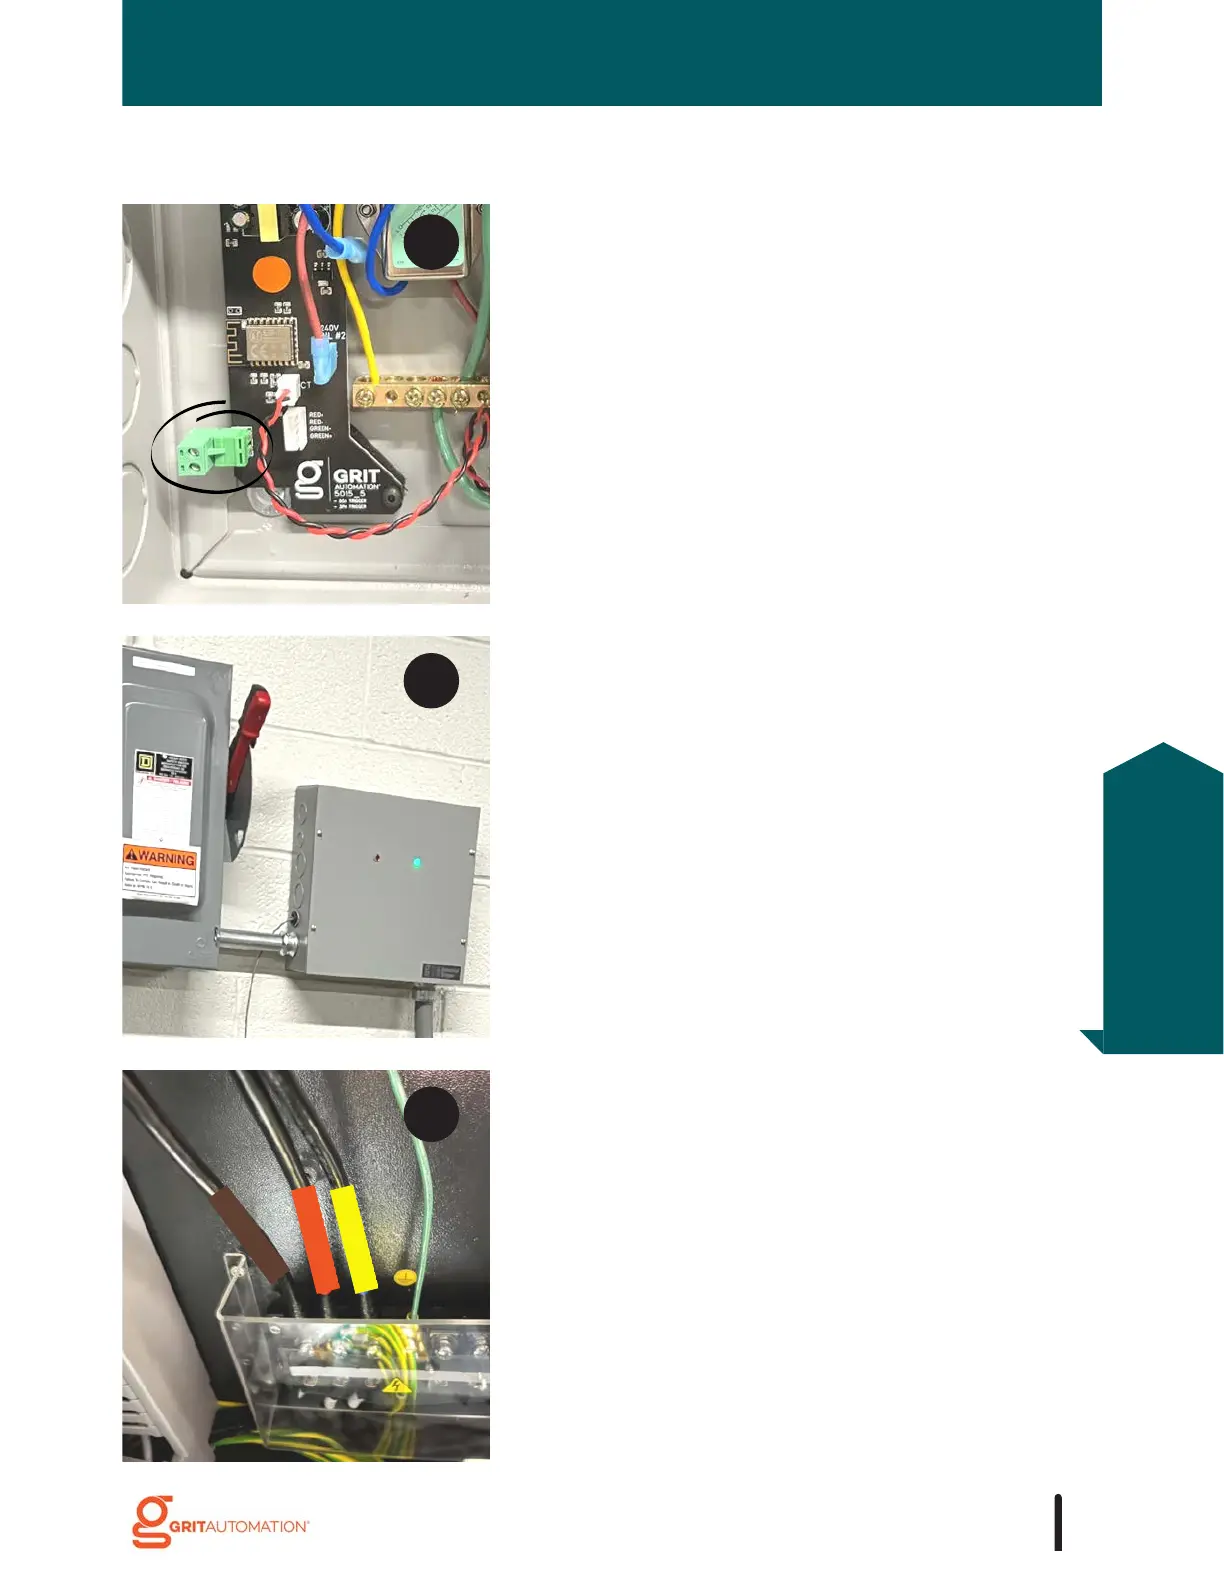
Re-land the wires leading into the tool.
Turn on breaker leading to the tool.
Replace and secure the lid.
Cut, strip, and land low-voltage wire(s) into the low-
voltage terminal located on the PCB.
9
1
0
1
1
51
Triggers
Installation
50
52
Table of Contents
Main Page
Table of Contents
5
Getting Started
9
GRIT Lock
9
Ways to Lock/Unlock Your Tools
11
Device Power
14
Initial Setup
17
GRIT Hub® Connection Options
18
Access the GRIT App
19
Create GRIT Administrator Account
20
Grit Hub® + App
21
GRIT Hub
21
Installation
22
GRIT Hub® Connection Options
24
Bind Devices
25
GRIT App
26
Save App to Home Screen
26
Common GRIT App Functionality
27
Dashboard
27
Navigation
28
Icons
29
Devices Page Overview
30
Replace/ Delete Device
31
Administration
32
My Profile
33
Network
34
Remote Access
35
Settings
36
Triggers
38
Standard 120V and 220V (up to 20A) Triggers
38
Installation
38
Standard 220V Heavy Duty (up to 30A) Triggers
39
Installation
39
Industrial 220V Single Phase Trigger
40
Installation
40
Industrial 208V 3Phase Trigger
41
Installation
41
Industrial 480V 3 Phase Trigger
47
Installation
47
Trigger Device Configuration
52
Activation Level and Power Profiles
53
Normal
53
Delay
55
Spike
57
Advanced
60
Maintenance Schedule
62
GRIT Switch
63
Installation
63
Switch Device Configuration
64
120V and 220V Collectors
65
Installation
65
Magswitch Collectors
66
COLLECTORS Magswitch Installation
66
Collector Device Configuration
75
Dust bin Sensor
76
Installation
76
Dust bin Sensor Device Configuration
79
Gate Control
80
Orientation
81
Installation
83
Finetune the Arm Position
85
Reattach the Arm
86
Slide Guide
88
Gate Control Device Configuration
89
Calibration
91
Air Quality
92
Installation
92
Air Quality Device Configuration
93
Programming an Ir or RF Remote
94
Mesh Xtndr
95
Installation
95
Mesh XTNDR Device Configuration
96
Grit Reports
97
Activity Reports
97
Tool Reports
99
Maintenance Reports
101