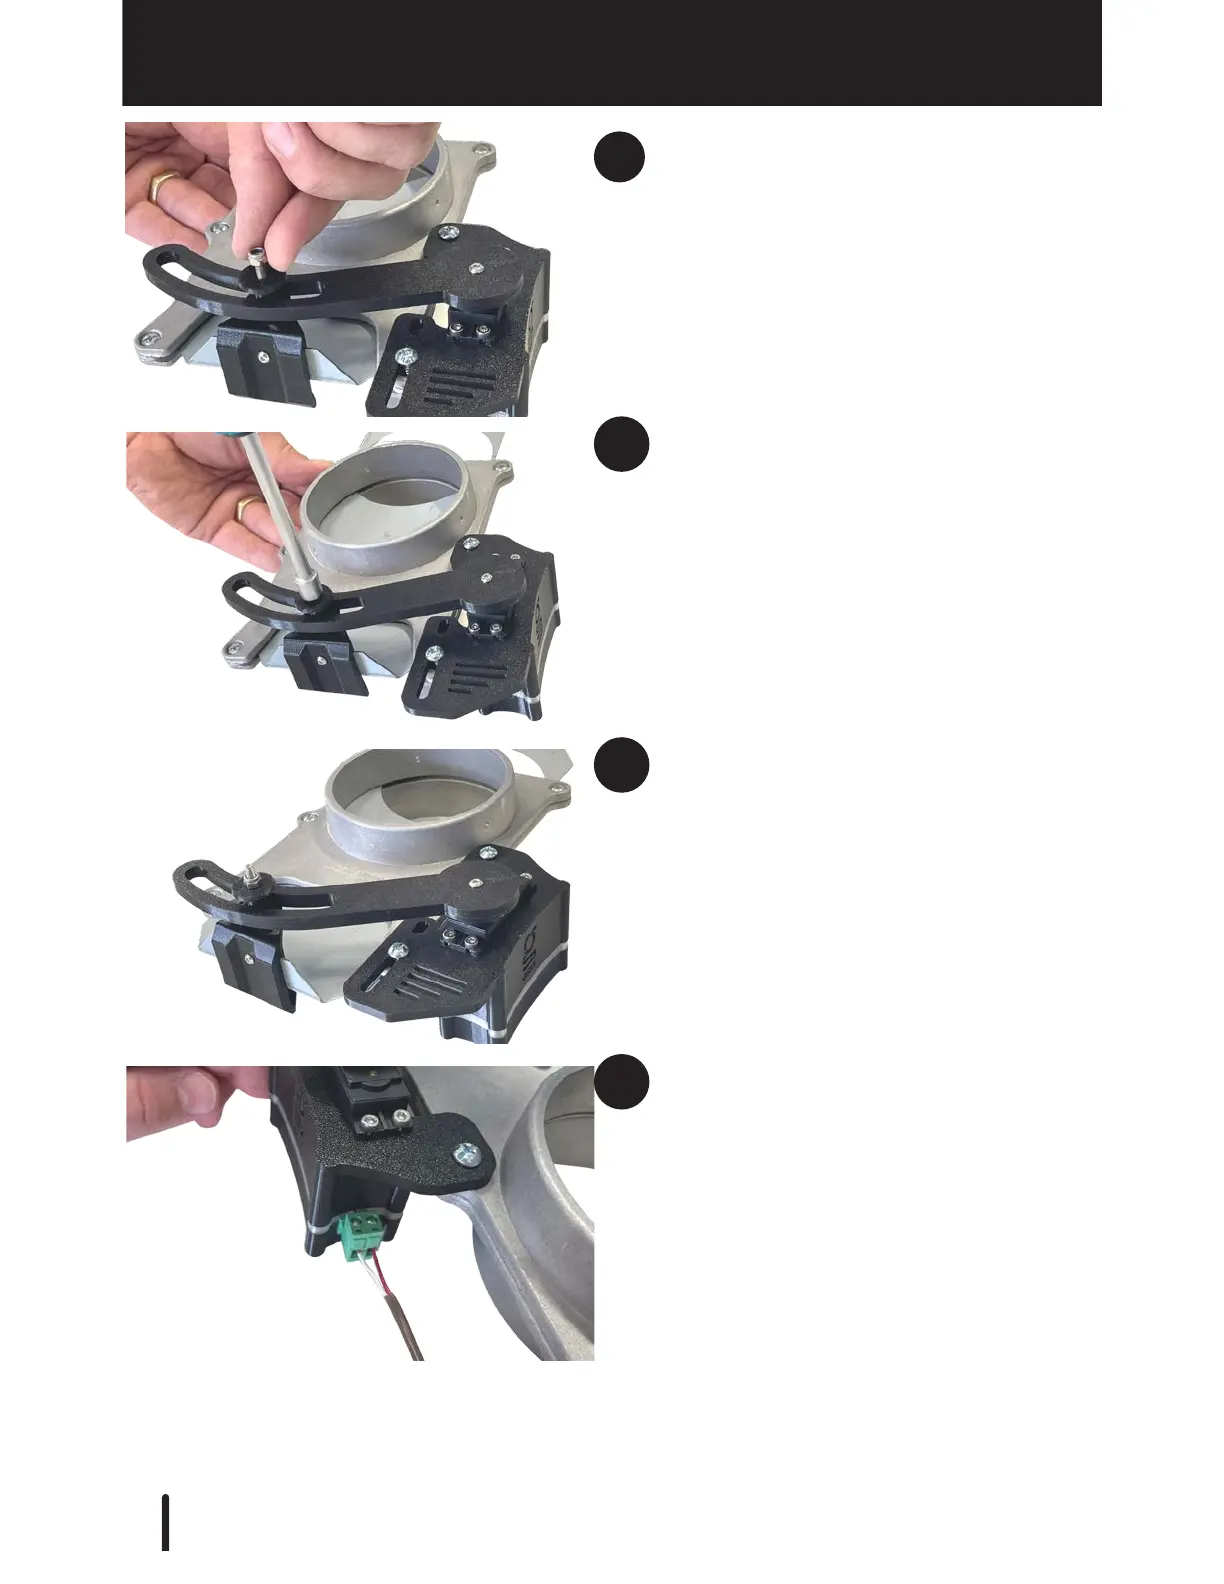
Replace the hat washer and lock nut on
the Slide Bracket so that the bottom of
the hat washer touches the flat washer
placed under the Arm.
Tighten the lock nut with the socket
driver. The Arm and hat washer should
be secure but still able to move freely.
The Gate Control is now fully installed
onto the existing metal blast gate.
Run the low-voltage wire from the low-
voltage terminal of the Gate Control
Actuator to a 9v Power Bank.
84