7.
Feed the workpiece evenly past the saw blade, keeping your fingers balled
int
o a fist.
8.
Pull the workpiece a few millimetres away from the saw blade and pull the
cr
osscut fence back into the starting position.
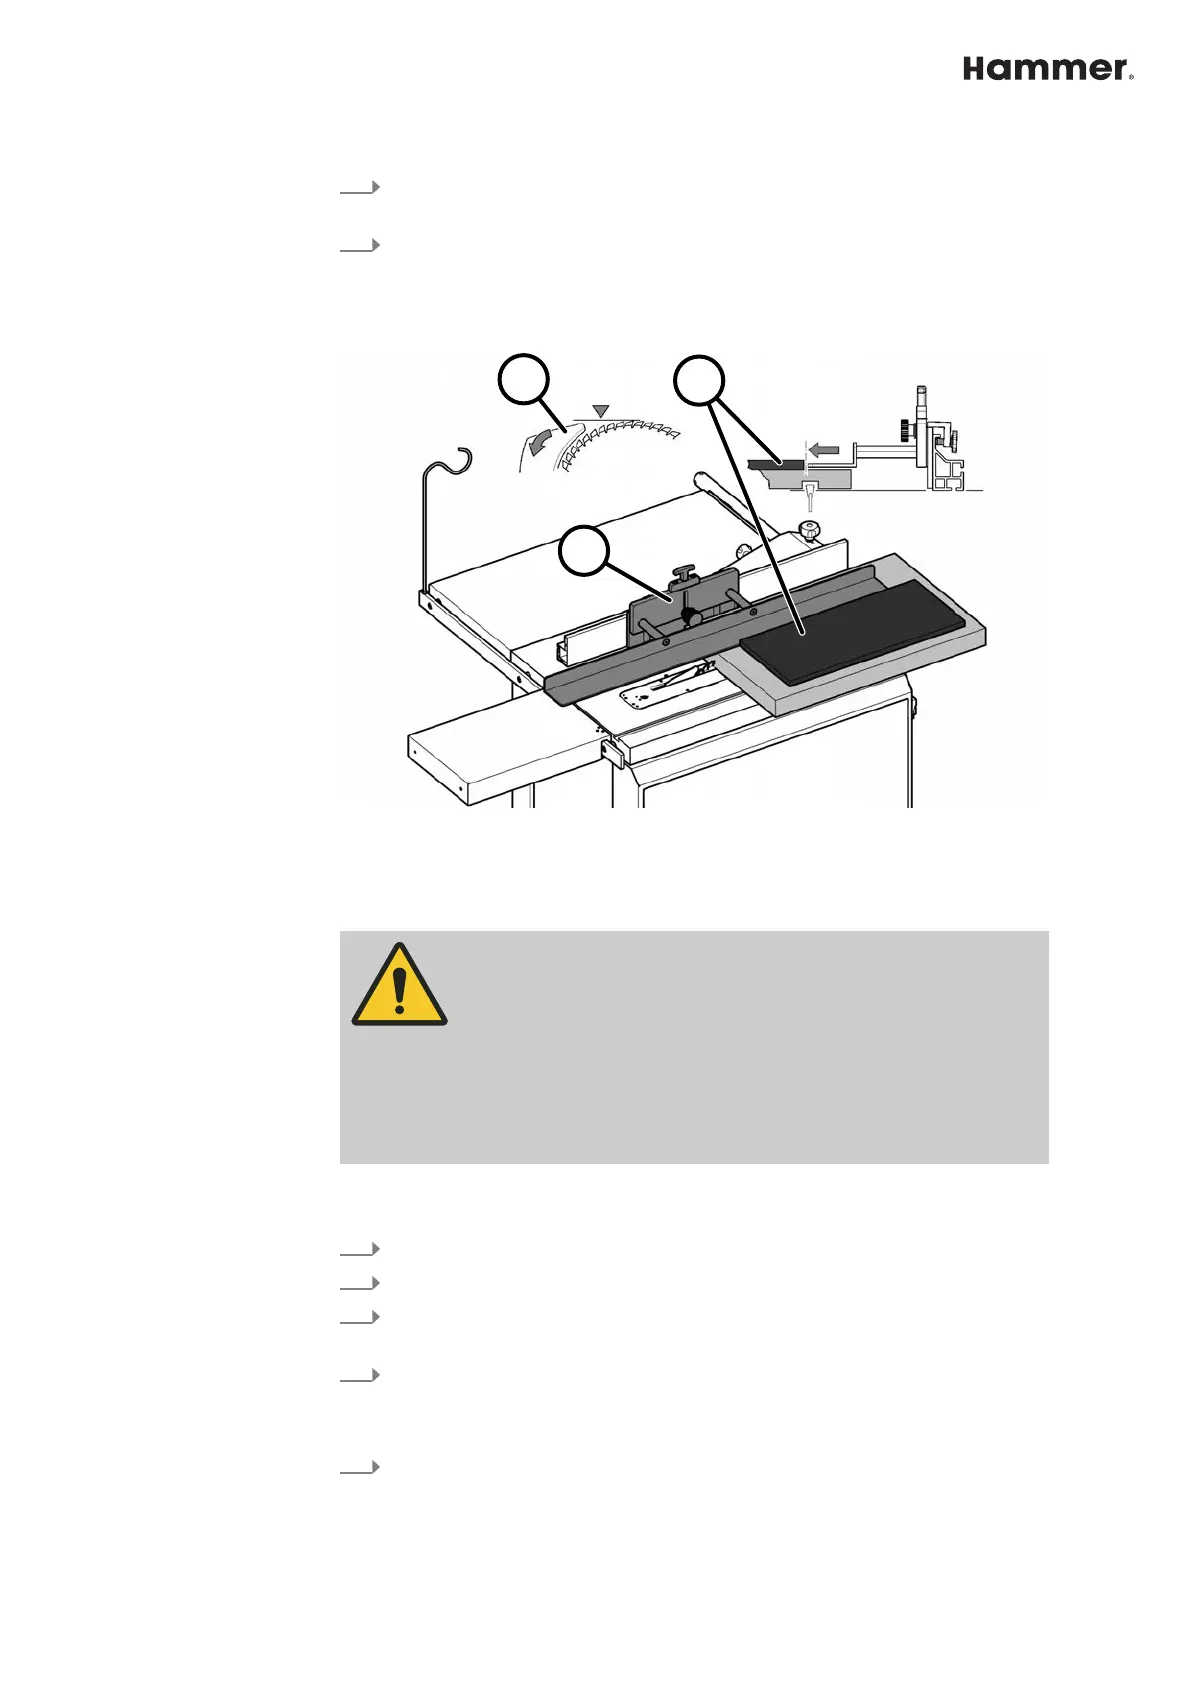
2.3.8 Covered cuts (Sägeboy auxiliary fence)
Fig. 28: Covered cuts
1 Riving knife
2 Sägeboy auxiliary fence (accessory)
3 Template (mounted to the workpiece)
WARNING
Lack of protection when performing covered cuts
S
evere injury caused by contact with a rotating saw blade.
− Use overhead saw guard or "Sägeboy" auxiliary fence (acces-
sor
y art. no. 01.0.022).
− Do not pull the rip fence plate (guide) back.
− Do not remove the riving knife.
The offcut strip falls off on the right side of the circular saw. Because of the high
r
isk of kickback, use a push stick to push the workpiece forward.
1.
Take note of general procedures for permitted working methods.
2.
Remove circular saw guards.
3.
Adjust riving knife: When carrying out covered cuts, the highest point of the
r
iving knife must be 0-2 mm below the highest point of the saw blade.
4.
Adjust the rip fence so that the edge of the saw blade is flush with the
Säg
eboy guide rail.
🡆
The Sägeboy guide rail also serves as a fence for sawing with templates.
5.
On machines with sliding table:
L
ock the sliding table into the centre position.