12.
Mount the front cover plate.
Mount the r
ear cover plate.
🡆
The respective cover plate must be in contact with the machine chassis on
all sides before tightening it.
3.5.3 Re-tensioning the drive belt
NOTICE
Do not over-tension the drive belt
An o
ver-tightened drive belt can tear or cause bearing damage.
− Stop turning the belt-tensioning screw once the drive belt is
tensioned suf
ficiently, enabling it to transmit power effectively.
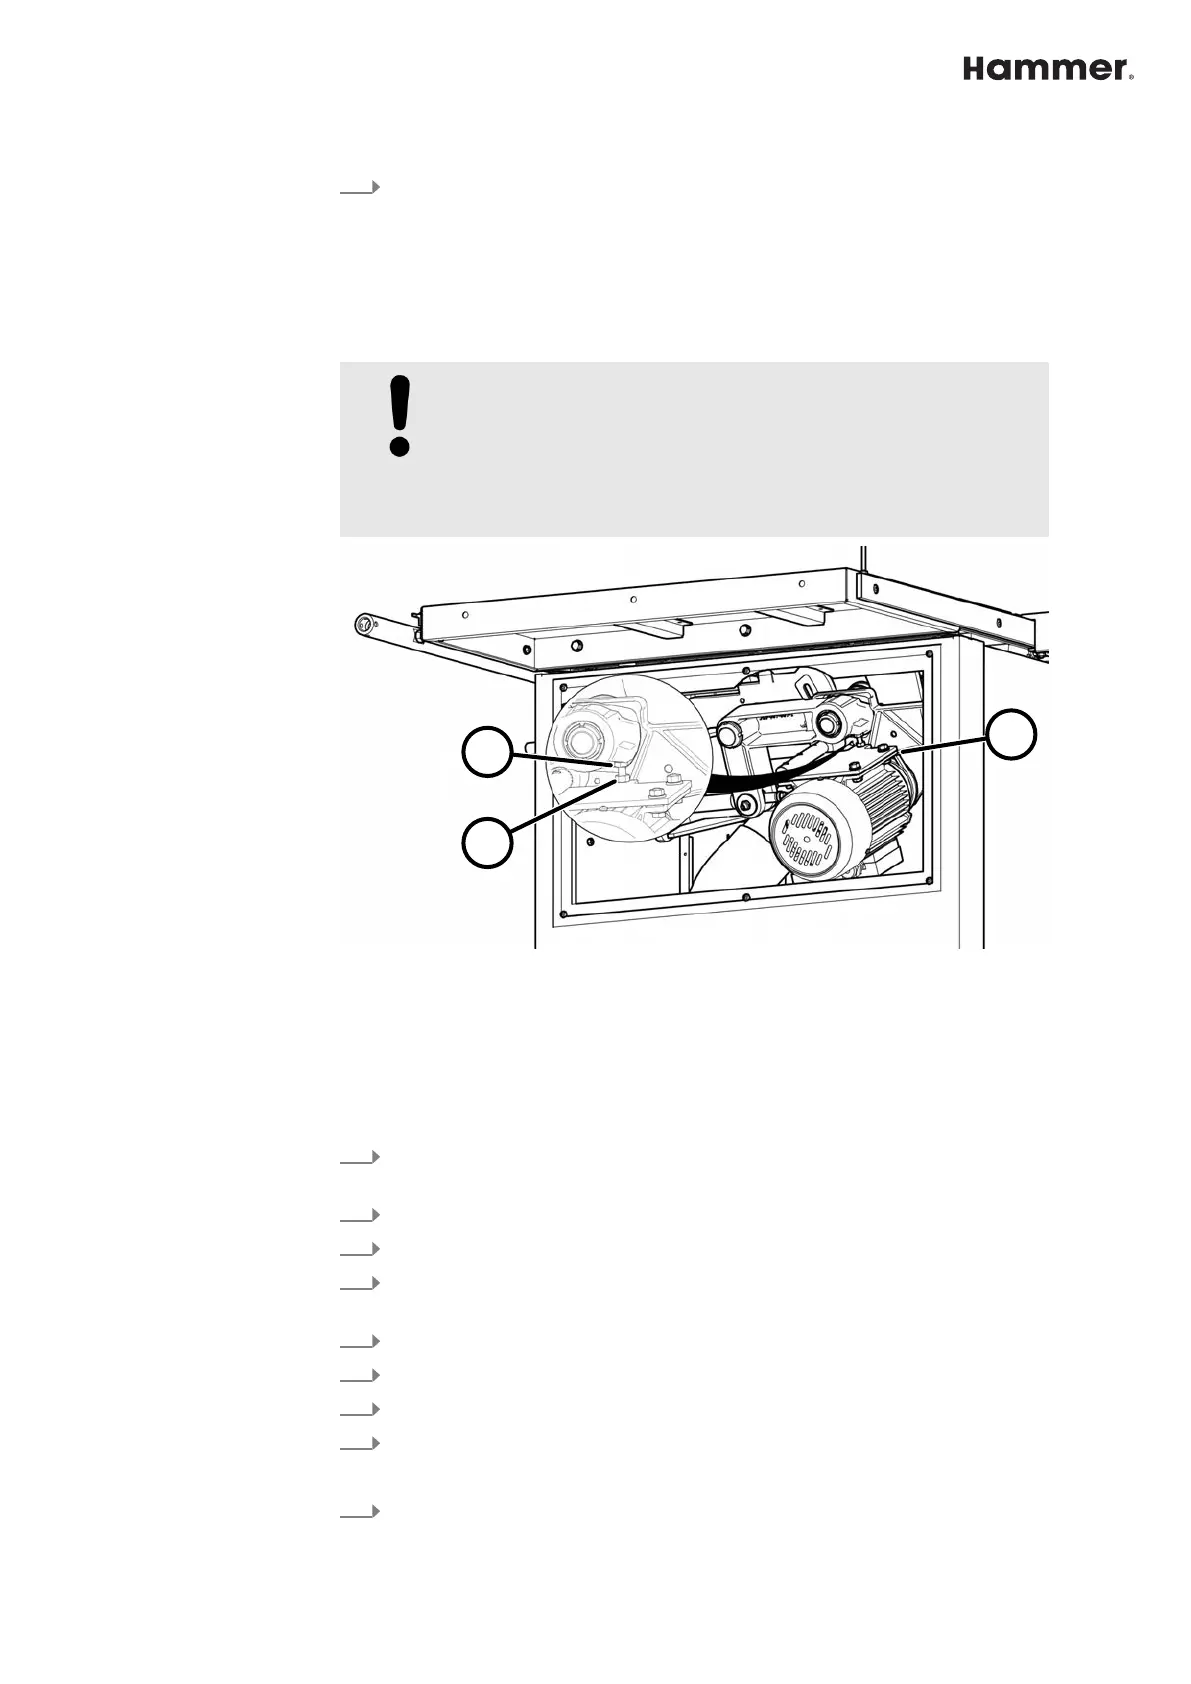
Fig. 36: Re-tensioning the drive belt
1 Locking nut
2 Tightening screw
3 Drive belt tension 210 - 230 Hz
Tool:
● Spanner 13 mm
1.
Tilt the saw to the approx. 30° position. Move the saw blade to the lower-
most position.
2.
Switch off the machine and secure it against being switched on again.
3.
Disconnect the machine from the mains power supply.
4.
Remove the rear cover plate. ⮫
Chapter 3.2 ‘Preparations for maintenance
work / Removing the cover plate’ on page 35
5.
Loosen locking nut.
6.
Use the belt-tensioning screw to tension the drive belt.
7.
Tighten locking nut.
8.
Place the cover plate in position and hang it on the screws.
🡆
The cover plate must be in contact with the machine chassis on all sides.
9.
Tighten screws (6x).