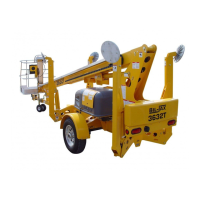
33 4000670450 E 04.19 USA / GB
3632T - HTT13
B
- Familiarization
Controls and indicators
Marking Description Function
1-2
Engine Start and Choke /
Glow Plug
1
1. For machines with engines only
• Start a cold engine by pressing (pushing) and holding the CHOKE ( 2 ) button,
and pressing (pushing) the ENGINE START ( 1 ) button to start the Engine. To start
/ restart a warm engine, press (push) the ENGINE START ( 1 ) button only.
• Glow plug operation : Press (push) the GLOW PLUG ( 2 ) button and hold for 30 -
60 seconds then press (push) the ENGINE START ( 1 ) button
3 Horn button
Pressing (pushing) the HORN button ( 3 ) will sound the HORN.
Use the horn button to warn personnel in the area of a falling object hazard,
impending boom motions or the need for assistance.
4
Battery Condition
Indicator
Indicator LEDs light up to indicate the level of charge in the batteries :
• A lighted green LED indicates an adequate charge level.
• A lighted yellow LED indicates the need for charging soon.
• A lighted red LED warns that the battery charge level is low; all functional
operations become non-functional until the batteries are recharged.
5 Emergency stop button
• When pushed in, the EMERGENCY STOP ( 5 ) button disconnects electrical
power to the ground (lower) and platform (upper) control boxes
• The EMERGENCY STOP button ( 5 ) should only be pressed (pushed) to
immediately stop all boom functions.
• To resume control, pull the EMERGENCY STOP ( 5 ) button out.
6 Speed buttons
• The SPEED ( 6 ) buttons are located along the lower right side of the control
panel, one of the speed buttons must be pressed (pushed) in and held while
selecting any boom function.
• There are four speeds that range from fast (RABBIT), to slow (TURTLE), available
to help control the positioning of the boom.
7-8 Boom Rotation Buttons
• Pressing (pushing) and holding a desired SPEED ( 6 ) button, and the BOOM
ROTATION ( 7 ) button at the same time enables the boom to rotate in the
CLOCKWISE direction.
• Pressing (pushing) and holding a desired SPEED ( 6 ) button, and the BOOM
ROTATION ( 8 ) button at the same time enables the boom to rotate in the
COUNTER CLOCKWISE direction.
• The boom will rotate through 700° of Non-Continuous rotation until the buttons
are released or the stop is reached.
9-10
Boom Raise / Down
Buttons
• Pressing (pushing) and holding a desired SPEED button ( 6 ) and the BOOM
RAISE button 9 at the same time will raise the boom.
• Pressing a desired SPEED ( 6 ) button and the BOOM DOWN 10 button at the
same time will lower the boom.
• Boom motion continues until the buttons are released or until each boom reaches
a hard stop or a safe travel limit.
11-12
Boom Extend / Retract
Buttons
• Pressing (pushing) and holding a desired SPEED ( 6 ) button and the BOOM
EXTEND ( 11 ) button at the same time extends the boom.
• Pressing (pushing) in and holding a desired SPEED button ( 6 ), and the BOOM
RETRACT button 12 at the same time retracts the boom.
• Boom motion continues until the buttons are released or until the boom reaches a
hard stop or a safe travel limit.
13-14 Platform Leveling Buttons
• Press (push) and hold any SPEED ( 6 ) button, and the desired PLATFORM
LEVELING UP ( 13 ) or PLATFORM LEVELING DOWN ( 14 ) button at the same
time to level the work platform.
• This levels the platform only, NOT the aerial work platform.
Outlet
An outlet has been provided as a power source for running electrical power tools,
while in the work platform. The power plug is located on the trailer frame, in front of
the accessory equipment stowage plate. A connecting power cord must be plugged
into a suitable power source. The outlet is rated for a 15 A load. Do not overload
the accessory power circuit.