1. Wear an electrostatic discharge (ESD) strap around your bare wrist and connect the strap to
an ESD point on the chassis. See ESD Prevention.
2. Take the IOM out of its antistatic bag.
3. Identify the slot of IOM.
4. If the slot is covered with a blank plate, loose its screws with a cross screwdriver and
remove the plate.
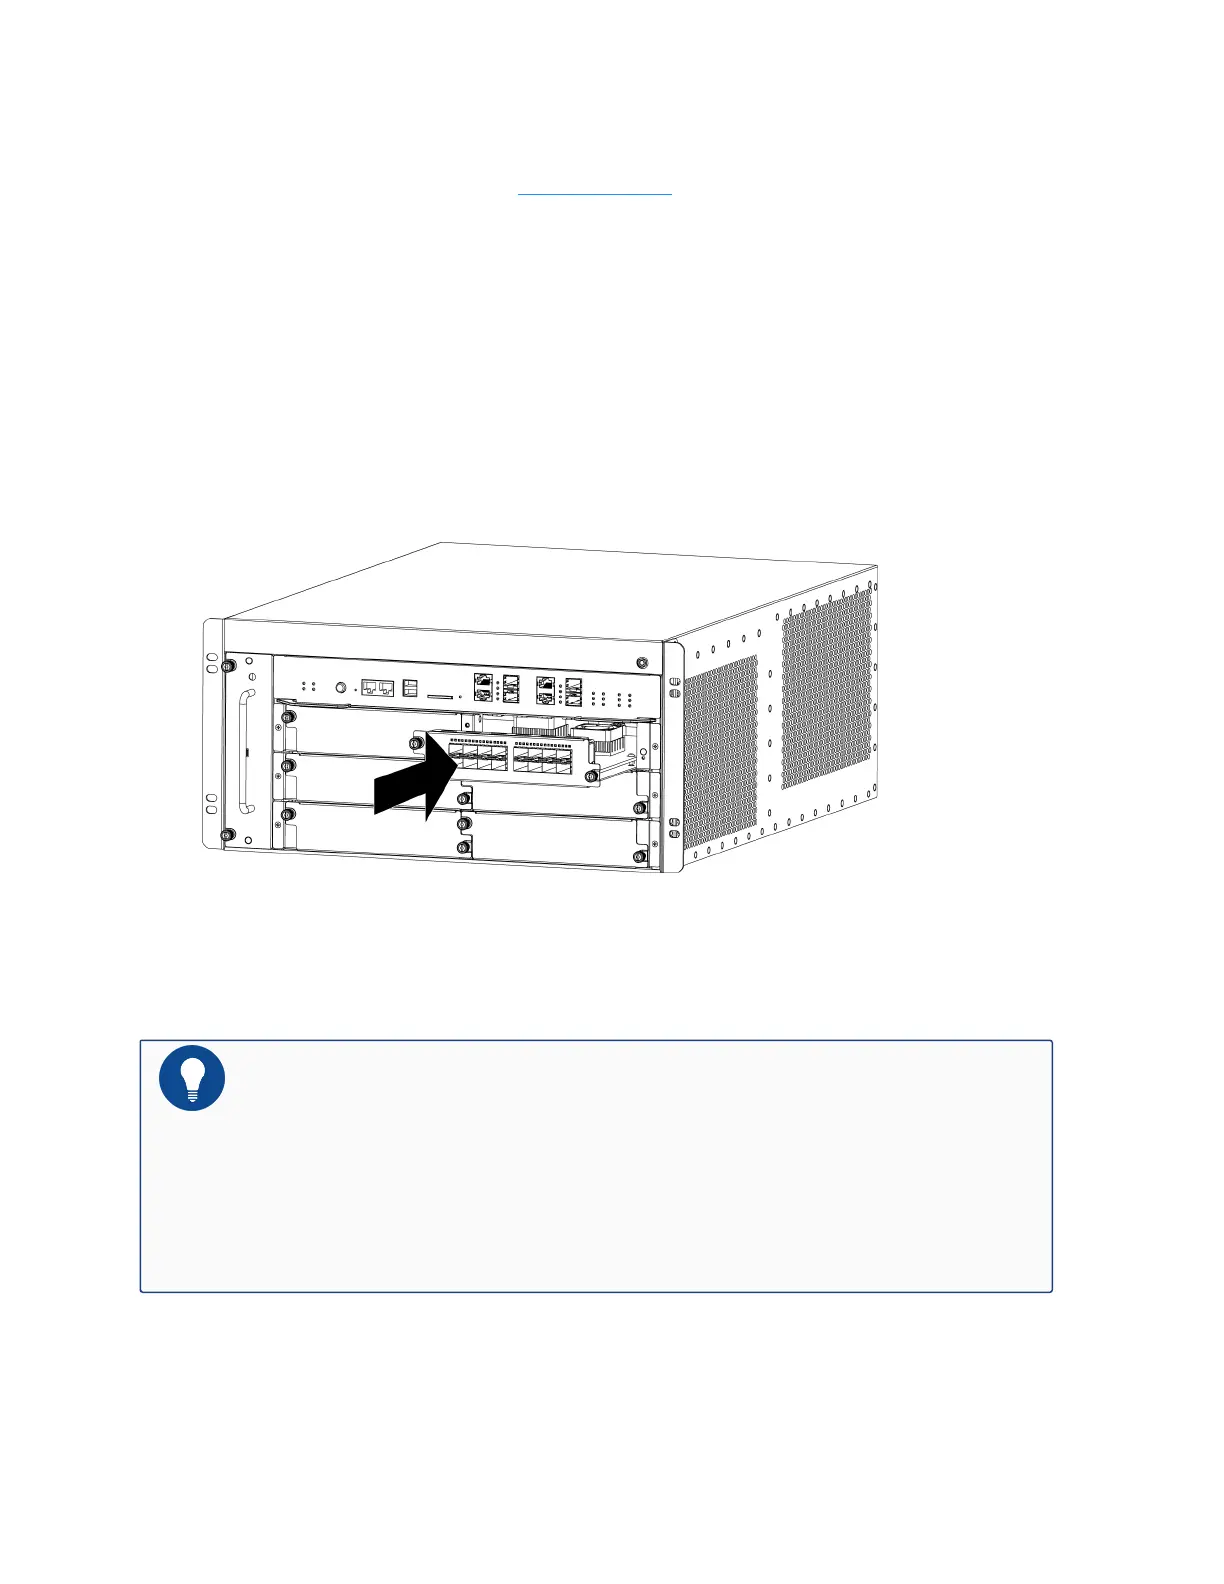
5. Position the IOM so that its front side faces you, and slide the IOM into the slot until you
feel resistant, as shown below.
6. Tighten the screws on the IOM with a cross screwdriver.
7. To install more IOMs, repeat Step 2 to 6.
Notes: When the modules are of half width, you can take the above steps to install
them. A tray is installed in each expansion slot at the factory, and the half width
modules can be installed on the tray directly. If you need to install the full width
modules (such as SSM-200, QSM-200, IOM-2Q8SFP+-200, IOM-2Q8SFP+ and
IOM-8SFP+), loose the screws at each end of the tray, remove the tray, and then
install the modules by taking the above steps.
107
Chapter 3 Installation
 Loading...