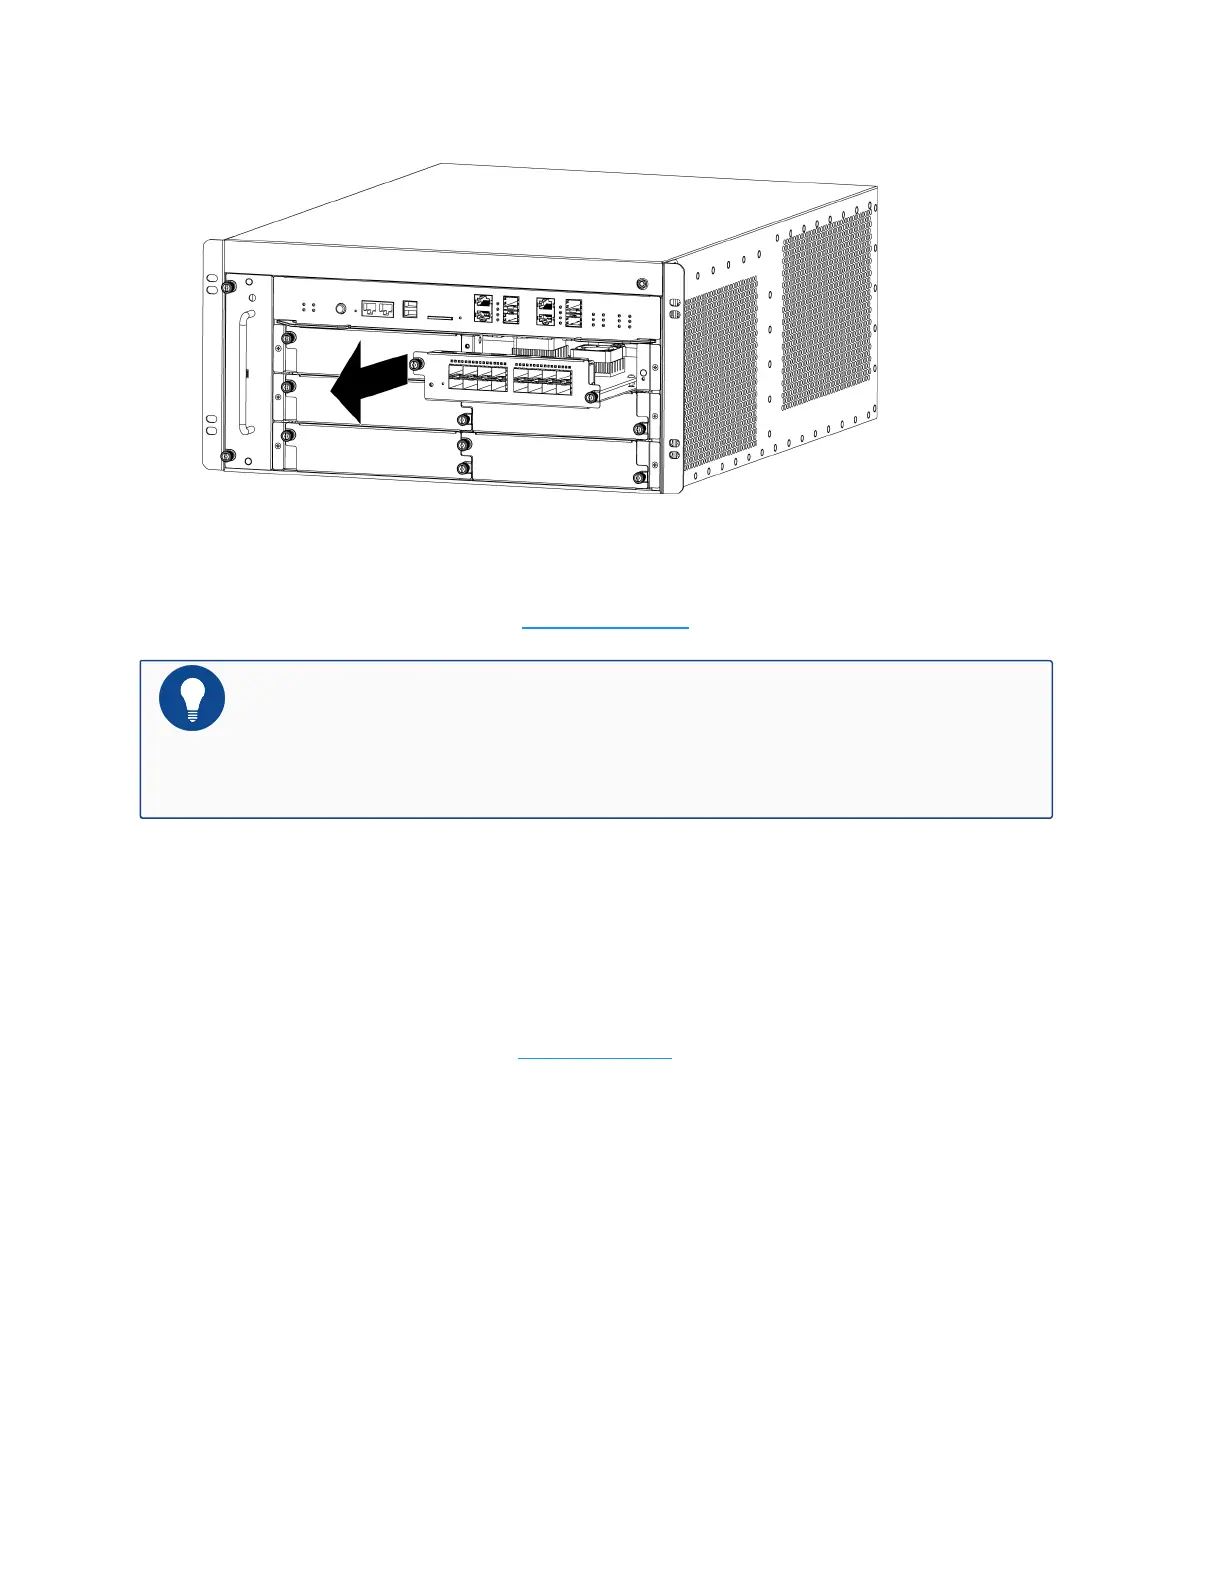
4. Hold the screws and pull the IOM straight out of the chassis, as shown below.
5. Put the removed module into an antistatic bag or on a flat antistatic table.
6. Install a replacement module (see Installing an IOM).
Notes: If you do not want to install a new module, apply a blank plate over the slot
to avoid dust falling into the chassis. The installation method of blank plates is the
same as that of modules.
Replacing a Bypass Module
To replace a bypass module, take the following steps:
1. Wear an electrostatic discharge (ESD) strap around your bare wrist and connect the strap to
an ESD point on the chassis. See ESD Prevention.
2. Remove all the cables connected to the module.
3. Use a cross screwdriver to loosen IOM screws until they pop out.
Chapter 5 Hardware Maintenance and
Replacement
140
 Loading...