48 User Manual Compact Crane C10
6.7.2 Order of operations for use with jib
Preparation
Make sure the machine is supported on the outriggers, with the tracks just above the ground.
Make sure the jib is correctly attached to the boom, as described for use of the jib (see section 6.6.1).
Make sure the attachments have been removed from the jib and stored and secured in place.
Make sure the boom and jib are horizontal and retracted,
Mounting winch head and attaching winch cable
Remove the winch head from the support on the boom, and mount the winch head to the jib with the
locking pin. Secure the pin.
Use one hand to operate the joystick for the winch and use the other hand to hold the winch cable and keep
it under tension. Roll out the winch cable until approximately one metre in front of the machine. Keep the
winch cable under tension while rolling it out.
Run the winch cable over the winch cable sheaves of the jib as shown in the figures. Check that the winch
cable has been run over the winch sheaves correctly. Fit the retainers again.
Run the winch cable over the winch head and attach the winch weight as described under ‘basic use of
winch’ (see section 6.7.1).
Check
Make sure all the pins and loose parts are properly attached and secured.
Make sure the winch cable does not get caught on the boom and jib structure.
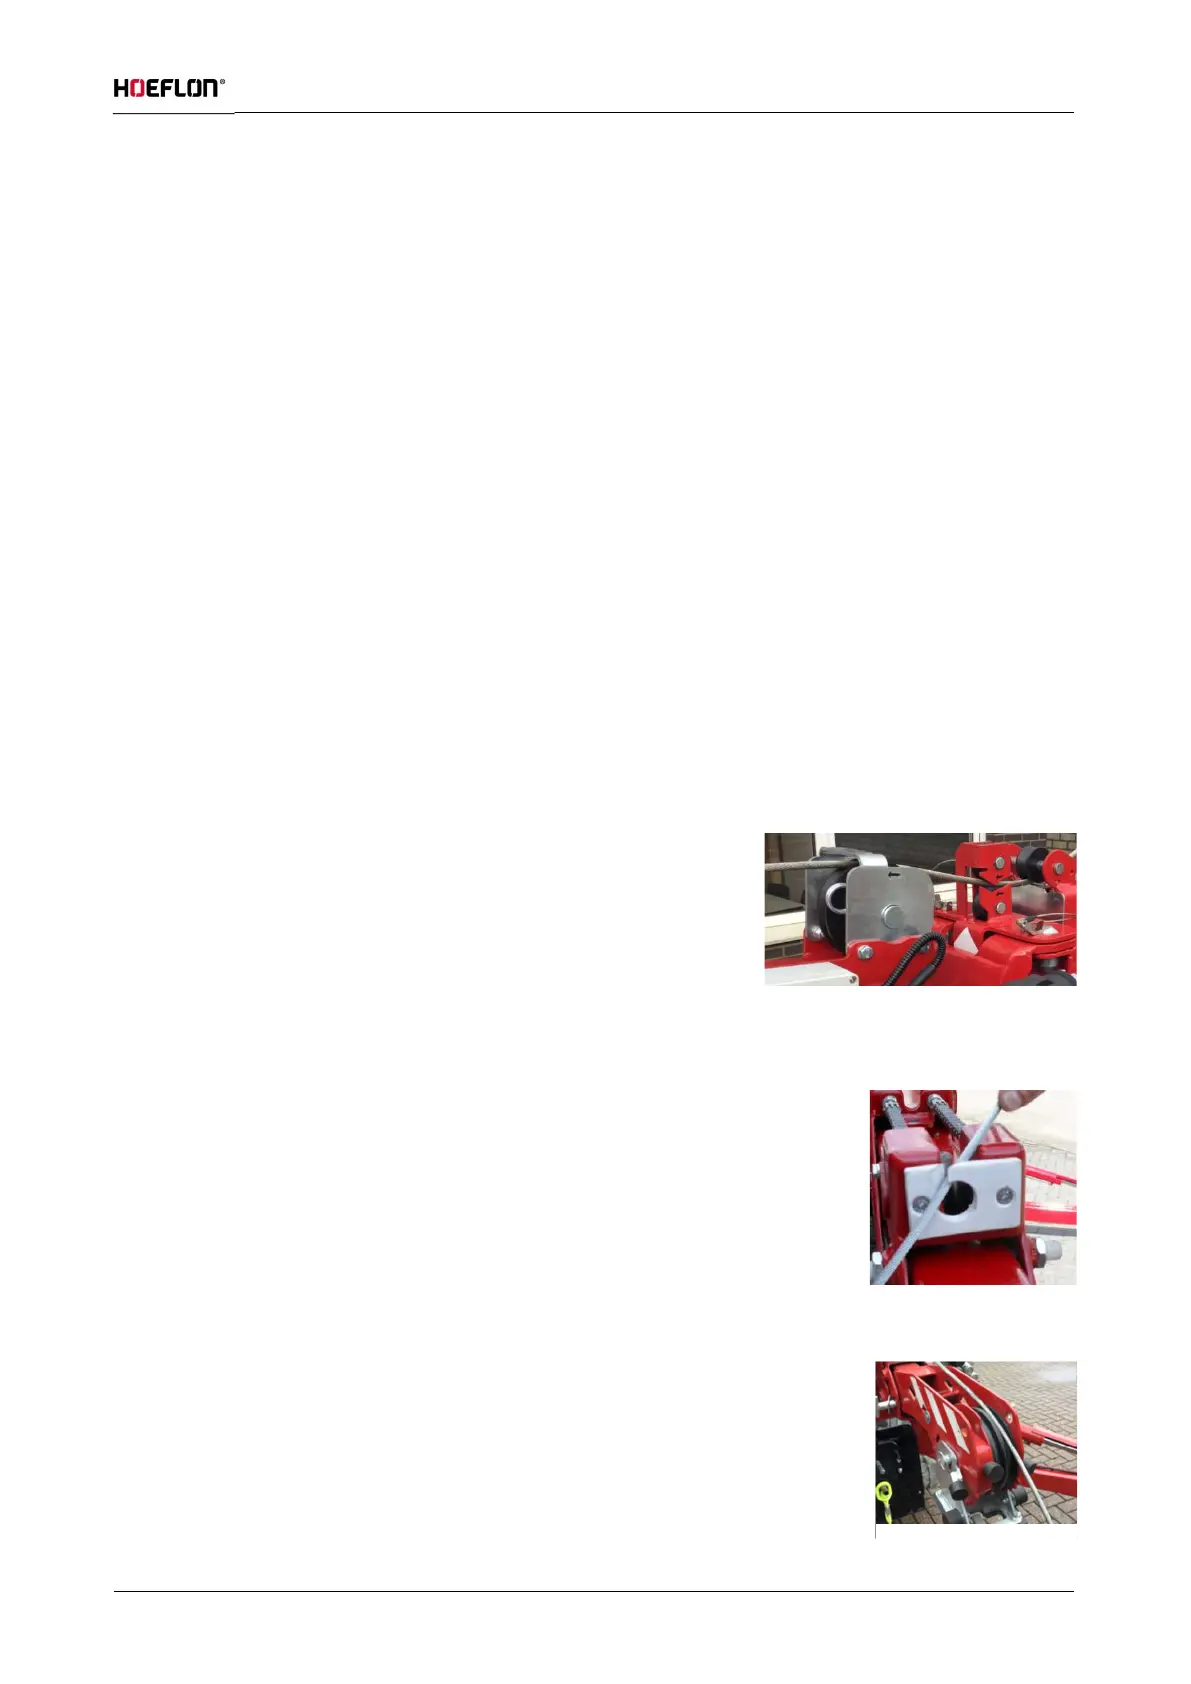
When the jib installed:
Slide the cable through the opening between the two cable rollers
(see figure 65). Now release the cable between the two rollers. Insert
the eye through the recessed support.
Now place the cable in the cable roller by holding the cable in the
upper notch and sliding the roller under it.
Now the cable can drop into the roller, and the roller with cable can
be slid back into the middle.
Pass the cable through the plastic slot so that it runs through the hole (see figure
66).
Pull the cable over the winch head (see figure 67) and follow the steps described
above.
To remove the winch cable, perform the steps in reverse order. Make sure that the
winch cable is rolled tightly by holding the cable firmly while rolling.
Figure: 65
Figure: 66
Figure: 67