How to adjust the LCD Contrast
You may need to adjust the LCD display contrast to suit the lighting level where the panel is installed.
How to change to another Access level from access level 1
"
If the controls are not used when at Access level 2, 3 or 4 then the system will timeout and return to Access level 1. When at Access levels 2 or 3 the system will timeout
after about 3 minutes and return to Access level 1. When at Access level 4 the menu will exit to Access level 1 after 1 hour.
How to exit to Access Level 1 from Access level 2, 3 or 4
Commissioning instructions
20 4188-949 issue 3_05/10_Nano Comms inst.
How to adjust the LCD Contrast
It is a good idea to return to Access level 1 before
changing to another Access level.
10:15 Mon 15/02/10
User Access Code Entry
Enter User Code : [0***]
Accept Quit
Accept
System >
SelectSelect
User
Select
Menu
Use these buttons to scroll to a required
number of your PIN, from a range 0 - 9.
Then repeat the sequence for
the next character (or PIN code) position.
To move to the next
character (or PIN code)
position.
The factory set Access level codes are:
Access level 2 code:- 0000
Access level 3 code:- 3333
Access level 4 code:- 4444
Indication given to remind
you are at Access level 4
(Maintenance Mode).
Note you will need to
manually exit this level
otherwise there is an
automatic exit to level 1 after 1hr.
Code
Exit to LEVEL 1 from LEVEL 3/4
ARE YOU SURE YOU WISH TO PROCEED?
Yes No
Logout Yes
Back Back
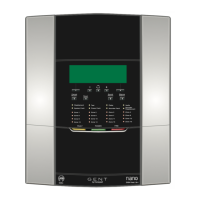
Panel is shown
without the front
cover fitted
To increase the contrast turn the tool clockwise
To decrease the contrast turn the tool anticlockwise
Carefully insert the trimmer tool into the hole on the
HMI assembly and locate the trimmer slot.
trimmer tool
Note component damage may occur if the
trimmer tool is forced into the hole.
assem
y
 Loading...