30 XLS140 Installation Manual Form Number 95-7673-3 P/N 51927:C 12/06/2005
Installation Installation Checklist
3.2 Installation Checklist
Table 3.1 provides an installation checklist for installing, wiring, and testing the XLS140 system. It
has references to installation information included in manuals listed in Section 1.2 “Supplemental
Documentation”.
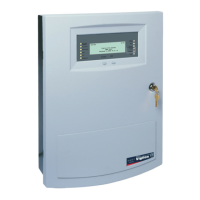
3.3 Mounting a Cabinet
This section provides instructions for mounting a CAB-4 Series backbox to a wall. Follow these
guidelines when mounting the backbox:
• Locate the backbox so that the top edge is 66 inches (1.6764 m) above the surface of the
finished floor.
• Access to the cabinet shall be provided in accordance with NFPA 90, article 110.33.
• Allow sufficient clearance around cabinet for door to swing freely. (See Section 2.3 “System
Cabinets”.)
• Use the four holes in the back surface of the backbox to provide secure mounting. (See
Figure 3.1.)
Seq Task Refer to
1. Mount the cabinet backbox to the wall. Section 3.3 “Mounting a Cabinet”
2. Install all required chassis in cabinet. Section 3.5 “Installing the Control Panel”
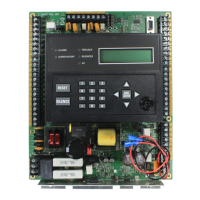
3. Install control panel onto chassis. Section 3.5.1 “Control Panel Circuit Board & Keypad/
Display Unit”
4. Optional: Install auxiliary power supply and/or external
battery charger
Auxiliary power manuals
5. Calculate the proper battery rating. Appendix A “Power Supply Calculations”
6. Connect AC wiring, place batteries into backbox without
connecting them, and run cable to optional power supplies,
DC power outputs, NACs, and relays.
CAUTION: Do not apply AC or DC power at this time.
Section 3.6 “Connecting the Power Cables”
7. Set switches for backup alarm (SW6-SW9). Section 3.9 “Backup-Alarm Switches”
8. Optional: Install and wire Auxiliary Relay Module (ARM-4). Section 3.13 “Auxiliary Relay Module (ARM-4):
Product-Specific Details”
9. Optional: Install Panel Circuit Modules (ICM-4RK,
CRM-4RK, VCM-4RK, DCM-4RK) and Voice Alarm System
components (AMG-1, FFT-7, Audio Amplifiers)
Section 3.12 “Installing Panel Circuit Modules”, and Voice
Alarm System Manual
10. Optional: Install output devices such as a printer, or CRT
terminal.
Section 3.14 “Installing Remote Printers and/or CRT”
11. Optional: Install XLS-NCA. XLS-NCA Manual
12. Secure any unused mounting holes in control panel circuit
board.
Figure 3.4
13. Wire the Signaling Line Circuits. Section 3.15 “Wiring a Signaling Line Circuit (SLC)”
14. Connect wire shielding as instructed. SLC Wiring Manual
15. Apply AC power to the control panel by placing the external circuit breaker to the ON position.
Do NOT connect batteries.
16. Check AC power. Table 3.3 in Section 3.6 “Connecting the Power Cables”
17. Connect the batteries using interconnect cable, P/N 75560 and 75561.
18. Install the CAB-4 series door. CAB-3/CAB-4 Series
Cabinet Installation Document
19. Program the control panel. XLS140 Programming Manual.
20. Field test the system. Section 5 “Testing the System”
Table 3.1 Installation Checklist

 Loading...