Installing components 22
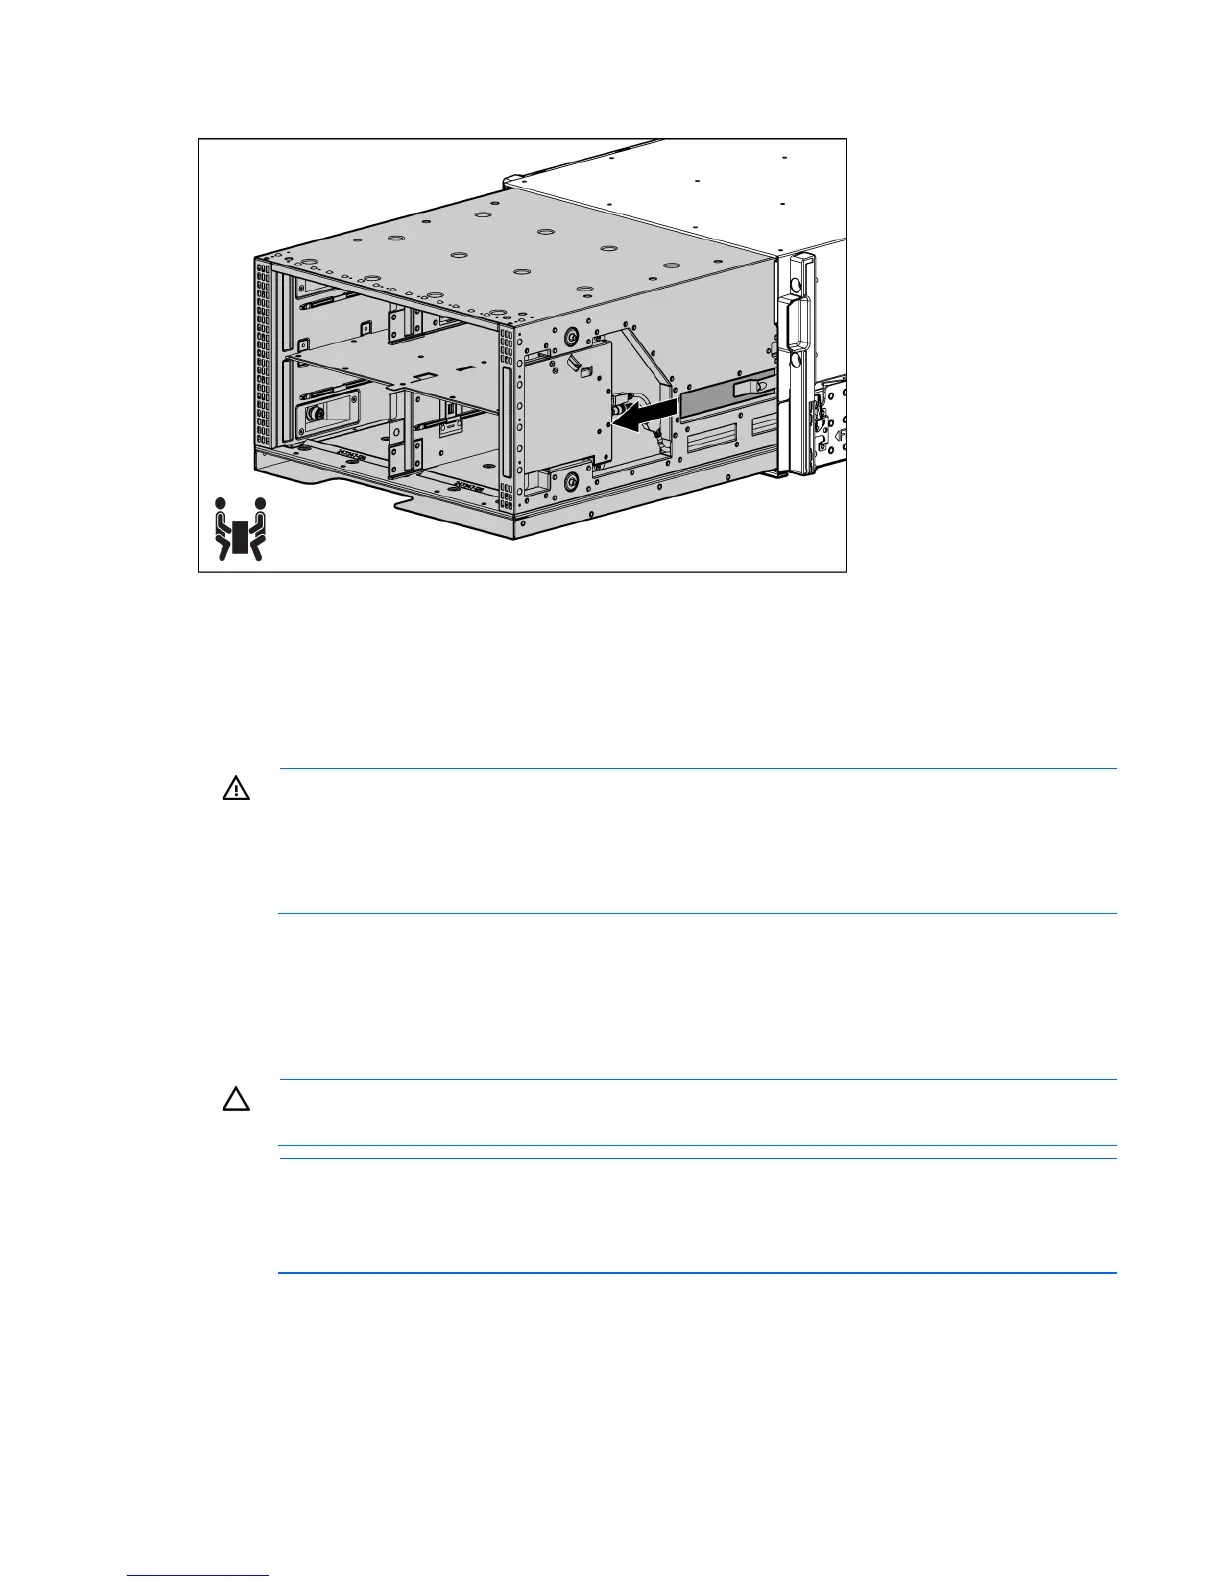
e.
Use the handholds to extend and remove the front cage from the enclosure.
Rack-free installation
To set up the enclosure in a rack-free environment:
1. Select the location for the enclosure. For more information, see "Rack-free environment requirements (on
page 7)."
WARNING: To reduce the risk of personal injury or damage to the equipment in a rack-free
environment:
• Never stack the enclosure on top of another enclosure.
• Never place equipment on top of the enclosure.
• Never place the enclosure on a surface that cannot support up to 131.5 kg (290 lb).
2. Place the enclosure on a flat, sturdy surface to support the enclosure.
3. Install the enclosure components ("Component installation" on page 26) into the enclosure.
Rack installation
CAUTION: Always plan the rack installation so that the heaviest item is on the bottom of the rack.
Install the heaviest item first, and continue to populate the rack from the bottom to the top.
NOTE: You can install up to seven 6U enclosures in a 42U rack. If you are installing more than
one enclosure, install the first enclosure in the bottom of the rack, and then install additional
enclosures by moving up the rack to the next available opening. Plan rack installations carefully
because it is difficult to change the location of components after they are installed.
To install an enclosure into the rack:
1. Use the rack template ("Measuring with the rack template" on page 23) to mark the locations for the
rack rails.
2. Install the rack rails ("Installing the rack rails" on page 23) for each enclosure.