Removal and replacement procedures 53
6.
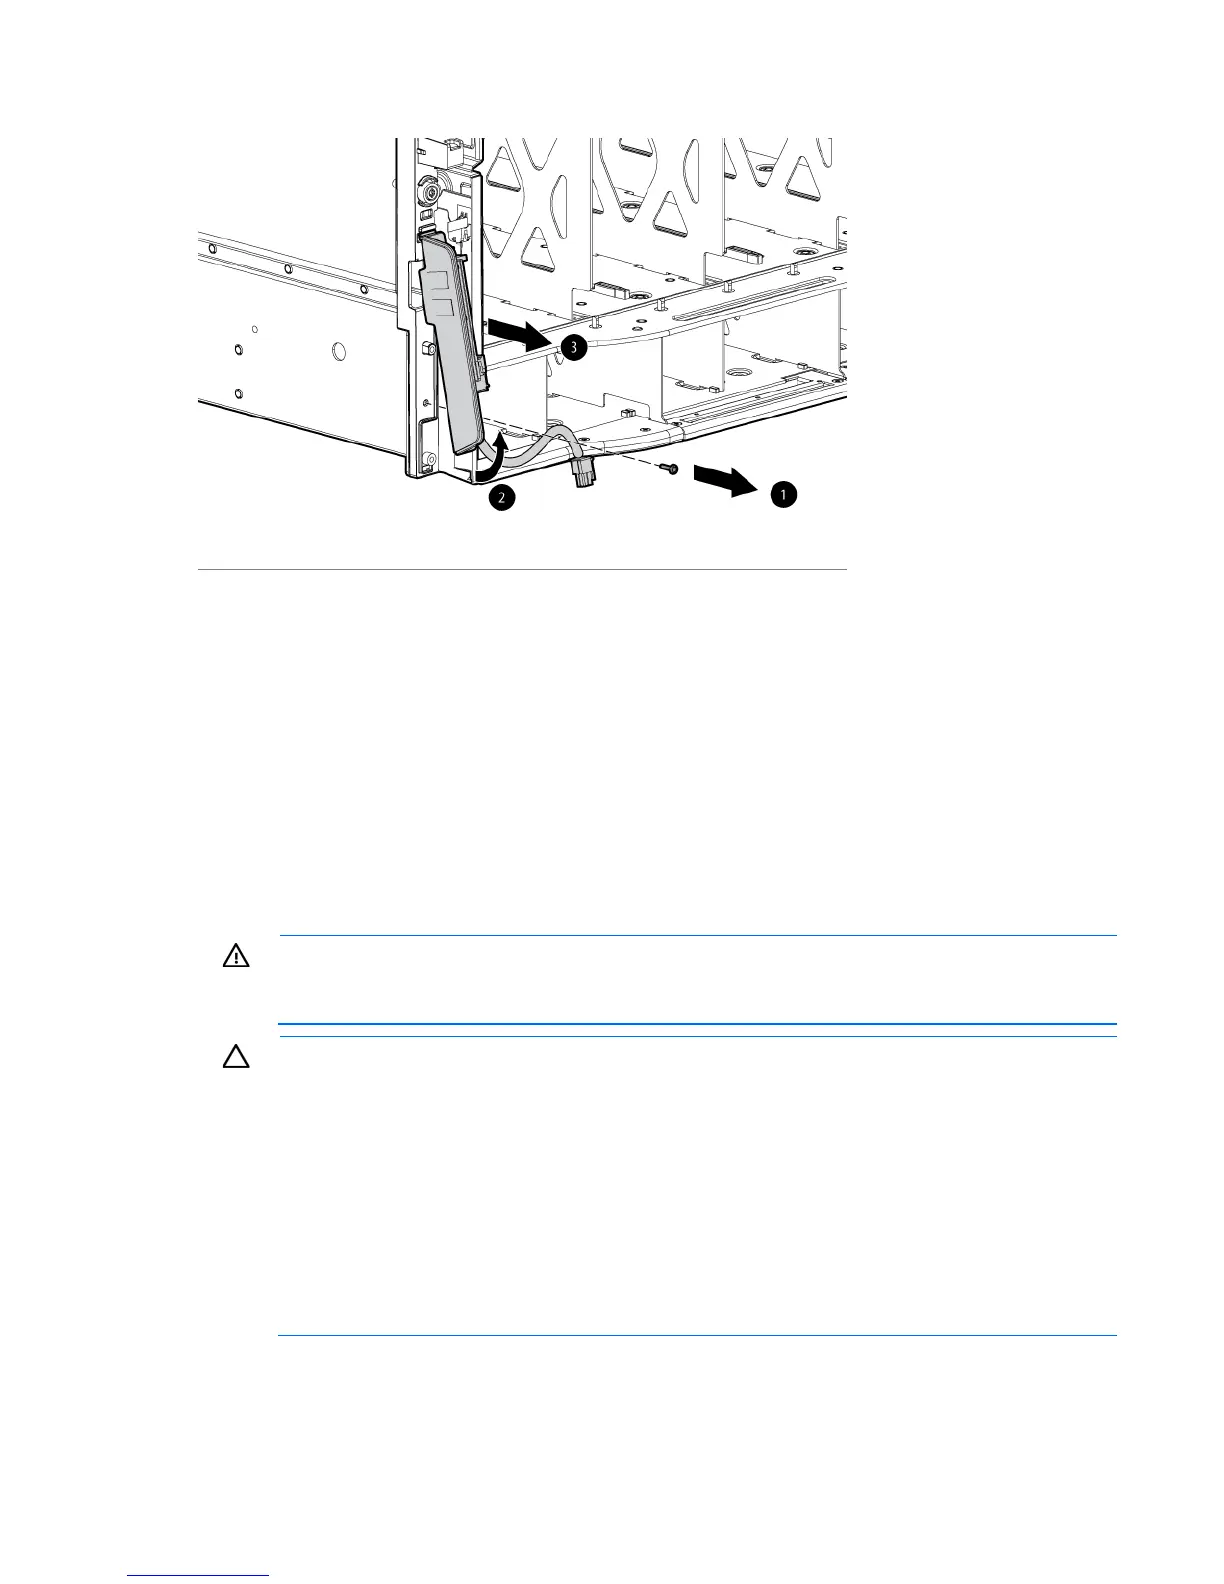
Remove the screw, lift up on the board, and then remove the board.
To replace the component, reverse the removal procedure.
Midplane assembly
Before replacing the midplane, locate and record the enclosure serial number and part number, using one of
the following methods:
• Locate the enclosure tag on the front, side, or rear of the enclosure.
• Access the Onboard Administrator.
• Log in to the Onboard Administrator CLI and run the command Show Enclosure Info. See the HP
BladeSystem Onboard Administrator Command Line Interface User Guide for information on accessing
the CLI.
WARNING: To reduce the risk of damage to the midplane and component connectors, always
remove or disengage and extend all blades and power supplies approximately 8 cm (3 in) before
removing or installing the rear cage.
CAUTION: The firmware included in Onboard Administrator version 3.20 and later
automatically restores the enclosure identity, including the serial number, PID, and PDU type, if a
midplane assembly replacement is detected. This firmware feature requires that the original
Onboard Administrator modules and all original fans be reinstalled along with all power supplies
before installing any other blade or interconnect module. All power supply modules can be
replaced while the enclosure is powered off without affecting the ability of the Onboard
Administrator to automatically restore enclosure identity.
VC, Virtual Connect Enterprise Manager, and Insight Control use the enclosure serial number as
a critical key. If you replace the midplane assembly without ensuring that the serial number is
restored prior to installing the VC modules and server blades, then the VC domain is deleted and
all server network and SAN connections are disabled .
To remove the midplane assembly:
1. Power down the blades (such as servers, workstation, storage, and so on) ("Power down the server
blades or workstation blades" on page 28).

 Loading...