v To make sure that there is adequate system cooling, do not operate the server
for more than 2 minutes without either a hard disk drive or a filler panel installed
in each bay.
1. Read the safety information that begins on page vii and “Installation guidelines”
on page 167.
2. Turn off the server and peripheral devices and disconnect the power cords and
all external cables.
Note: When you disconnect the power source from the server, you lose the
ability to view the LEDs because the LEDs are not lit when the power source is
removed. Before you disconnect the power source, make a note of which LEDs
are lit, including the LEDs that are lit on the operation information panel, on the
light path diagnostics panel, and LEDs inside the server on the system board;
then, see Chapter 3, “Diagnostics,” on page 23 for information about how to
solve the problem.
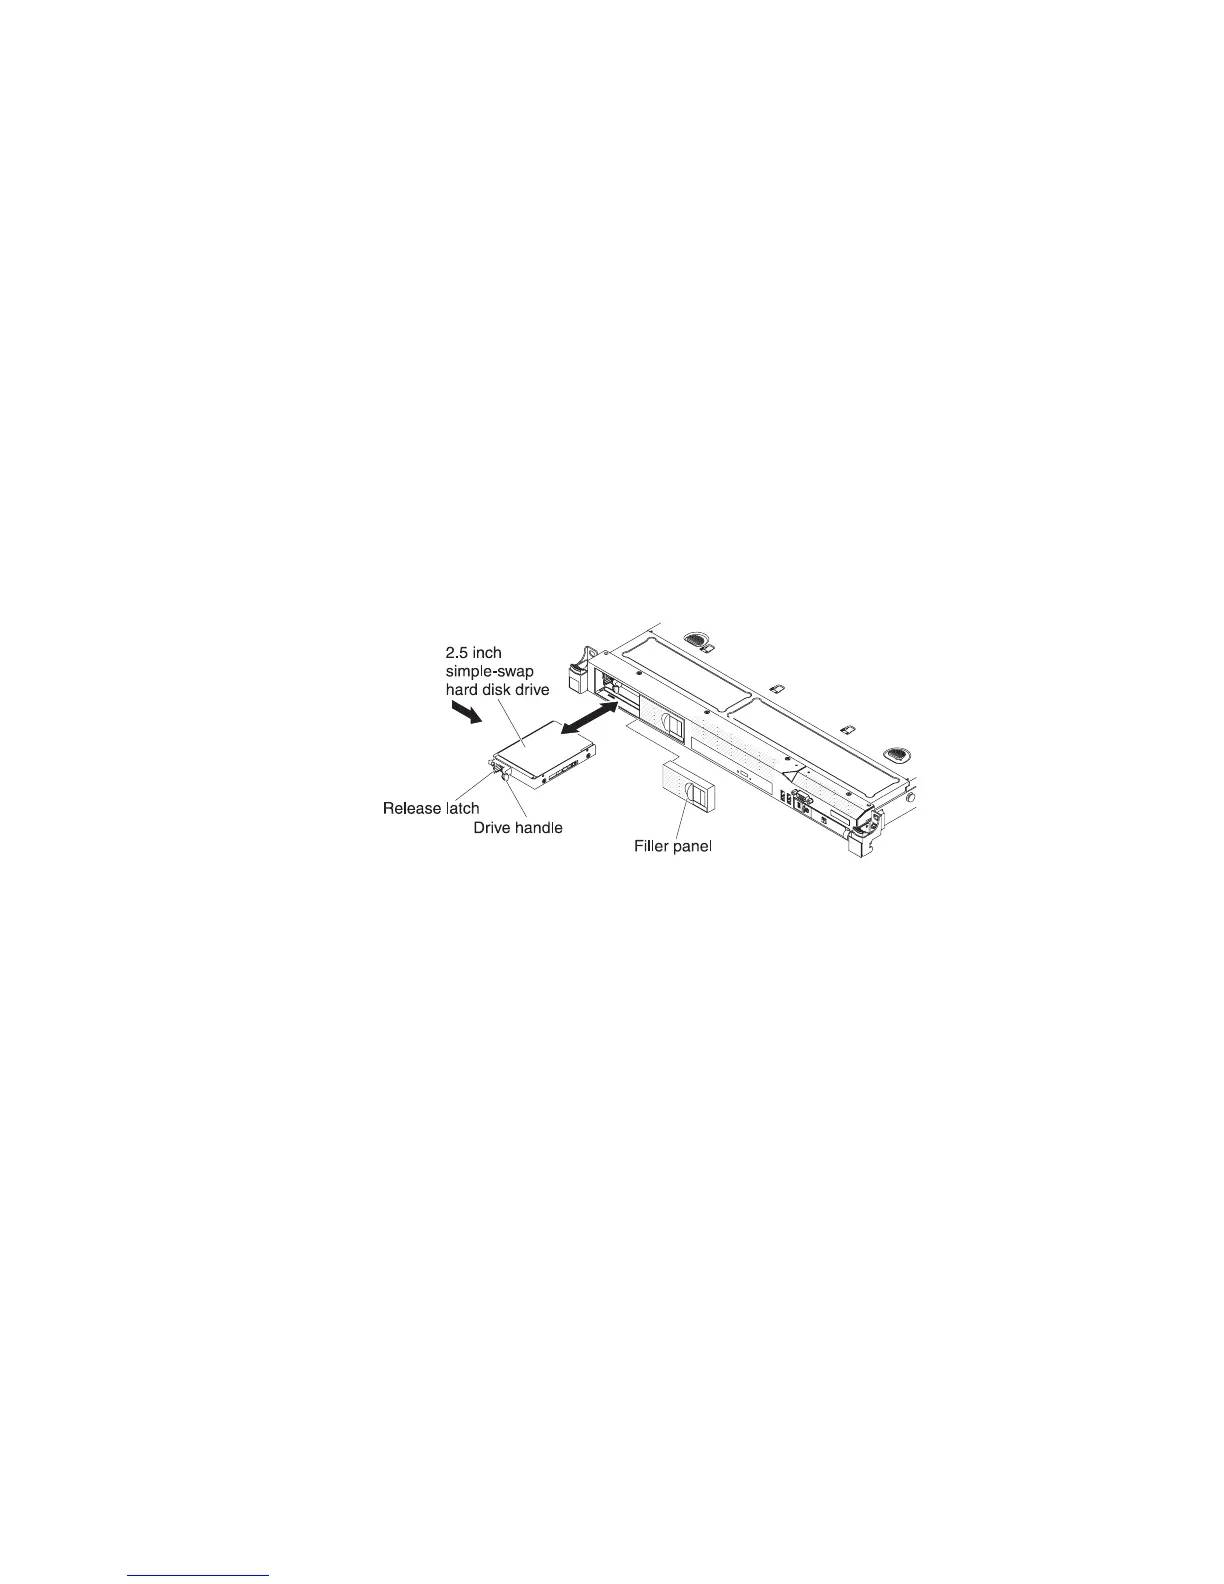
3. Remove the filler panel from the drive bay.
4. Slide the blue release latch to the right with one finger (to release the drive)
while using another finger to grasp the black drive handle and pull the hard disk
drives out of the drive bay.
5. If you are instructed to return the drive assembly, follow all packaging
instructions, and use any packaging materials for shipping that are supplied to
you.
Installing a simple-swap hard disk drive
The simple-swap server models support up to four 2.5-inch simple-swap SATA hard
disk drives that are accessible from the front of the server. You must turn off the
server before installing simple-swap drives in the server. Before you install a
simple-swap SATA hard disk drive, read the following information. For a list of
supported hard disk drives, see http://www.ibm.com/servers/eserver/serverproven/
compat/us/.
v Locate the documentation that comes with the hard disk drive and follow those
instructions in addition to the instructions in this chapter.
v Make sure that you have all the cables and other equipment that are specified in
the documentation that comes with the drive.
v Select the bay in which you want to install the drive.
v Check the instructions that come with the drive to determine whether you have to
set any switches or jumpers on the drive. If you are installing a SATA device, be
sure to set the SATA ID for that device.
v You can install up to four 2.5-inch simple-swap SATA hard disk drives in the
server. Do not install hot-swap drives into a simple-swap server model, it is not
supported.
Chapter 5. Removing and replacing server components 187

 Loading...


