v One optical drive bay filler panel
v One SATA cable
v One retention bracket
v Four screws
v One bezel
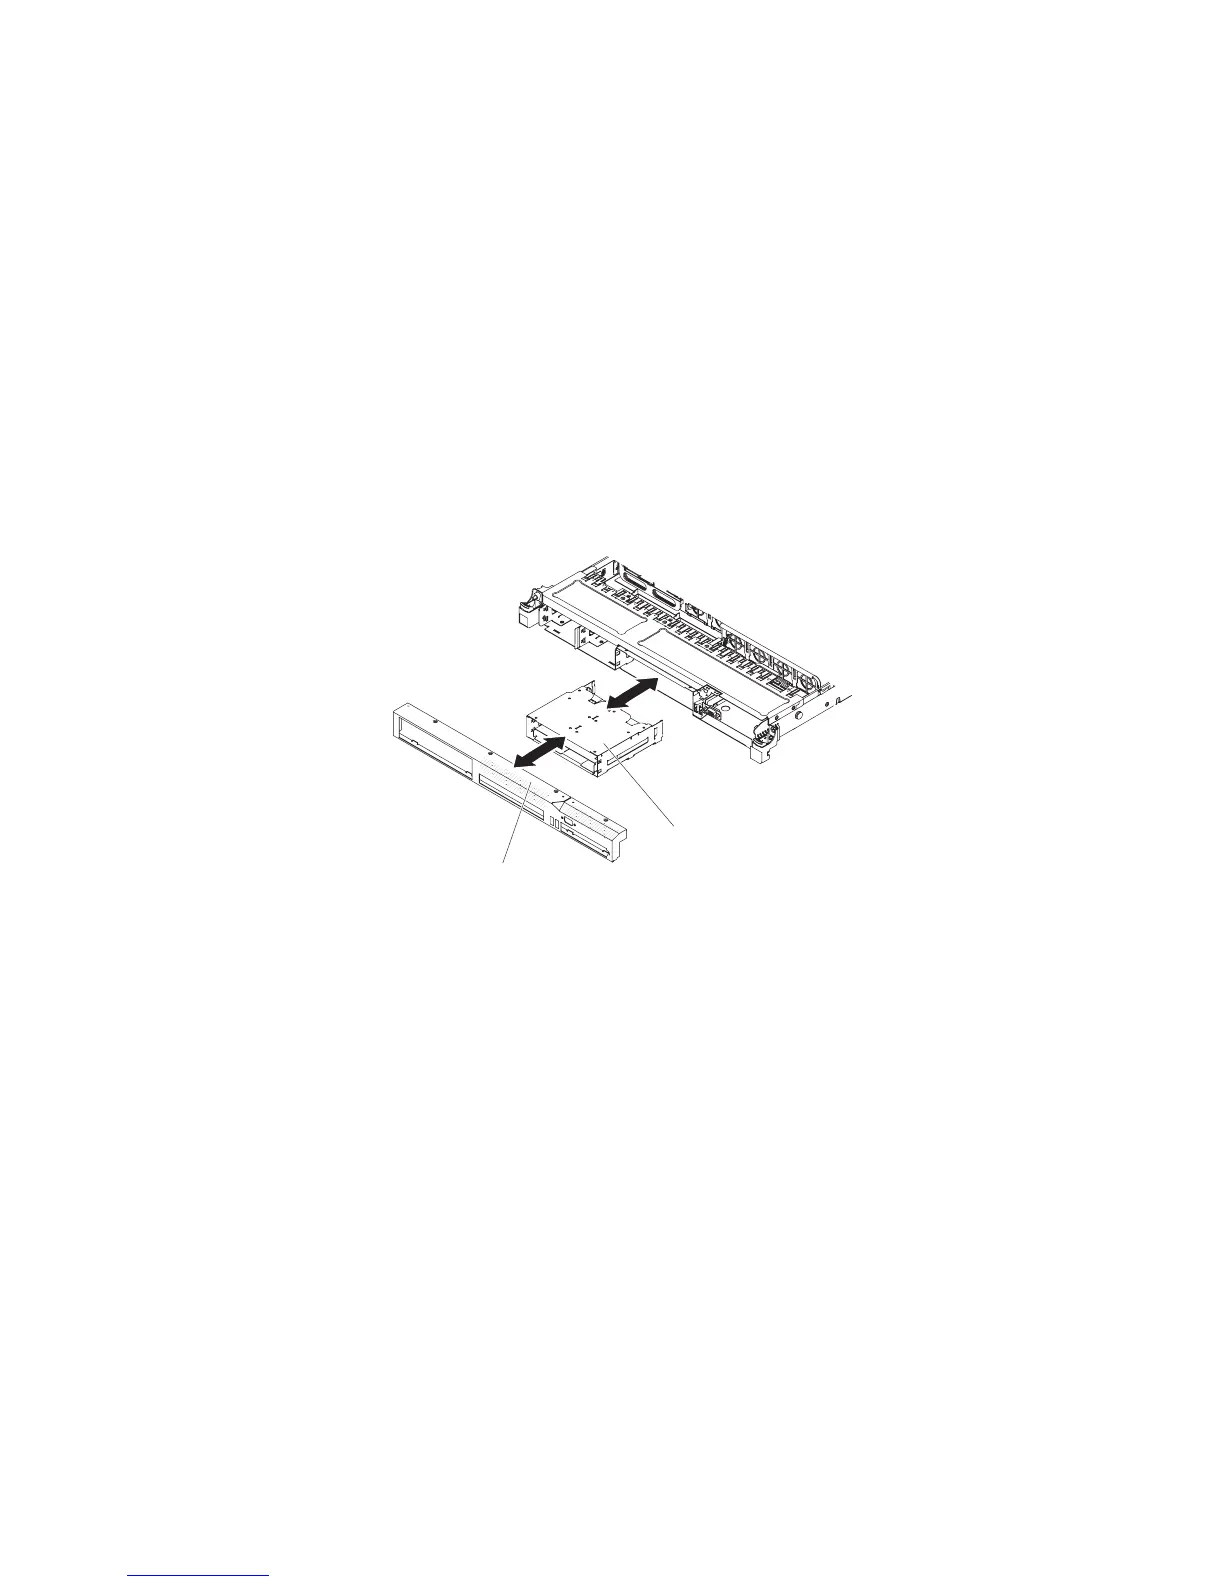
To install an optical drive cage, complete the following steps:
1. Read the safety information that begins on page vii and the “Installation
guidelines” on page 167.
2. Turn off the server and peripheral devices and disconnect the power cords and
all external cables.
3. Remove the cover (see “Removing the cover” on page 174).
4. Remove the bezel (see “Removing the bezel” on page 227).
5. Slide the optical drive cage forward into the optical drive bay until the screw
holes on the drive cage align with the screw holes on the chassis.
Bezel
Optical drive cage
6. Install the bezel (see “Installing the bezel” on page 227).
7. Install the DVD cable (see “Installing the DVD cable” on page 230).
8. Install the cover (see “Installing the cover” on page 174).
9. Reconnect the power cords and any cables that you removed.
10. Slide the server into the rack.
11. Turn on the peripheral devices and the server.
Removing the DVD cable
To remove the DVD cable, complete the following steps:
1. Read the safety information that begins on page vii and “Installation guidelines”
on page 167.
2. Turn off the server and peripheral devices and disconnect all power cords.
3. Remove the cover (see “Removing the cover” on page 174).
4. Remove the fans in fan connectors 2, 3, and 4 (see “Removing a hot-swap fan
assembly” on page 213).
5. Remove the DVD drive (see “Removing an optional DVD drive” on page 189).
6. Press and hold the connector release tab; then, remove the DVD cable from the
connector on the system board.
Chapter 5. Removing and replacing server components 229

 Loading...


