6. Reinstall the fans (see “Installing a hot-swap fan assembly” on page 215).
7. Replace the cover (see “Installing the cover” on page 174).
8. Slide the server into the rack.
9. Reconnect the power cord and any cables that you removed.
10. Turn on the peripheral devices and the server.
Removing a SAS/SATA 4 Pac HDD option
To remove a SAS/SATA 4 Pac HDD option, complete the following steps:
1. Read the safety information that begins on page vii and the “Installation
guidelines” on page 167.
2. Turn off the server and peripheral devices and disconnect the power cords and
all external cables.
3. Remove the cover (see “Removing the cover” on page 174).
4. Pull the hard disk drives and filler panels out of the server slightly to disengage
them from the hard disk drive backplane.
5. Remove the bezel (see “Removing the bezel” on page 227).
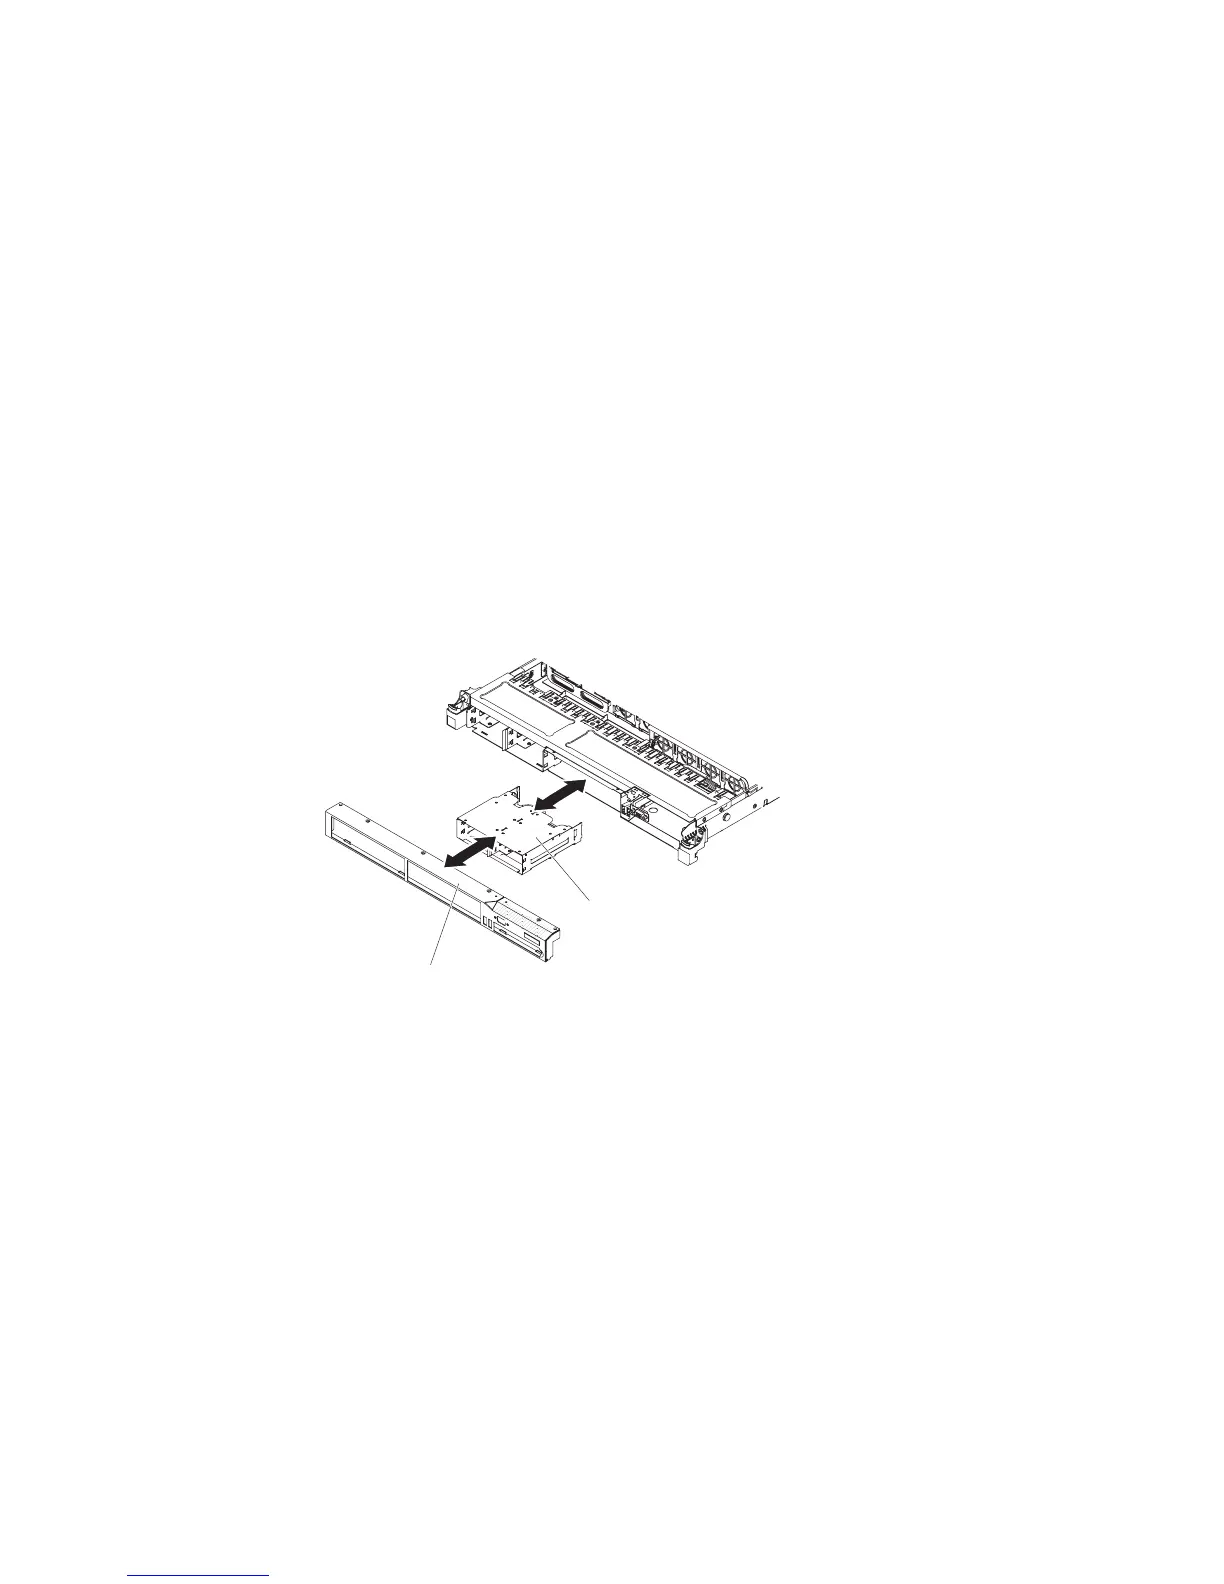
6. Slide the optional hot-swap hard disk drive cage out of the chassis and set it
aside.
Bezel
Hard disk drive cage
Installing a SAS/SATA 4 Pac HDD option
You can install an IBM System x3550 M3 Hot-swap SAS/SATA 4 Pac HDD option to
add four additional 2.5-inch hot-swap hard disk drives in the server. See
http://www.ibm.com/servers/eserver/serverproven/compat/us/ for a list of supported
optional devices. To order a SAS/SATA 4 Pac HDD option, contact your IBM
marketing representative or authorized reseller.
The SAS/SATA 4 Pac HDD option kit contains the following components:
v One 2.5-inch hard disk drive backplane (with bracket)
v Four drive bay filler panels
v One SAS signal cable
v One 4 Pac hard disk drive cage and screws
v One bezel (depending on the option you purchase)
To install a SAS/SATA 4 Pac HDD option, complete the following steps:
1. Read the safety information that begins on page vii and the “Installation
guidelines” on page 167.
232 IBM System x3550 M3 Types 4254 and 7944: Problem Determination and Service Guide

 Loading...


