Removing and replacing Tier 2 CRUs
You may install a Tier 2 CRU yourself or request IBM to install it, at no additional
charge, under the type of warranty service that is designated for your server.
The illustrations in this document might differ slightly from your hardware.
Removing the bezel
To remove the bezel, complete the following steps:
1. Read the safety information that begins on page vii and “Installation guidelines”
on page 167.
2. Turn off the server and peripheral devices and disconnect the power cords and
all external cables (see “Turning off the server” on page 15).
3. Remove the hard disk drives and filler panels from the hard disk drive bays (see
“Removing a hot-swap hard disk drive” on page 184).
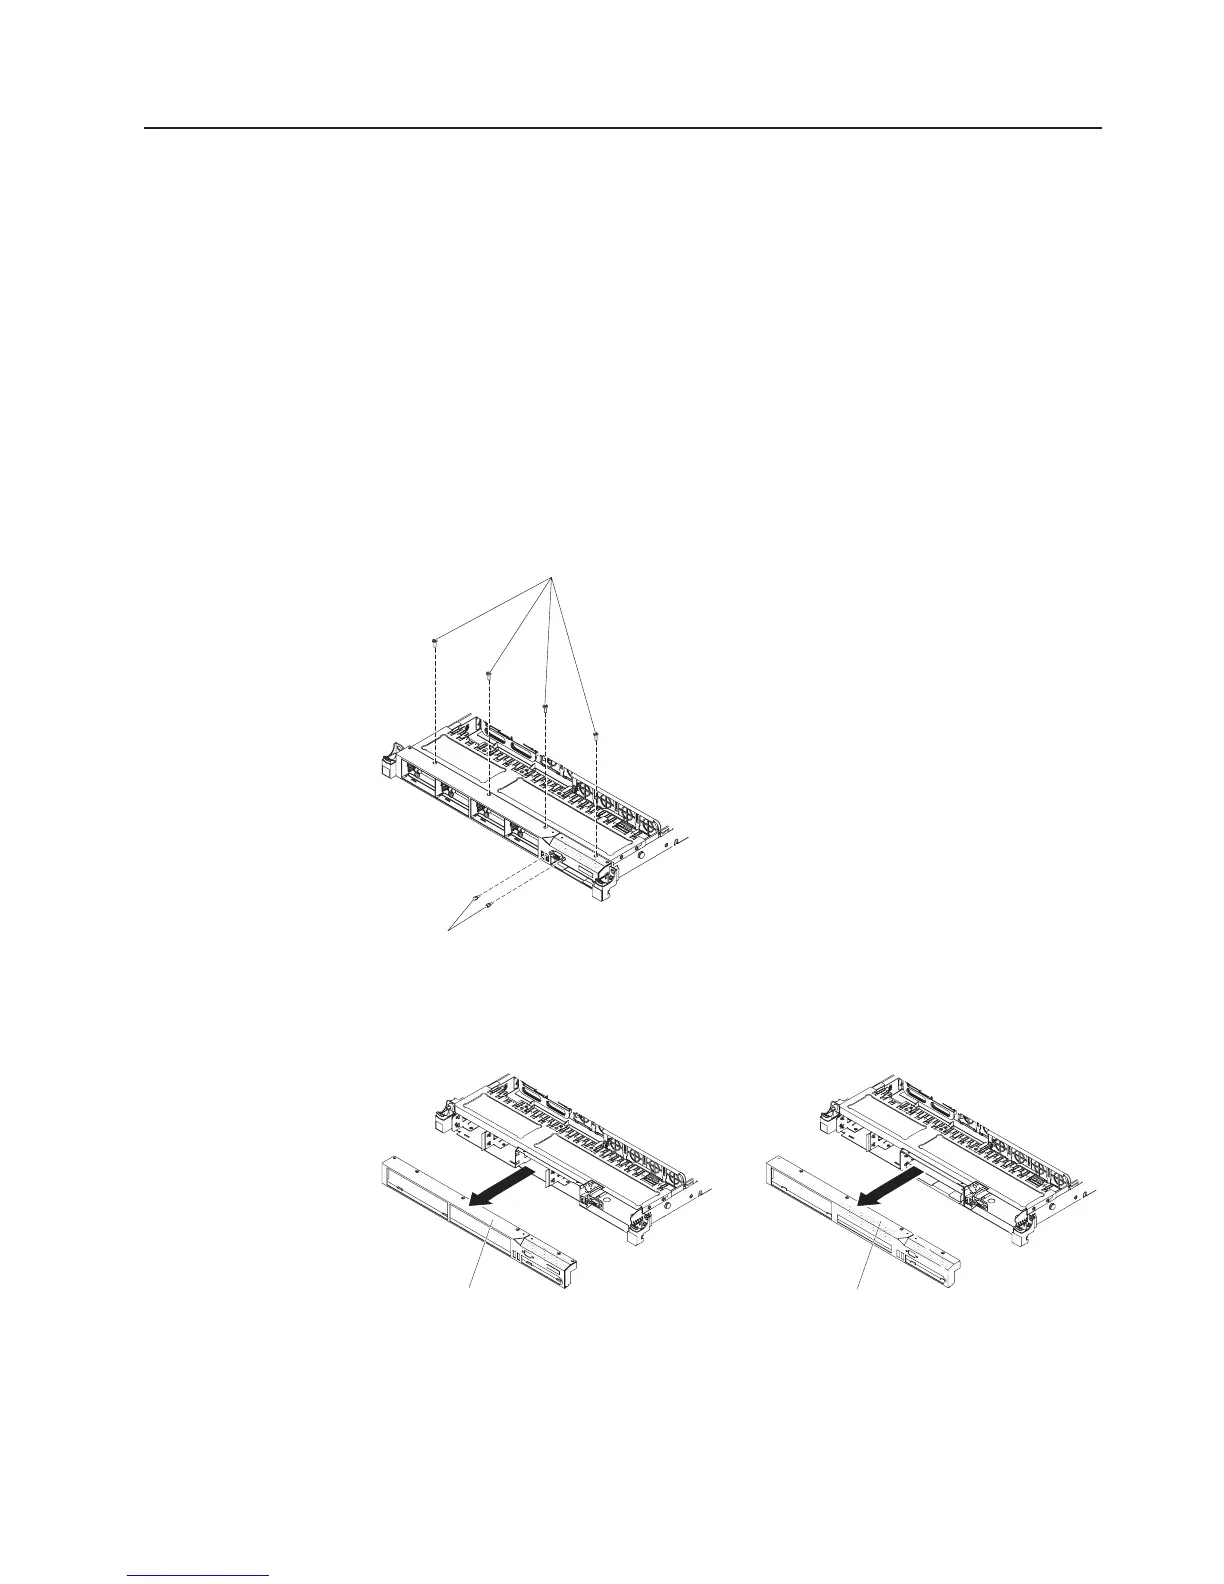
4. Remove the screws from the bezel.
Bezel screws
Video connector
screws
5. Remove the screws from the video connector.
6. Pull the top of the bezel out slightly; then, rotate it downward until the tabs on
the bottom of the bezel disengages from the chassis and set it aside.
Bezel
Bezel
Installing the bezel
To install the bezel, complete the following steps:
1. Insert the tabs on the bottom of the bezel into the holes on the chassis.
2. Rotate the bezel upward to the server and reinstall the bezel screws.
Chapter 5. Removing and replacing server components 227

 Loading...


