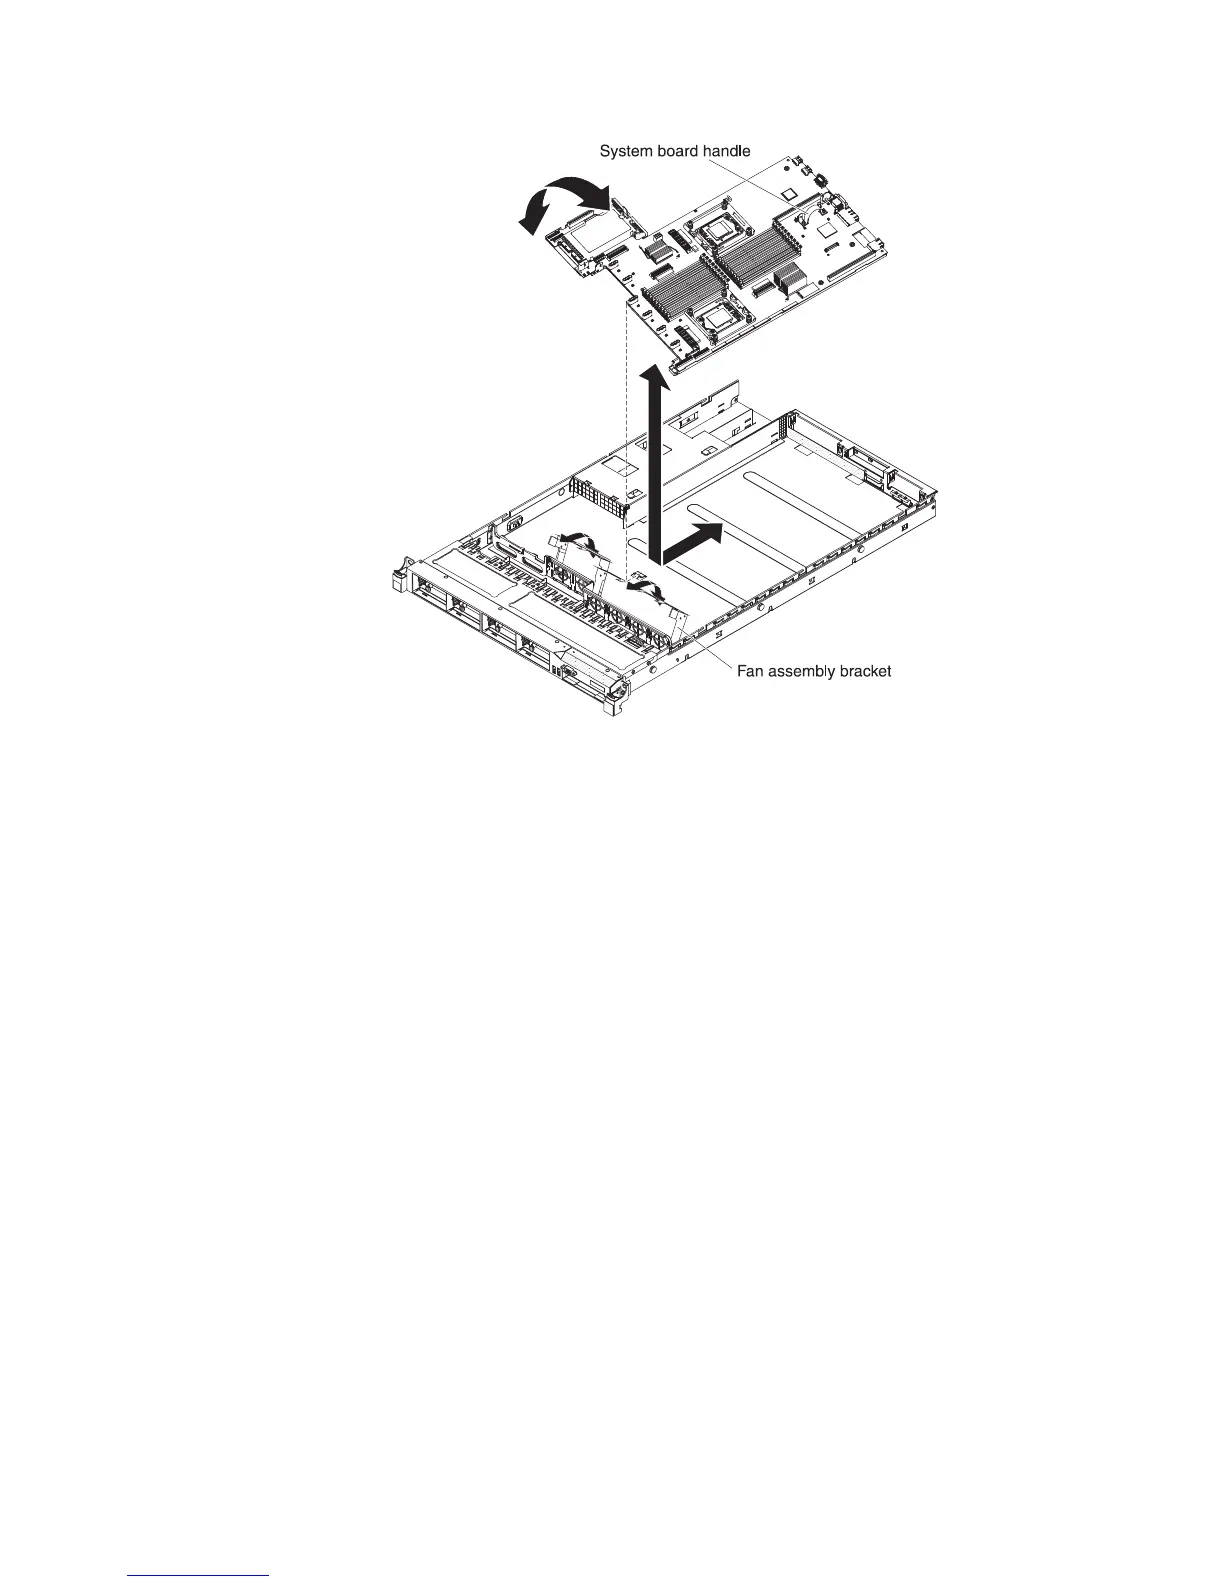
3. Grasp the fan assembly brackets and rotate them down toward the chassis.
4. Reinstall the hot-swap fans (see “Installing a hot-swap fan assembly” on page
215).
5. (Trained service technician only) Reinstall the microprocessor and heat sink
(see “Installing a microprocessor and heat sink” on page 245).
6. Reinstall the SAS/SATA RAID riser-card assembly base (see “Installing the
SAS/SATA RAID riser-card assembly” on page 183).
7. Reinstall the DIMMs (see “Installing a memory module” on page 195).
8. Reinstall the microprocessor 2 and DIMM air baffles (see “Installing the
microprocessor 2 air baffle” on page 176 and “Installing the DIMM air baffle” on
page 178).
9. Reinstall the PCI riser-card assemblies and adapters, if any were installed (see
“Installing a PCI riser-card assembly” on page 235 and “Installing an adapter”
on page 180).
10. Reinstall the virtual media key (see “Installing the virtual media key” on page
216).
11. Reconnect to the system board the cables that you disconnected in step 11 of
“Removing the system board” on page 250.
12. Install the cover (see “Installing the cover” on page 174).
13. Slide the server into the rack.
14. Reconnect the power cords and any cables that you removed.
15. Turn on the peripheral devices and the server.
Important: Perform the following updates:
v Either update the server with the latest RAID firmware or restore the pre-existing
firmware from a diskette or CD image.
Chapter 5. Removing and replacing server components 253

 Loading...


