5-18
Maintaining the Printer
Rev AA
4 Reconnect the printhead connector to the new printhead.
5 Place the printhead in the parked position and secure it with the
printhead screw.
6 Set the printhead resistance.
Setting the Printhead Resistance
Printheads are manufactured with variations in their resistance. The
printhead resistance is pre-set in the factory. The printer must be set up
with the correct printhead resistance.
Caution
PRINTHEAD RESISTANCE. If the printhead is changed, the new
printhead resistance must be set. If not set correctly, damage could
occur to the printhead, or poor quality images could result. Such
damage is not covered by your printer warranty.
To set the printhead resistance, proceed as follows.
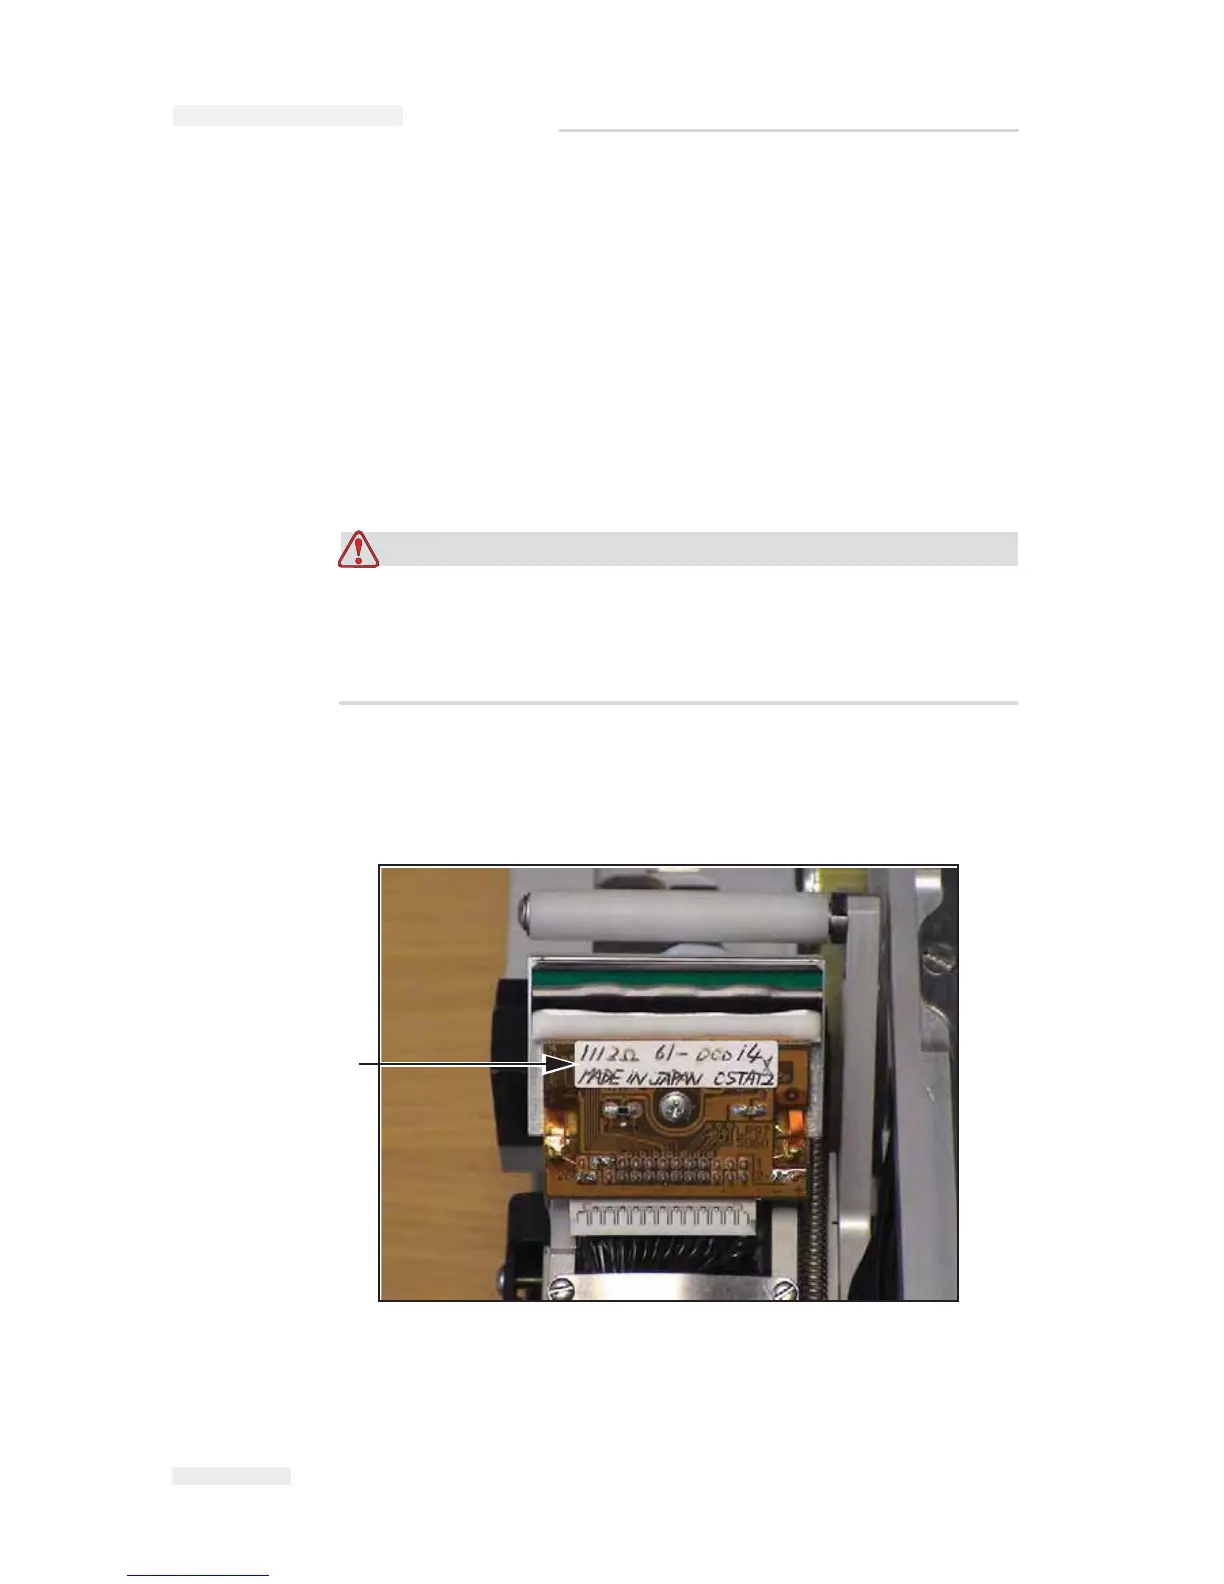
1 Find and note the printhead resistance value from the label on the
printhead (e.g. R=1113 O) as shown in Figure 5-23.
2 Touch the Tools button on the Home page.
3 Touch the Setup button on the Tools page.
Printhead Label
Figure 5-23: Printhead Resistance Value
I
CE Pegasus Service Manual