Rev AA Maintaining the CLARiTY Controller 5-5
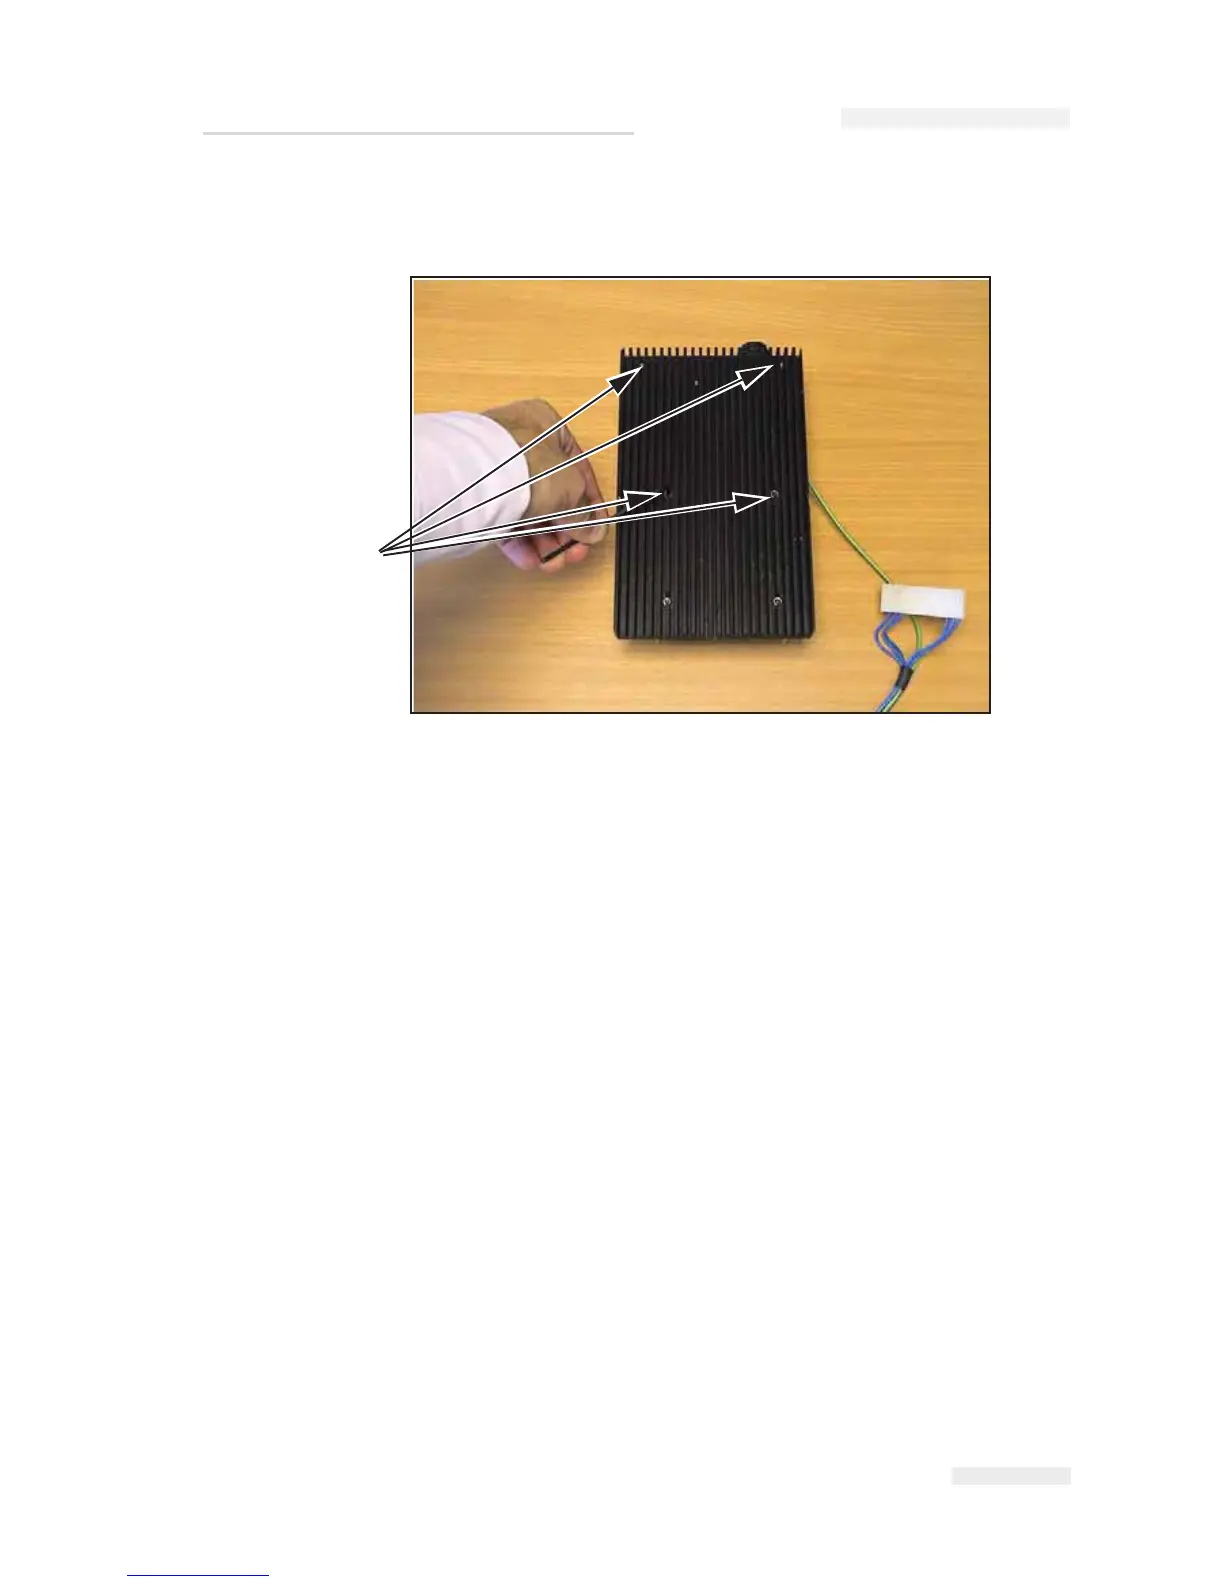
3 Next turn the base over and undo the four screws from the base plate.
The PSU can now be separated from the base plate.
4 To re-assemble reverse the above procedure ensuring that all electrical
connectors are securely pushed into place.
Replacing the CLARiTY Processor PCB and LCD Touchscreen Assembly
In order to replace the CLARiTY Processor PCB or the LCD/Touchscreen
Assembly, remove the top cover as described in the section “Replacing the
Power Supply Unit” on page 5-3".
Then follow the additional procedure below.
1 Remove the power connector from the main PCB.
Screws
Figure 5-5: Base Screw Removal
I
CE Pegasus Service Manual