Part 2 - Conguration
44
Selecting RS-232, RS-485, USB-Serial 1 through 8, or LAN
1 through 16 as the port activates the Port Setup button.
Select Setup and congure the Baud Rate, Data Bit,
Stop Bit, and Parity settings.
• If any one of LAN1 through 16 has been selected as
the port, select the Port Setup button and congure
the network port setting.
• If using a USB-serial port, the Text-In feature may
malfunction if the USB cable is removed while the
system is in operation.
• Title: Designate a name for the text-in device.
• Actions: Specify which actions to take when text-in is
detected.
– Record: Specify which cameras to begin linked
recording on when an event occurs. If the schedule
is set to Event or Time & Event mode, the selected
cameras will begin linked recording when an event
occurs.
– Alarm-Out: Designate event-triggered alarm-out
channels and beeps.
– Notify: Congure to be notied of events by Mail,
LAN1 through 5, FTP, Push, and/or Alert Window.
– PTZ: Moves the PTZ camera to a specic preset
position when an event occurs.
In order to use the Callback feature, the DVR must be
registered on the remote program.
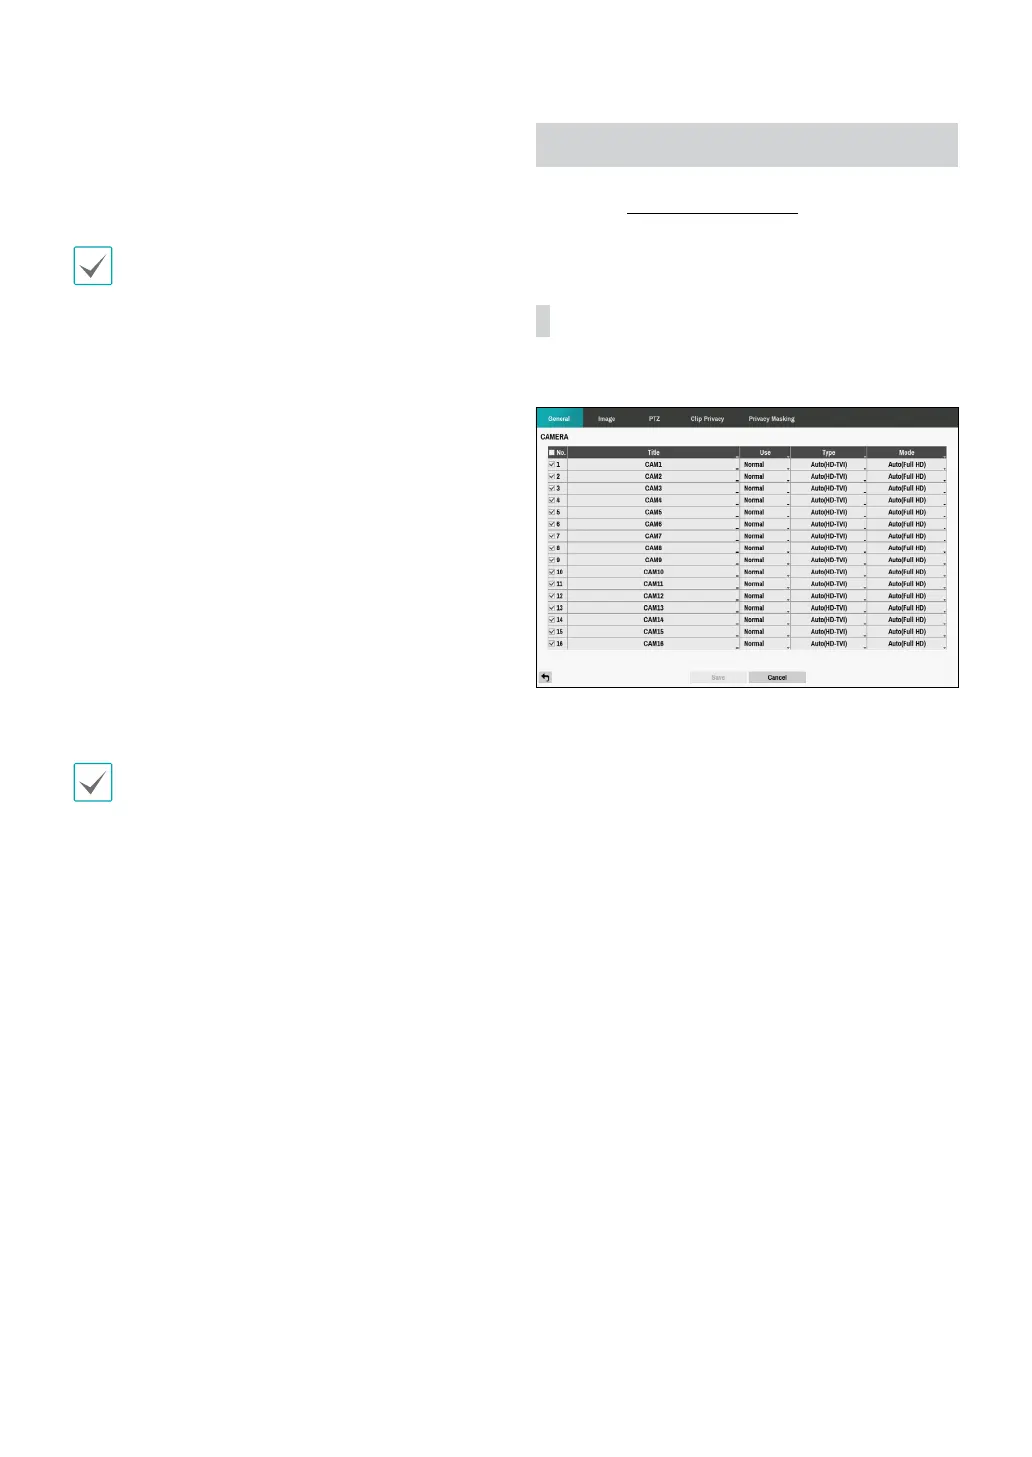
Camera Setup
Refer to the Menu Use on page 21 for basic
information on using the Setup menus.
General
Enable/disable the covert view and rename cameras.
• No.: Turn the camera number On or O.
• Title: Edit the camera’s name.
• Use: Set the camera as Normal, Covert 1, or Covert 2.
Live images and video recordings from cameras that
have been set as Covert 1 or Covert 2 will not be
available to users who do not have covert camera
access. Setting a camera as Covert 1 hides its images
but does display OSD information about the camera.
Setting a camera as Covert 2 hides its images as well
as OSD information about the camera as if it has been
deactivated completely.
• Type: Select the type supported by the camera
among Auto, SD, HD-TVI and AHD. Selecting Auto
allows the DVR to automatically detect the type
supported by the camera.