Part 2 - Conguration
46
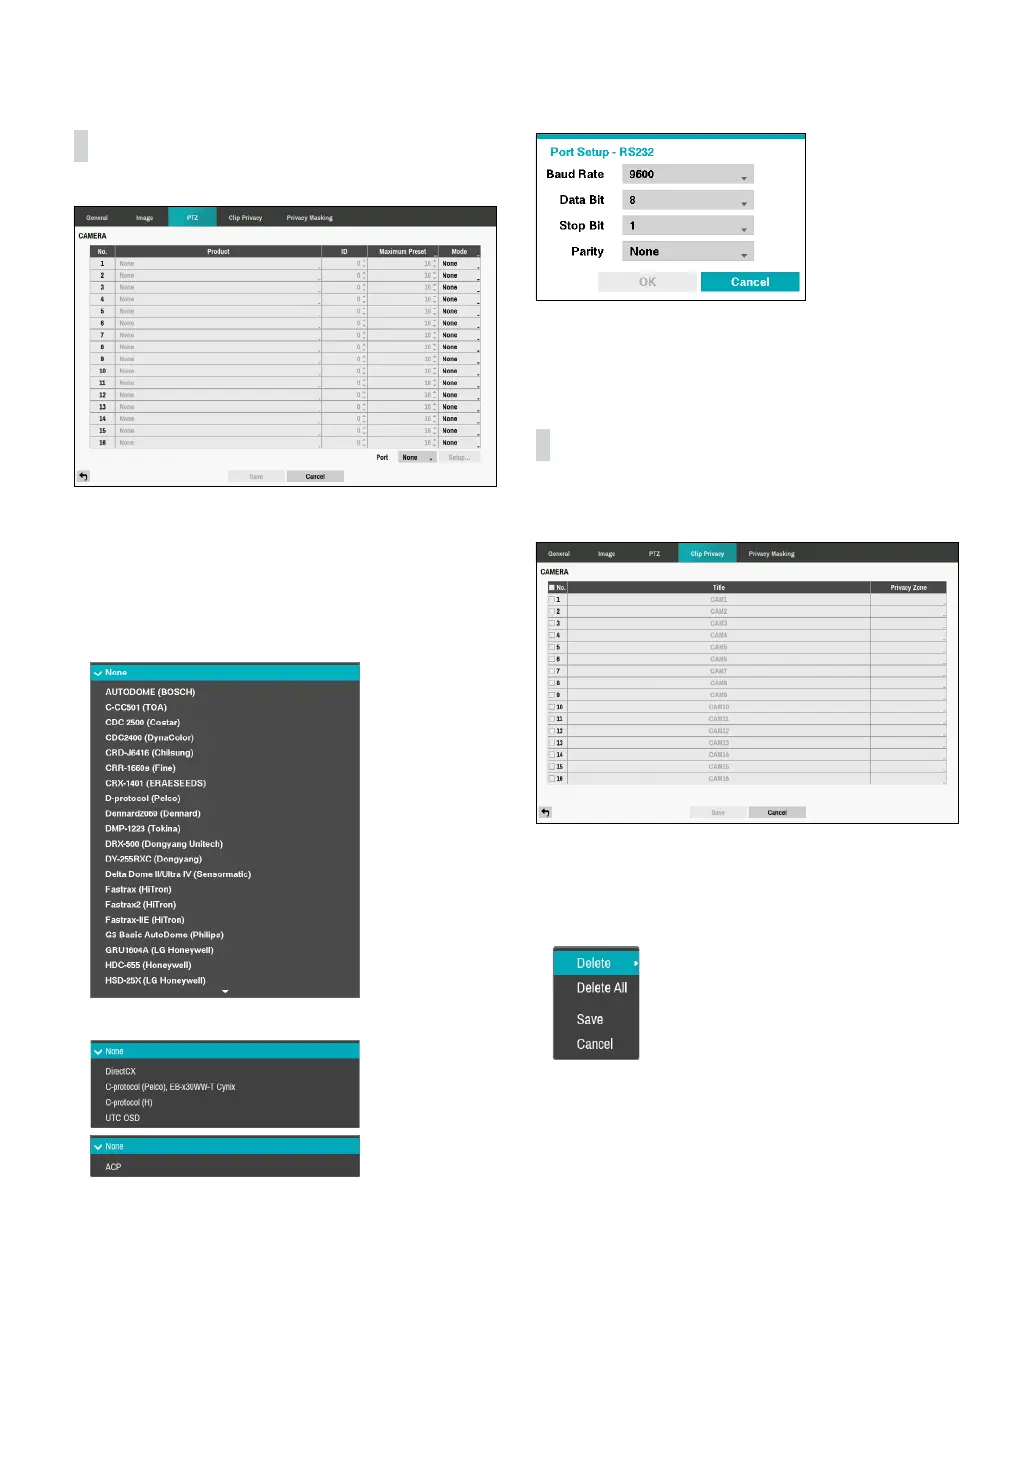
PTZ
• Product: You can select the PTZ camera you wish to
congure.
• ID: You can assign IDs to each camera by highlighting
the box under the ID heading. Change the number
by highlighting it and using the Up and Down arrow
buttons to increase and decrease the number. The
PTZ ID number can be set from 0 to 256.
<RS232/RS485>
<UTC>
• Mode: Select None, UTC, RS232, or RS485. UTC is
only used for HD and Full HD cameras.
• You will need to connect the camera to the RS232 or
RS485 connector on the back of the DVR following the
camera manufacturer’s instructions.
Congure the port’s setting based on the PTZ camera
manufacturer’s instructions.
Clip Privacy
Congure privacy masking zone for CLIP COPY.
• No.: Turn on/o the camera number.
• Privacy Zone: Display the full screen live mode of the
channel, and you can congure the privacy zone area
by dragging on the area with the mouse (The privacy
masking zone can be congured up to 16 areas).
– Delete: Delete the selected privacy masking area.
– Delete All: Delete the all privacy masking area.
– Save: Save the changes and exit the privacy
masking area options screen.
– Cancel: Exit the privacy masking area options
without saving the changes.