9
This document covers the 8- and 16-channel digital
video recorders. The DVRs are identical except for
the number of cameras and alarms that can be
connected and the number of cameras that can
be displayed. For simplicity, the illustrations and
descriptions in this document refer to the 16-channel
model.
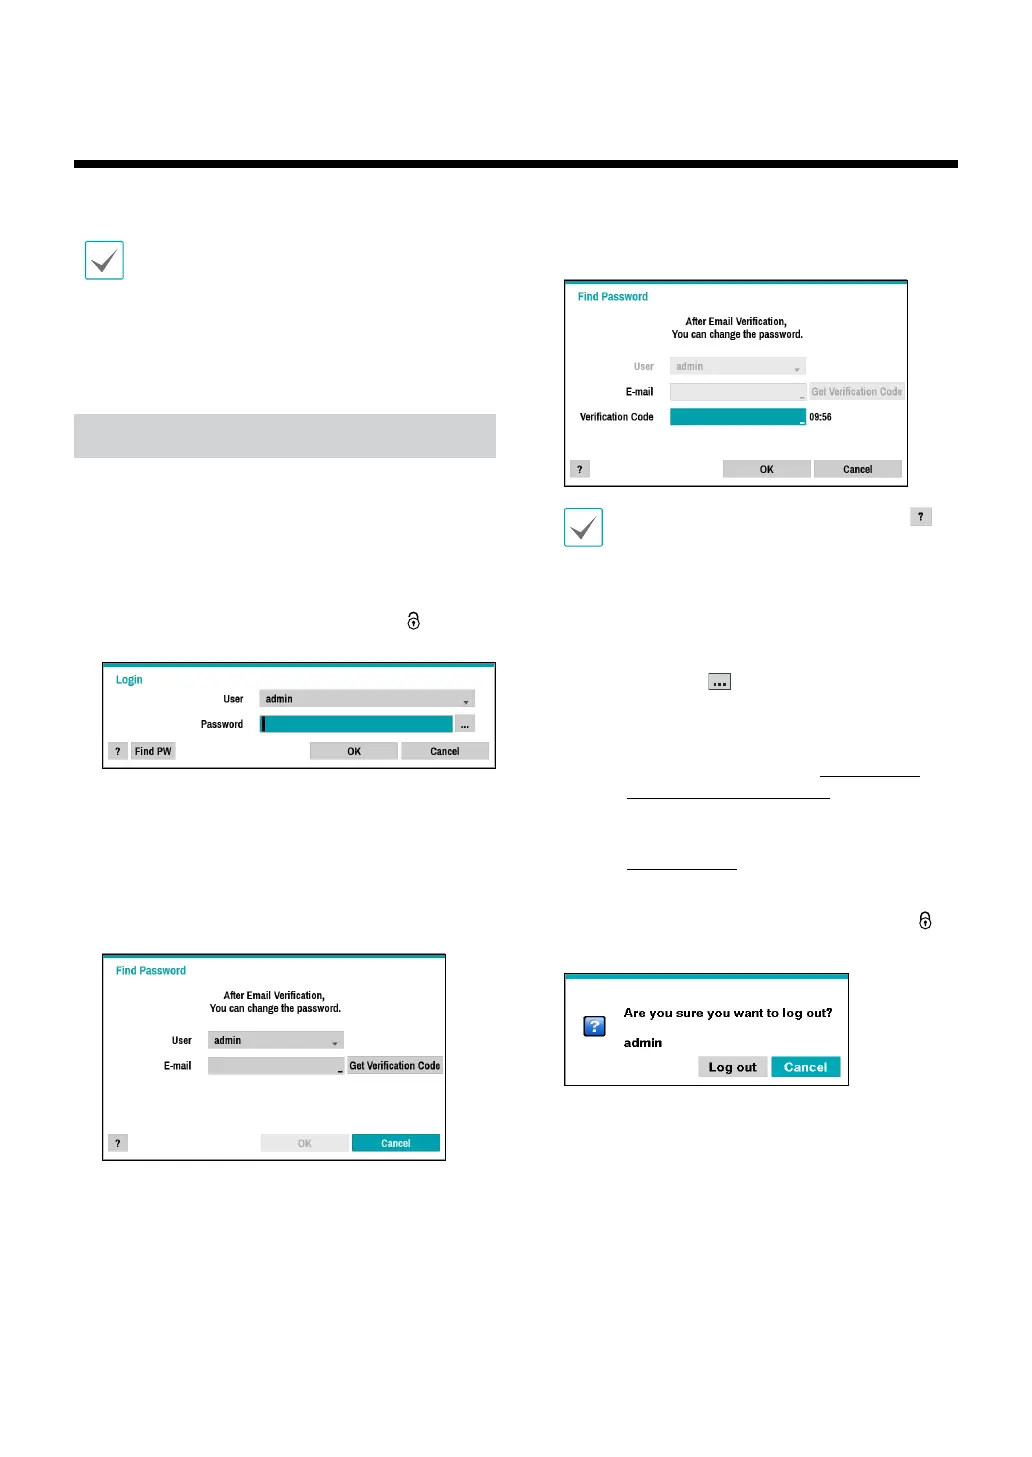
Login
Conguring the DVR’s settings and accessing its
searching and other functions require an authorized
user login.
1
Bring up the Live menu and either press the SETUP
button on the remote control or click on
(Login)
using the mouse.
2
Select a user, enter the password, and then select
OK.
3
Select Find PW from the login screen if you do not
remember the password. Select a user and enter the
E-mail address, and click Get Verication Code.
4
Enter the verication code you receive by e-mail and
click OK.
• If you do not know the password, click the
button for guidance.
• Leaving the admin account unassigned with
a password poses a security risk. Please assign
a password at your earliest convenience. A
warning message will continue to be displayed
until a password is assigned.
• Click on the
button next to the password
eld using the mouse. This will bring up a
virtual keyboard you can use to assign a
password. For more information on using the
virtual keyboard, refer to the Text Input via
Virtual Keyboard on page 21.
• SMTP setup is necessary for verication. For
more information on SMTP setup, refer to the
FEN on page 51.
5
To log out, bring up the Live menu and click on
(Log out) using the mouse.
Part 1 - Getting Started