Part 2 - Conguration
55
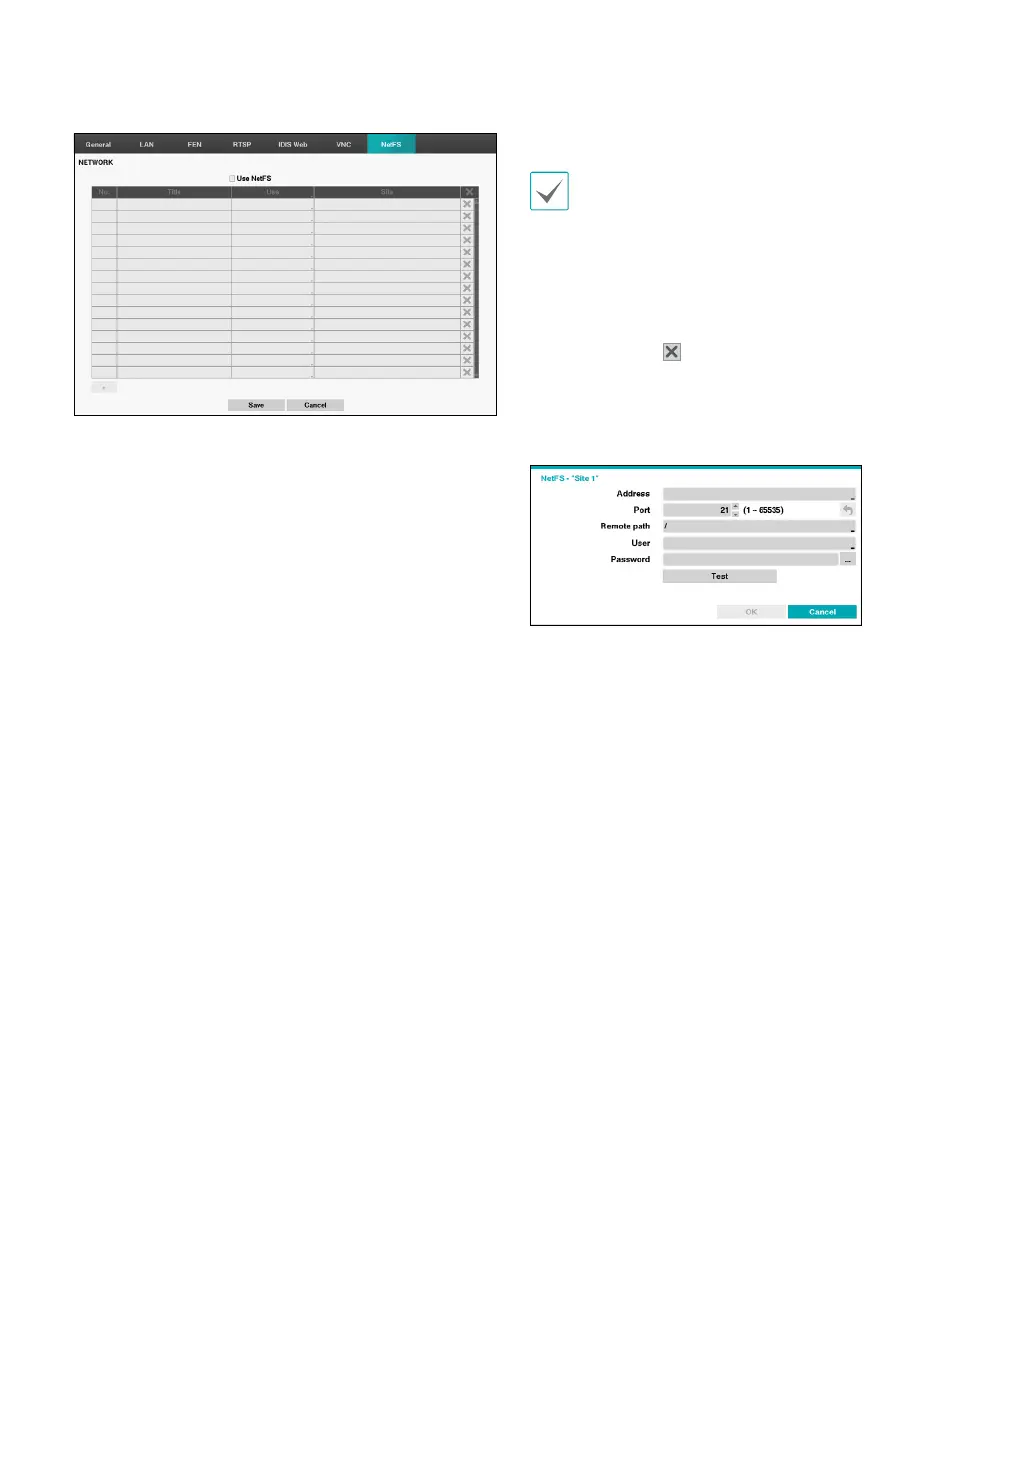
Select the Use NetFS to use the NETFS feature. Select the
+ icon at the bottom of the list to add a FTP site up to 16.
• Title: Display the NetFS site name. Use the virtual
keyboard to enter the name.
• Use: Select the usage of the NetFS feature.
– N/A: disables the NetFS feature.
– ALL: enables the NetFS feature.
– Upgrade: It allows you to use the upgrade le
uploaded on the NetFS site.
– Setup: It allows you to import or export a setup le
uploaded on the NetFS site.
– System Log – It allows you to save system log on the
NetFS site.
– Clip-Copy – It allows you to manually copy video
clips to the NetFS site or to automatically copy
event-detected video clips to the NetFS site.
– Print – It allows you to save images as a PDF le on
the NetFS site.
• Site: Enter NetFS site information.
• When you delete a FTP site in the NetFS setup
screen on the Network menu, the FTP site in the FTP
setup screen on the Eventupload will be deleted,
too.
• When you change the usage to other than ALL
or Clip-Copy, a FTP notication function will be
disabled.
• Select the
icon to delete the existing NetFS site.
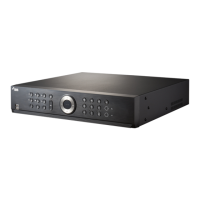
Entering the NetFS site information using the virtual.Click
the test buton to test the current NetFS site settings you
made.
• Address: Enter the NetFS address using the virtual
keyboard.
• Port: Congure the port for connecting NetFS site.
• Remoth path: Enter a folder path in the NetFS site
using the virtual keyboard.
• User / Password: Enter the user and password when
accessing the NetFS site using the virtual keyboard.
• Test: Test the current NetFS site settings you made.