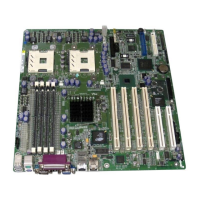
Intel Server Board SE7501HG2 Product Guide
38
Installing or Replacing Processor(s)
✏
NOTES
Use the instructions provided below to install or replace a processor instead
of using the instructions that came with the processor.
If a single processor is to be used, it must be installed in the processor socket
labeled CPU1. This socket is located closest to the corner of the server
board.
When installing a second processor, verify that the processors are identical
and of the same voltage and speed. Do not mix processors of different types
or frequencies.
CAUTIONS
Processor must be appropriate: You may damage the server board if
you install a processor that is inappropriate for your server. Make sure your
server can handle a newer, faster processor (thermal and power
considerations). For exact information about processor interchangeability,
contact your customer service representative or visit the Intel Customer
Support website:
http://support.intel.com/support/motherboards/server/SE7501HG2
ESD and handling processors: Reduce the risk of electrostatic
discharge (ESD) damage to the processor by doing the following: (1) Touch
the metal chassis before touching the processor or server board. Keep part of
your body in contact with the metal chassis to dissipate the static charge
while handling the processor. (2) Avoid moving around unnecessarily.
If you are adding a second processor to your system, you must verify that the
second processor is identical to the first processor, same voltage and speed.
Using non-identical processors could cause system failure.
Use correct retention mechanism clips: The 400 MHz and 533 MHz
versions of the Intel Xeon processors use slightly different retention
mechanism clips. The clips look nearly identical, but vary slightly in size.
Use only the clips that came with your processor.
 Loading...
