Images & Illustrations
Figure 1. Proper lifting procedures for the FlexJet . .......................................................... xiii
Figure 2.
The Ioline FlexJet Printer front view . ................................................................. xvi
Figure 3.
The Ioline FlexJet Printer rear view . ................................................................. xvii
Figure 4.
The Ioline FlexJet Printer front view close-up ............................................... xviii
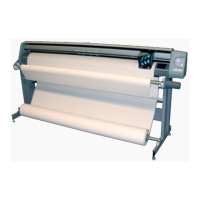
Figure 5.
The Ioline Flexjet . .................................................................................................... 19
Figure 6.
Paper direction . ........................................................................................................ 21
Figure 7.
Carriage movement . ................................................................................................ 21
Figure 8.
Workow: output direct from CAD software (without FlexPlot) . .............. 23
Figure 9.
Workow using FlexPlot for le conversion and output ............................ 23
Figure 10.
FlexJet Control Center main menu . ................................................................ 25
Figure 11.
The Ioline Flexjet power supply . .......................................................................... 29
Figure 12.
Rear power panel assembly . .................................................................................. 29
Figure 13.
Service Station assembly . ....................................................................................... 30
Figure 14.
Pinchwheel assembly . .............................................................................................. 30
Figure 15.
Ink cartridges: HP 51645A . .................................................................................... 30
Figure 16.
FlexJet logic board (Rev 1, above; Rev 2 below) . .............................................. 31
Figure 17.
Carriage assembly with cover on . ........................................................................ 32
Figure 18.
Carriage assembly with cover off . ........................................................................ 32
Figure 19. LED lights
on the keypad . ................................................................................... 36
Figure 20. Keypad LED error codes
. ................................................................................ 36
Figure 21.
The correct paper feeding path on the Ioline FlexJet Printer . ...................... 42
Figure 22. HP cartridges have an ink level indicator
. ............................................... 44
Figure 23.
The ink cartridge is dirty, dry, or empty . ............................................................ 44
Figure 24.
The ink cartridge requires cleaning . .................................................................... 45
Figure 25.
Damaged and dirty print cartridge . ..................................................................... 45
Figure 26.
Use a deliberate frame gap to help calibrate . .................................................... 46
Figure 27.
The Cartridge Calibration window in the Control Center . ................ 47
Figure 28.
The Cartridge Alignment dialog box . .................................................................. 47
Figure 29.
Increase the alignment value for cartridge #2 to improve line quality . ....... 47
Figure 30.
Decrease the alignment value for cartridge #2 to improve line quality . ..... 47
Figure 31.
The Motion Adjust window . .................................................................................. 48
Figure 32.
The heads are drawing the lines too late on this plot . .................................... 48
Figure 33.
The Frame Gap window . ........................................................................................ 48
Figure 34.
Frame gaps on the plot . .......................................................................................... 49
Figure 35.
Frame gaps may indicate that the FlexJet platen or stand is not level . ........ 49
Figure 36.
The height-adjusting spacer . .................................................................................. 49
Figure 37.
The ink stall can crack if the cartridge door is not closed and locked ........ 50