OPERATION
57
Using Position Control
Function - Attaching / detaching implements and op-
erations requiring the implement to be kept at constant
height above ground. Also used with tool bars having
flexible row units and implements equipped with gauge
(support) wheels.
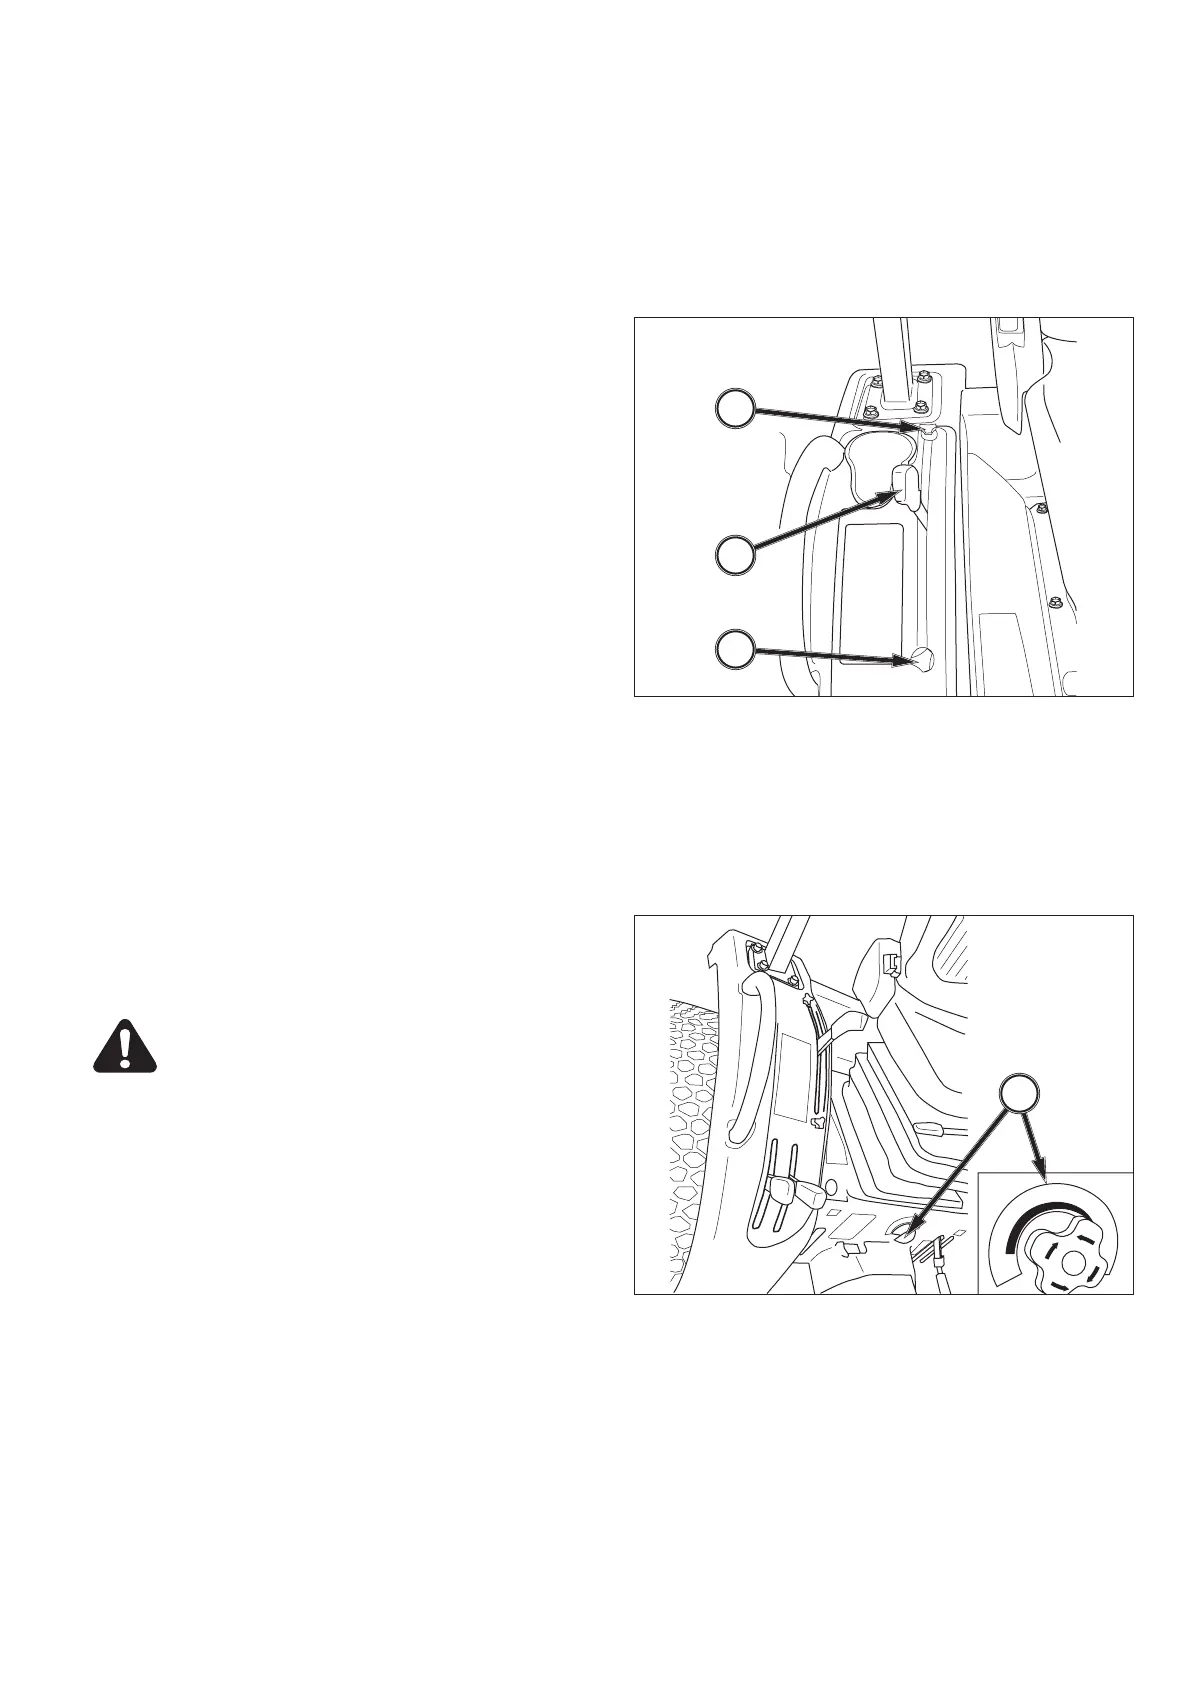
FIG. 98: Lever Positions - Use the control lever, 1, to ad-
just hitch and implement position.
NOTE: Front lever stopper, 2, can be set to contact po-
sition control lever in implement work position.
This enables the implement to be returned
to identical position after the hitch has been
raised for turning, transporting, etc. Rear lever
stopper, 3, can be set to limit raising height, if
required.
To Begin Work - Align the tractor and implement in field
and move the position control lever, 1, forward (toward
DOWN). Adjust implement height using the position con-
trol lever and set the adjustable stoppers, 2, and, 3, as
desired.
When Turning - Move the position lever, 1, rearward
(toward Up) to raise the implement. Finish turning and
return the lever against the lower stop to resume opera-
tion.
To Finish Work and Transport - Move the position con-
trol lever, 1, fully rearward in the quadrant.
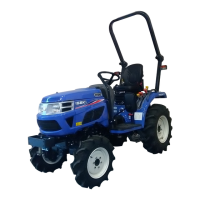
FIG. 99: Lowering speed can be readjusted as neces-
sary using the lowering rate control handle, 4. Turning
the handle fully clockwise will prevent links from lower-
ing.
CAUTION: When using a mounted imple-
ments with PTO driveline, make sure:
• PTO drive shaft has minimum 51 mm (2”)
engagement of telescoping sections at all
hitch / implement positions.
• Hitch height during raising does not bind
drive shaft universal joints due to extreme
drive shaft angles.
• PTO drive is disengaged during transport.
2
1
3
r
t
¨
4
FIG. 98
FIG. 99



 To Next Page