57
X-Series Waterblast Unit
Figure 97: Gland Installation.
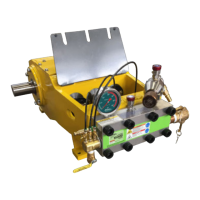
Plunger Coupling
Plunger
Figure 98: Plunger Coupling Installation.
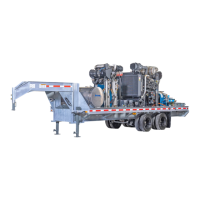
Figure 99: Tightening the Gland.
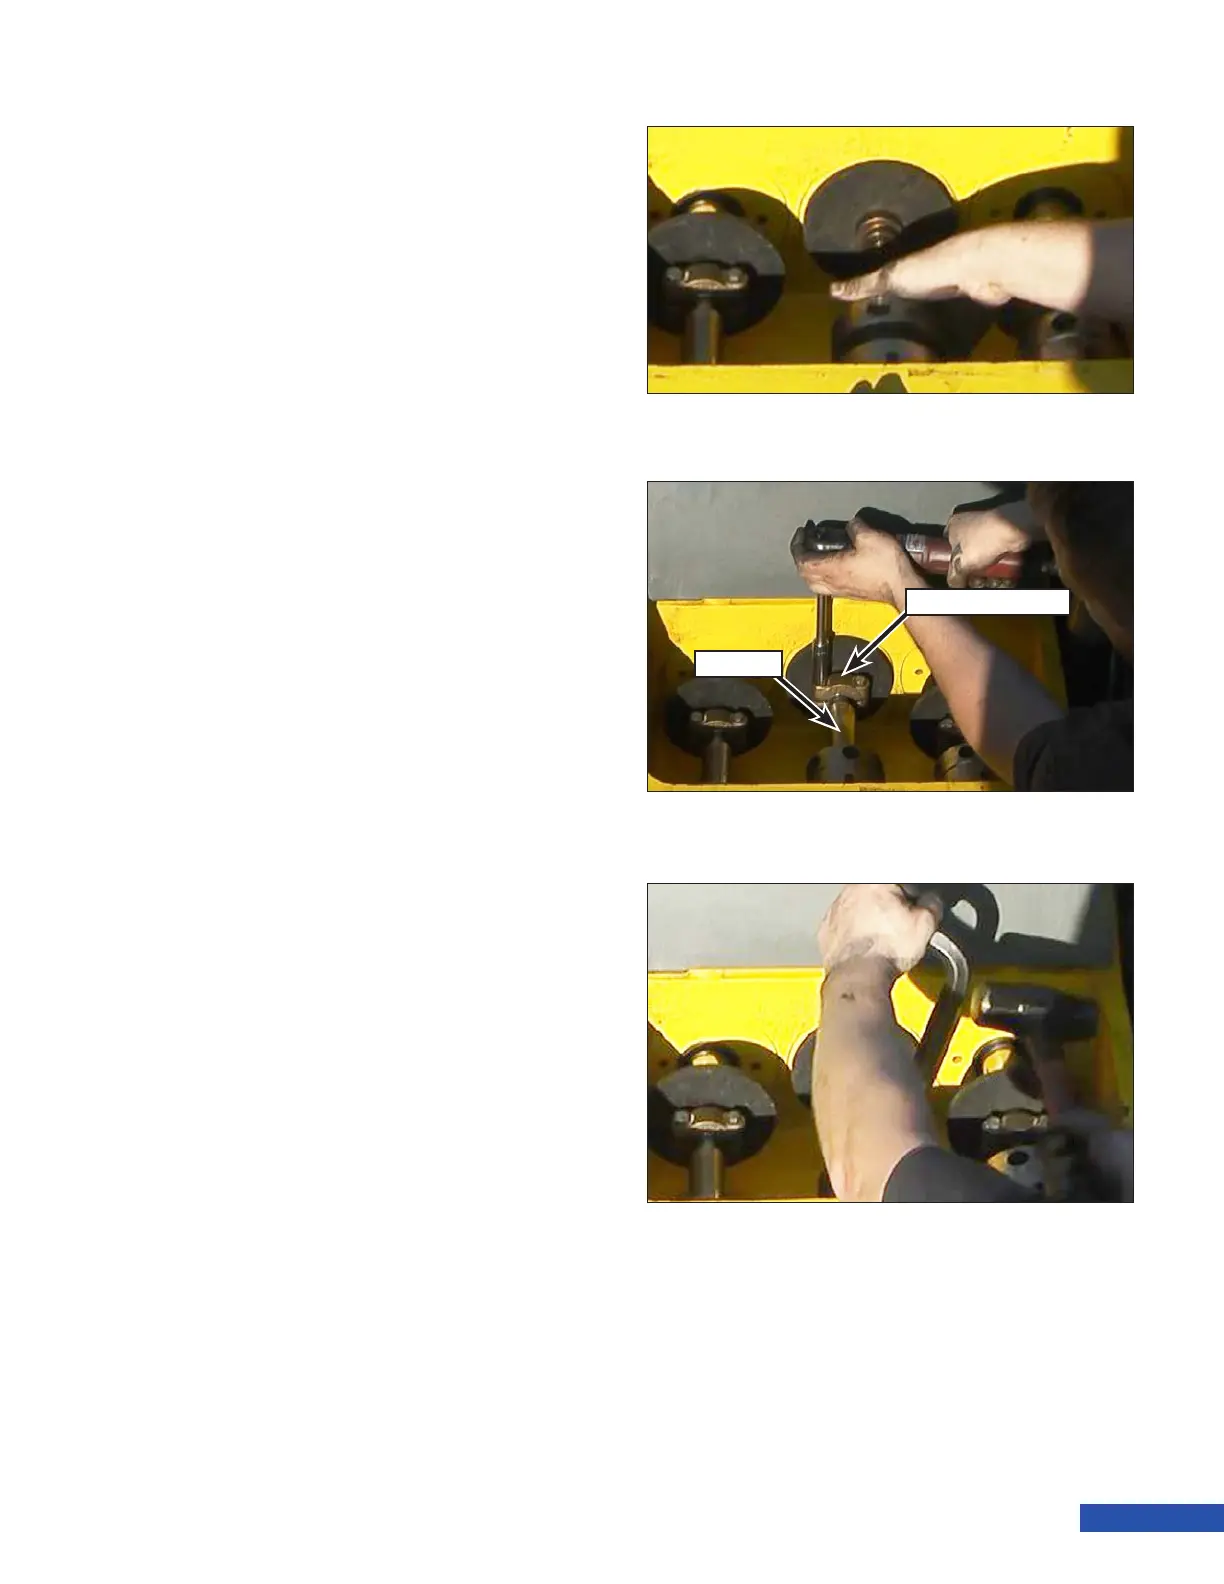
5. Pull the plunger (Figure 97) back to meet
the crosshead pony rod. If the packing is
too tight to move the plunger by hand,
the pump can be rotated by hand (via the
belts) to move the pony rod to meet the
plunger.
6. Place the plunger coupling into position
and install the coupling bolts (Figure 98).
Tighten the bolts to 20 ft.-lb.(27 N·m).
7. Use the pump wrench and a 5 lb. (2 kg)
hammer to tighten the gland nuts to ap-
proximately 250 ft.-lb.(338 N·m). Hit the
wrench about three times using moderate
force (Figure 99). This will supply suf-
cient torque on the nut.
8. Repeat the previous steps for the remain-
ing stufng boxes.
9. Connect the water lubrication lines and
close the rod box cover.
10. It is necessary to break-in new packing
properly to ensure optimal performance
and a proper seal. Refer to “Breaking in
New Packing” on page 29 for the proper
break-in procedure.