69
X-Series Waterblast Unit
6. Continue the lapping process until the
desired sealing surface is achieved.
7. Repeat the lapping process for the dis-
charge valve.
8. When completed, clean all metal parts
by submerging in a mineral spirits solu-
tion for a few minutes. Remove and air dry
thoroughly with compressed air. Ensure
that no compound or solution remains in
the cross holes.
Bypass Valve Cartridge Replacement
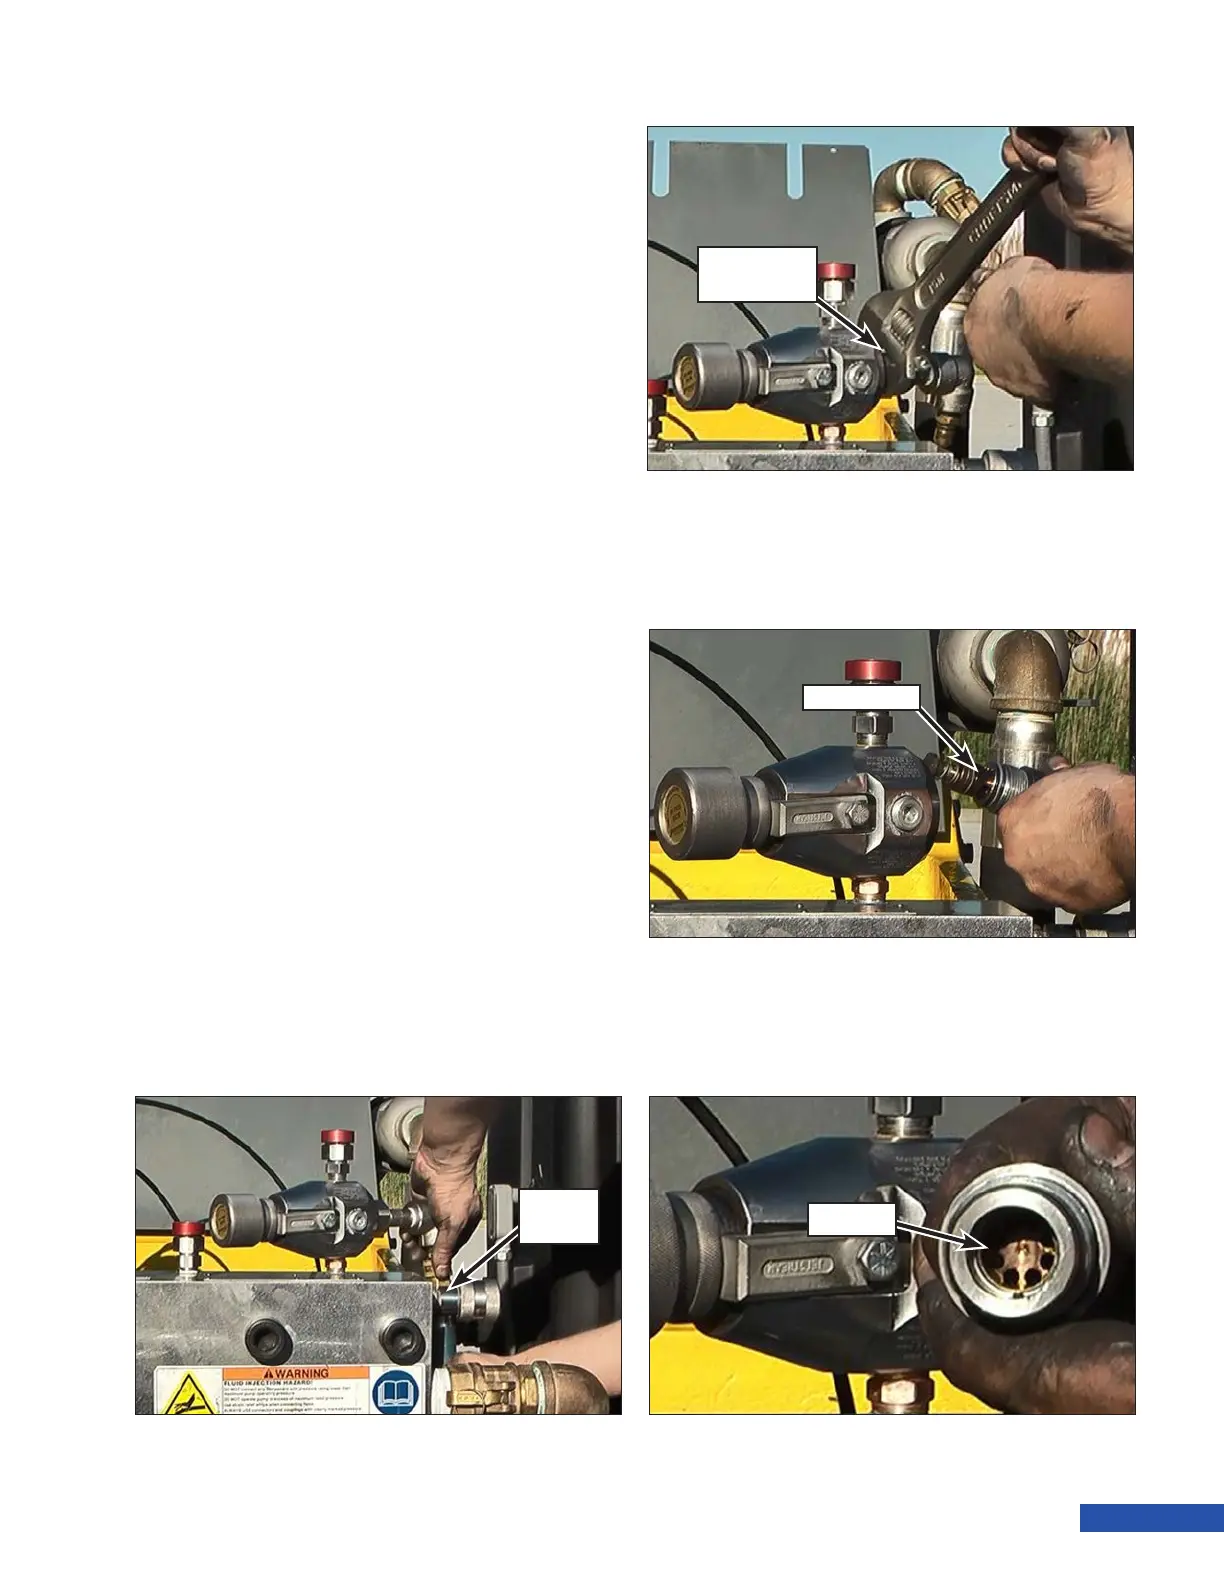
1. Remove the dump hose (Figure 131) from
the bypass valve.
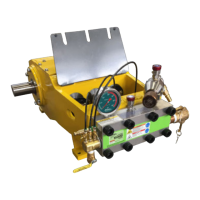
2. Using an adjustable wrench, remove the
cartridge housing (Figure 132) from the
valve.
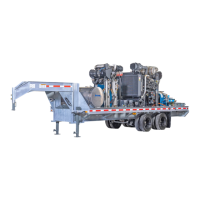
3. Pull the cartridge (Figure 133) from the
housing.
4. Inspect the diffuser (Figure 134) for jet-
ting damage. Replace if damage is exten-
sive.
5. Push the new cartridge into the housing
until it snaps into place.
6. Install the cartridge housing back onto
the bypass valve.
7. Install the dump hose onto the bypass
valve.
Figure 131: Dump Hose Removal.
Dump
Hose
Figure 132: Cartidge Housing Removal.
Cartridge
Housing
Cartridge
Figure 133: Cartridge Removal.
Figure 134: Seating Surface Inspection.
Diffuser