3-6
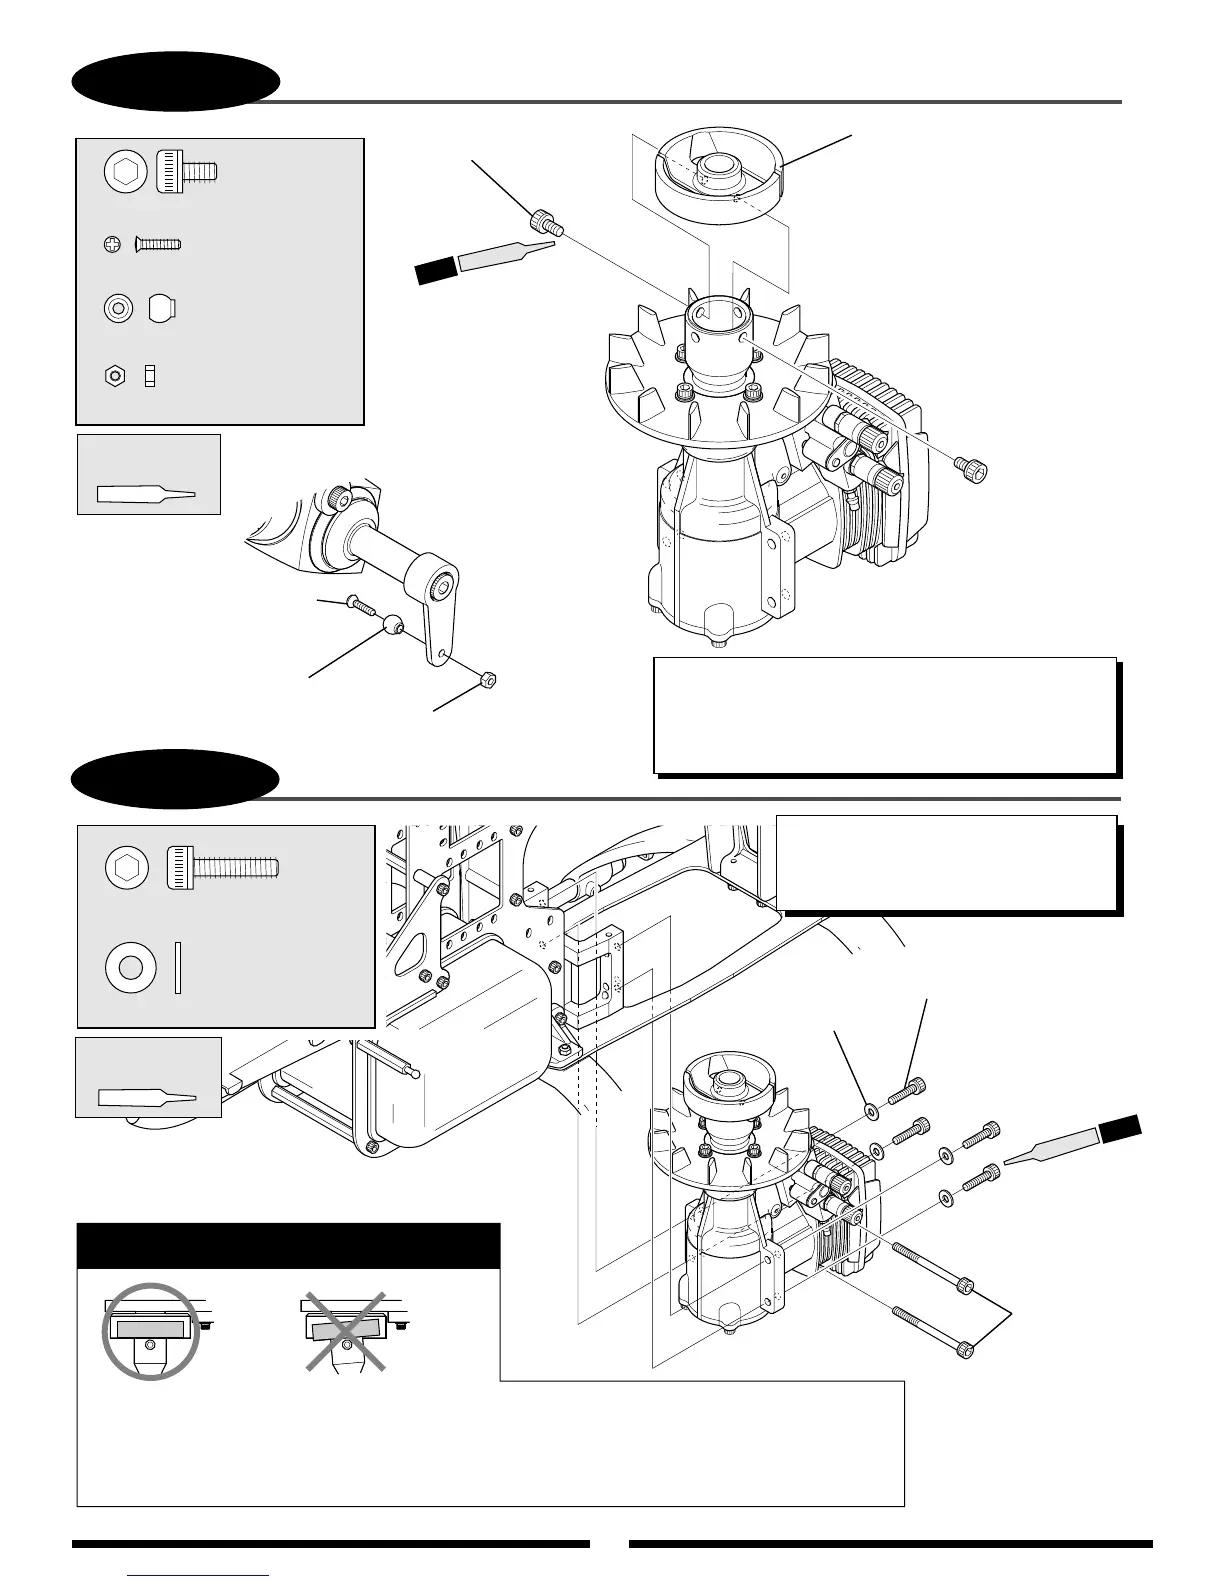
ENGINE INSTALLATION
1. Adjust the position of the engine as shown so the bottom of the clutch assembly is flush with
the bottom of the clutch bell. Also check to insure that the engine and clutch bell are parallel.
2. It is highly recommended that you insert the muffler bolts into the engine case prior to
installing the engine in the frame.
Flat Washer, 4 mm
Socket Head Bolt, 4 x 15 mm
.....4 pcs
........................4 pcs
Flat Washer, 4 mm (4 pcs)
Muffler Bolts
(not included)
Socket Head Bolt, 4 x 15 mm (4 pcs)
Caution: Be sure to note the
correct installation of the engine.
3-5
CLUTCH ASSEMBLY ATTACHMENT
.....................1 pc
............2 pcs
......................1 pc
..........................1 pc
Flat Head Screw, 2 x 8 mm
Flat Head Screw, 2 x 8 mm
Steel Joint Ball
Steel Joint Ball
Hex Nut, 2 mm
Hex Nut, 2 mm
Socket Head Bolt, 4 x 6 mm
Socket Head
Bolt, 4 x 6 mm (2 pcs)
Clutch Assembly
2 pcs
Use Red
Threadlock
TEAM TIP: Before the clutch is permanently attached,
rotate the clutch/fan assembly to check for trueness.
If any clutch runout is detected, reposition the clutch
at 90
°
intervals through the use of the four holes in the
fan hub until optimum clutch trueness is achieved.
Use Red
Threadlock
4 pcs
TEAM TIP: The engine can be installed
either from the bottom or from the side
of the frame. It may be easier to
install the engine from the side.
Red
Red