4-6
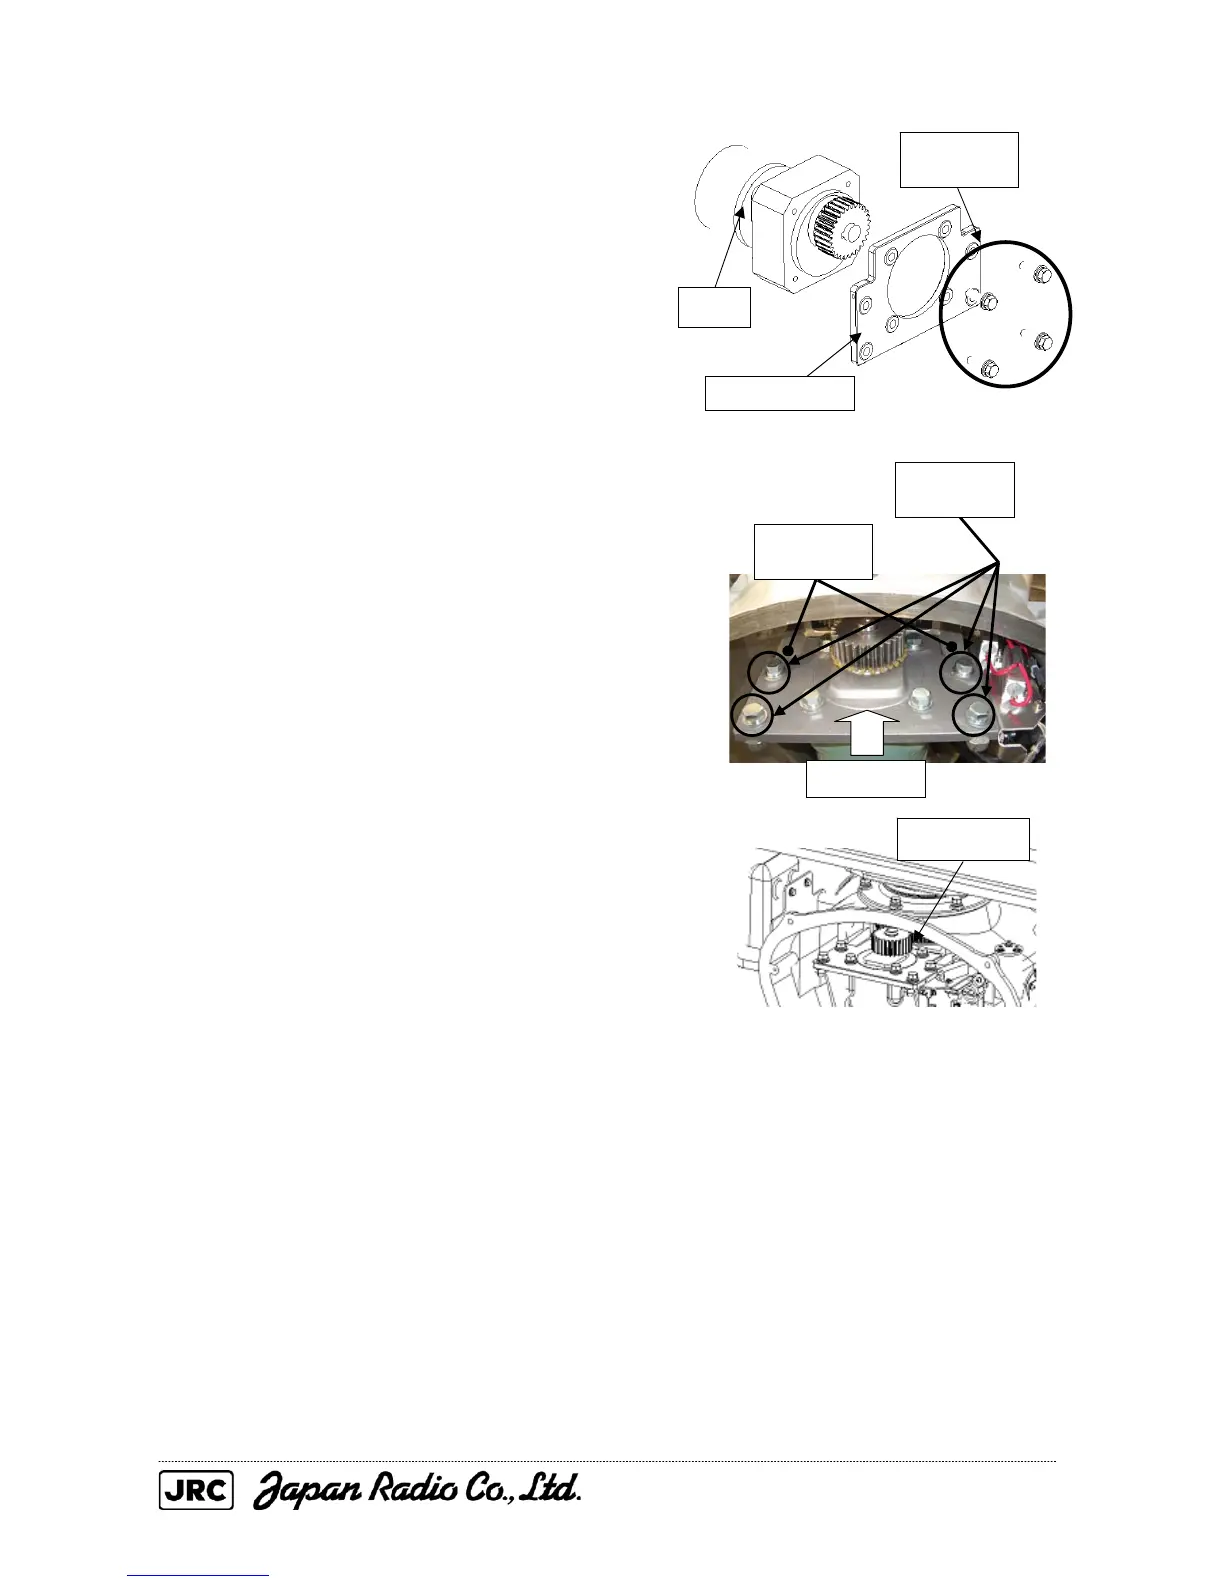
(3) Remove the four hexagon bolts (M8),
and detach the mounting plate from the
motor.
(4) Attach the mounting plate to the new
motor. Be sure to tighten all the four
hexagon bolts with specified torque
(210 kgf
cm).
(5) Install the motor in the scanner unit.
Press the motor against the protrusions on
the arms extending from the chassis, and
secure the motor after adjustment to
minimize motor backlash.
Be sure to tighten all the four hexagon
bolts with specified torque (140 kgfcm).
(6) Apply grease to the gear after installing
the motor.
(7) After the motor replacement, carry out
the work in reverse order of removal.
Be sure to tighten all the bolts and
screws and connect all the cables.
[Operation check]
After completing the replacement work, check the operation by following the
procedure below.
(1) Turn on the radar, transmit radar signals when the countdown is finished, and
check that radar images are displayed normally. There shall be no abnormal noise
emitted when the motor starts running, when it is running, or when it stops.
Motor
Remove the
four bolts.
Mounting plate
Tighten the
four bolts.
Protrusions
from the arm
Press
Apply grease.

 Loading...