To remove a transceiver (see Figure 31 on page 118):
1. Have ready a replacement transceiver or a transceiver slot plug, an antistatic mat,
and a rubber safety cap for the transceiver.
2. Attach an ESD grounding strap to your bare wrist and connect the strap to one of the
ESD points on the chassis.
3. Label the cables connected to the transceiver so that you can reconnect them correctly
later.
WARNING: Do not look directly into a fiber-optic transceiver or into the
ends of fiber-optic cables. Fiber-optic transceivers and fiber-optic cable
connected to a transceiver emit laser light that can damage your eyes.
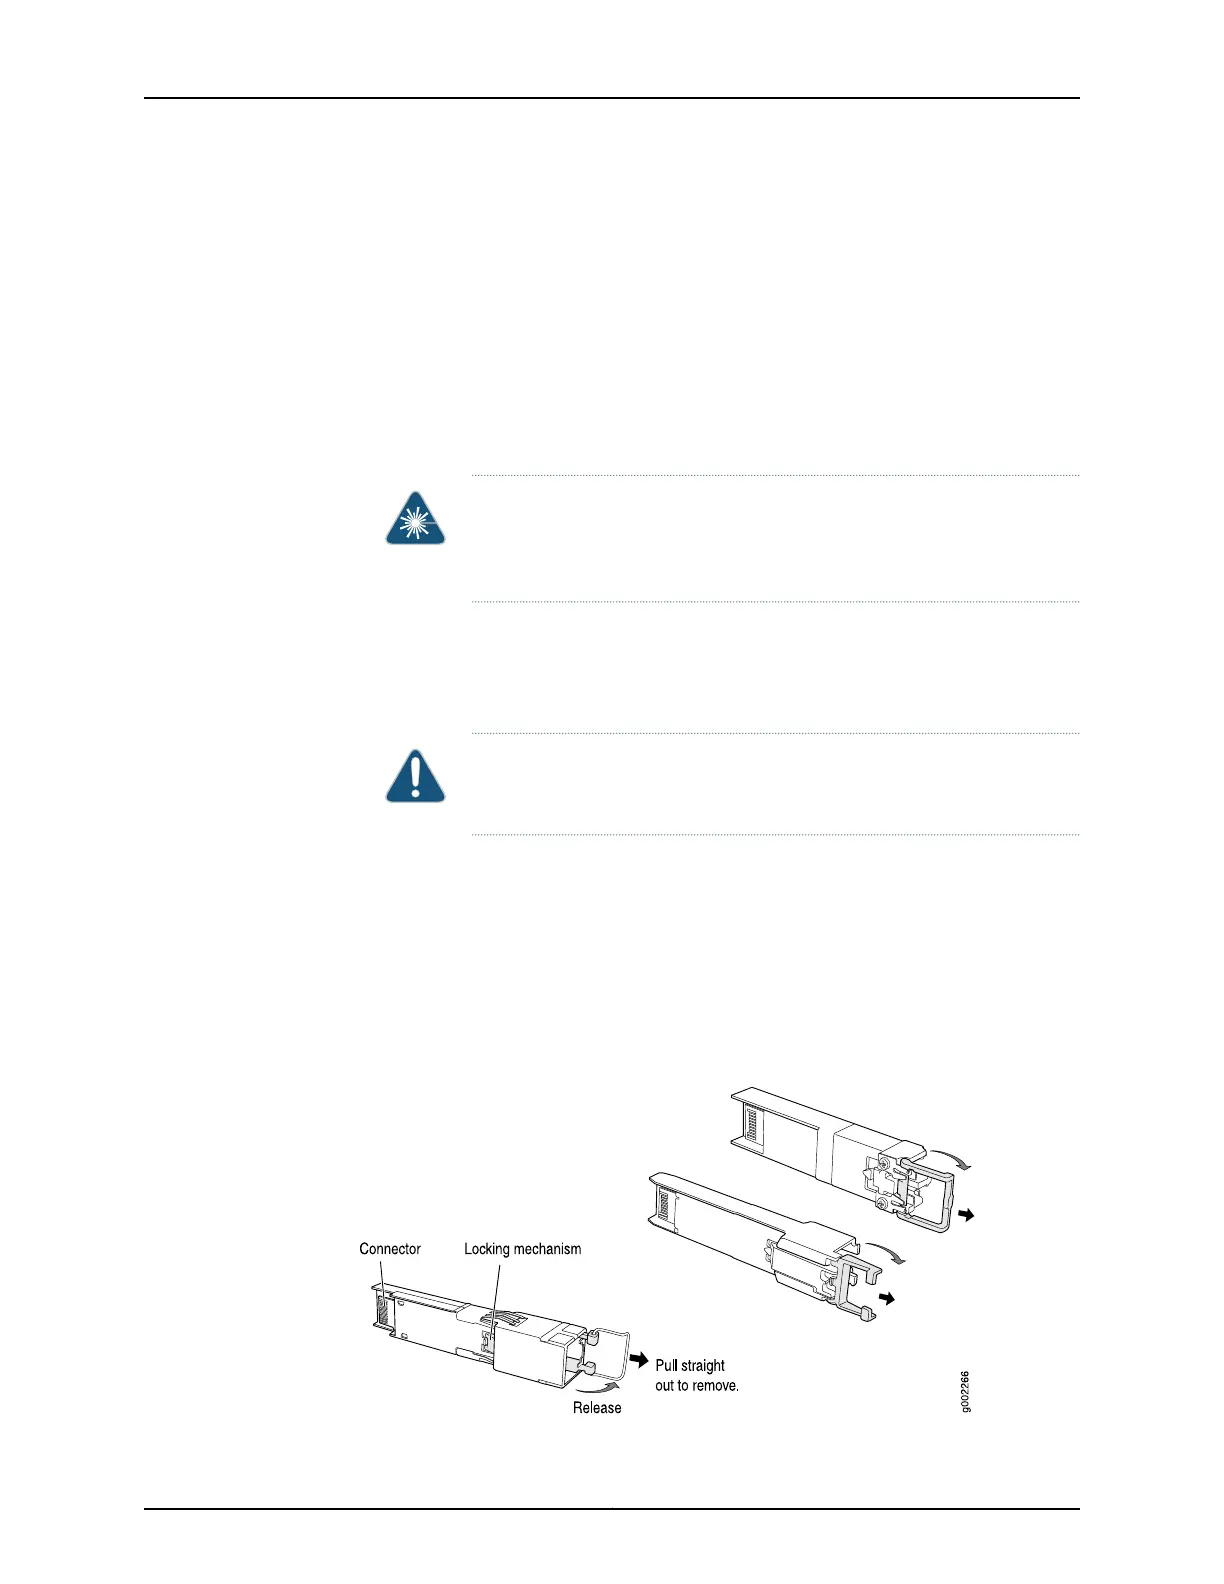
4. Remove the cable connector from the transceiver.
5. Pull the ejector handle out from the transceiver to unlock the transceiver.
CAUTION: Make sure that you open the ejector handle completely until
you hear it click. This action prevents damage to the transceiver.
Use needlenose pliers to pull the ejector handle out from the transceiver.
6. Grasp the transceiver ejector handle, and pull the transceiver approximately 0.5 in. (1.3
cm) out of the router.
7. Using your fingers, grasp the body of the transceiver, and pull it the rest of the way
out of the router.
Figure 31: Removing Transceivers
Copyright © 2017, Juniper Networks, Inc.118
ACX1000 and ACX1100 Universal Access Router Hardware Guide