Wait until a message appears on the console confirming that the operating system
has halted.
For more information about the command, see the CLI Explorer.
3. Attach an ESD grounding strap to your bare wrist and connect the strap to one of the
ESD points on the chassis.
4. Shut down power to the router by pressing the AC input switch or DC circuit breaker
for all power supplies to the off (O) position.
5. Disconnect power from the router.
6. Remove the cables that connect to all external devices.
7. Remove all field replaceable units (FRUs) from the router.
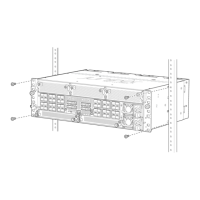
8. Remove the router from the rack. One person should grasp the router while a second
person unscrews and removes the mounting screws from the rack. One lifter can then
move the router to the shipping container.
9. Place the router in the shipping container.
10. Cover the router with an ESD bag and place the packing foam on top of and around
the router.
11. Replace the accessory box on top of the packing foam.
12. Securely tape the box closed.
13. Write the RMA number on the exterior of the box to ensure proper tracking.
Related
Documentation
• Returning a Hardware Component to Juniper Networks, Inc. on page 133
• Contacting Customer Support on page 129
135Copyright © 2017, Juniper Networks, Inc.
Chapter 26: Packing and Returning Components
 Loading...
