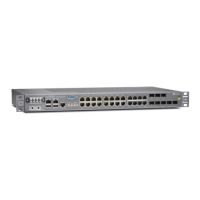
ACX2000 router:
user@host> show chassis fpc pic-status
Slot 0 Online
PIC 0 Online 16x CHE1T1, RJ48
PIC 1 Online 8x 1GE(LAN) RJ45
PIC 2 Online 2x 1GE(LAN) SFP
PIC 3 Online 2x 10GE(LAN) SFP+
ACX2100 router:
user@host> show chassis fpc pic-status
Slot 0 Online
PIC 0 Online 16x CHE1T1, RJ48
Slot 1 Online
PIC 0 Online 4x 1GE(LAN) RJ45
PIC 1 Online 4x 1GE(LAN) SFP, RJ45
PIC 2 Online 2x 1GE(LAN) SFP
PIC 3 Online 2x 10GE(LAN) SFP+
SEE ALSO
ACX2000 and ACX2100 Routers Hardware and CLI Terminology Mapping | 20
Removing a Transceiver from the ACX2000 or ACX2100
Removing a transceiver does not interrupt router functioning, but the removed transceiver no longer
receives or transmits data.
To remove a transceiver (see Figure 28 on page 120):
1. Have ready a replacement transceiver or a transceiver slot plug, an antistatic mat, and a rubber safety
cap for the transceiver.
2. Wrap and fasten one end of the ESD grounding strap around your bare wrist, and connect the other
end of the strap to an ESD point.
3. Label the cables connected to the transceiver so that you can reconnect them correctly later.
119

 Loading...