54
54
Operation
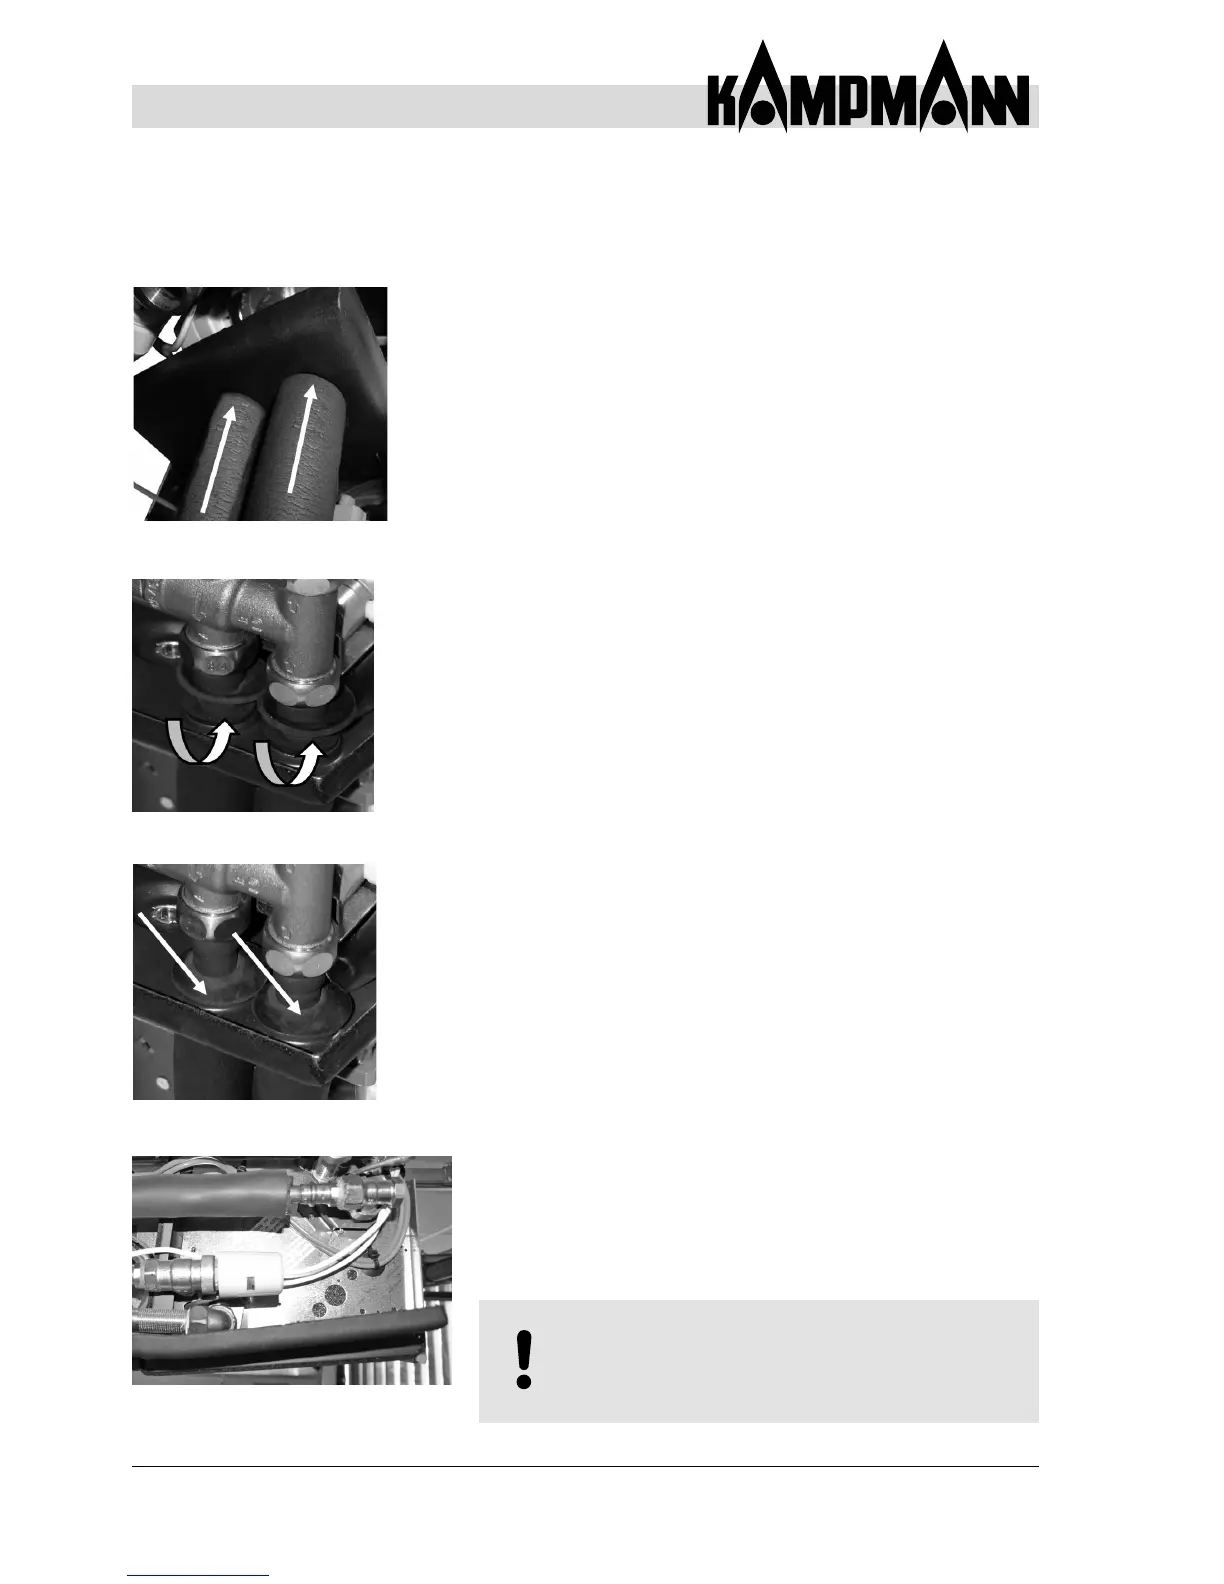
Sealing the pipework to the valve condensate tray
Proceed as follows when using the optional valve condensate tray to
catchcondensationfromthevalves:
• Wall-mounted: Push the impermeable insulation from below through
the condensate opening on the pipe as far as the upper edge (see Fig.
41).
• Glue the drip ring with insulation and the stem of the condensate
tray and press the rubber pipe cuffs onto the insulation (see Fig. 42).
• Press the rubber pipe cuffs onto the insulation (see g. 43).
• If the insulation is not leak-proof and/or if the insulation is not
connected to the condensate tray and the drip ring, there is a danger
of condensate escaping and entering the room.
• Continue the insulation as far as the valves with ceiling units.
• When space is tight, e.g. with 4-pipe units (see Fig. 44), only continue
and stick the insulation as far as the valve condensate tray).
Fig. 41: Fix insulation through the
openings of the condensate tray
Fig. 42: Glue the insulation with
rubber pipe cuffs
Fig. 43: Press the rubber tube cuffs
onto the insulation
Fig. 44: Insulating with ceiling units
6.12 Sealing the Pipework to the Valve Condensate Tray (Accessory)
IMPORTANT NOTE!
Donotbendthevalvecondensatetrayttedatthe
side.
Check the free condensate drain with water at latest
when commissioning the unit.