72
72
Maintenance
Cleaning
8.3.3 Cleaning Work on the Basic Unit
1
2
3
4
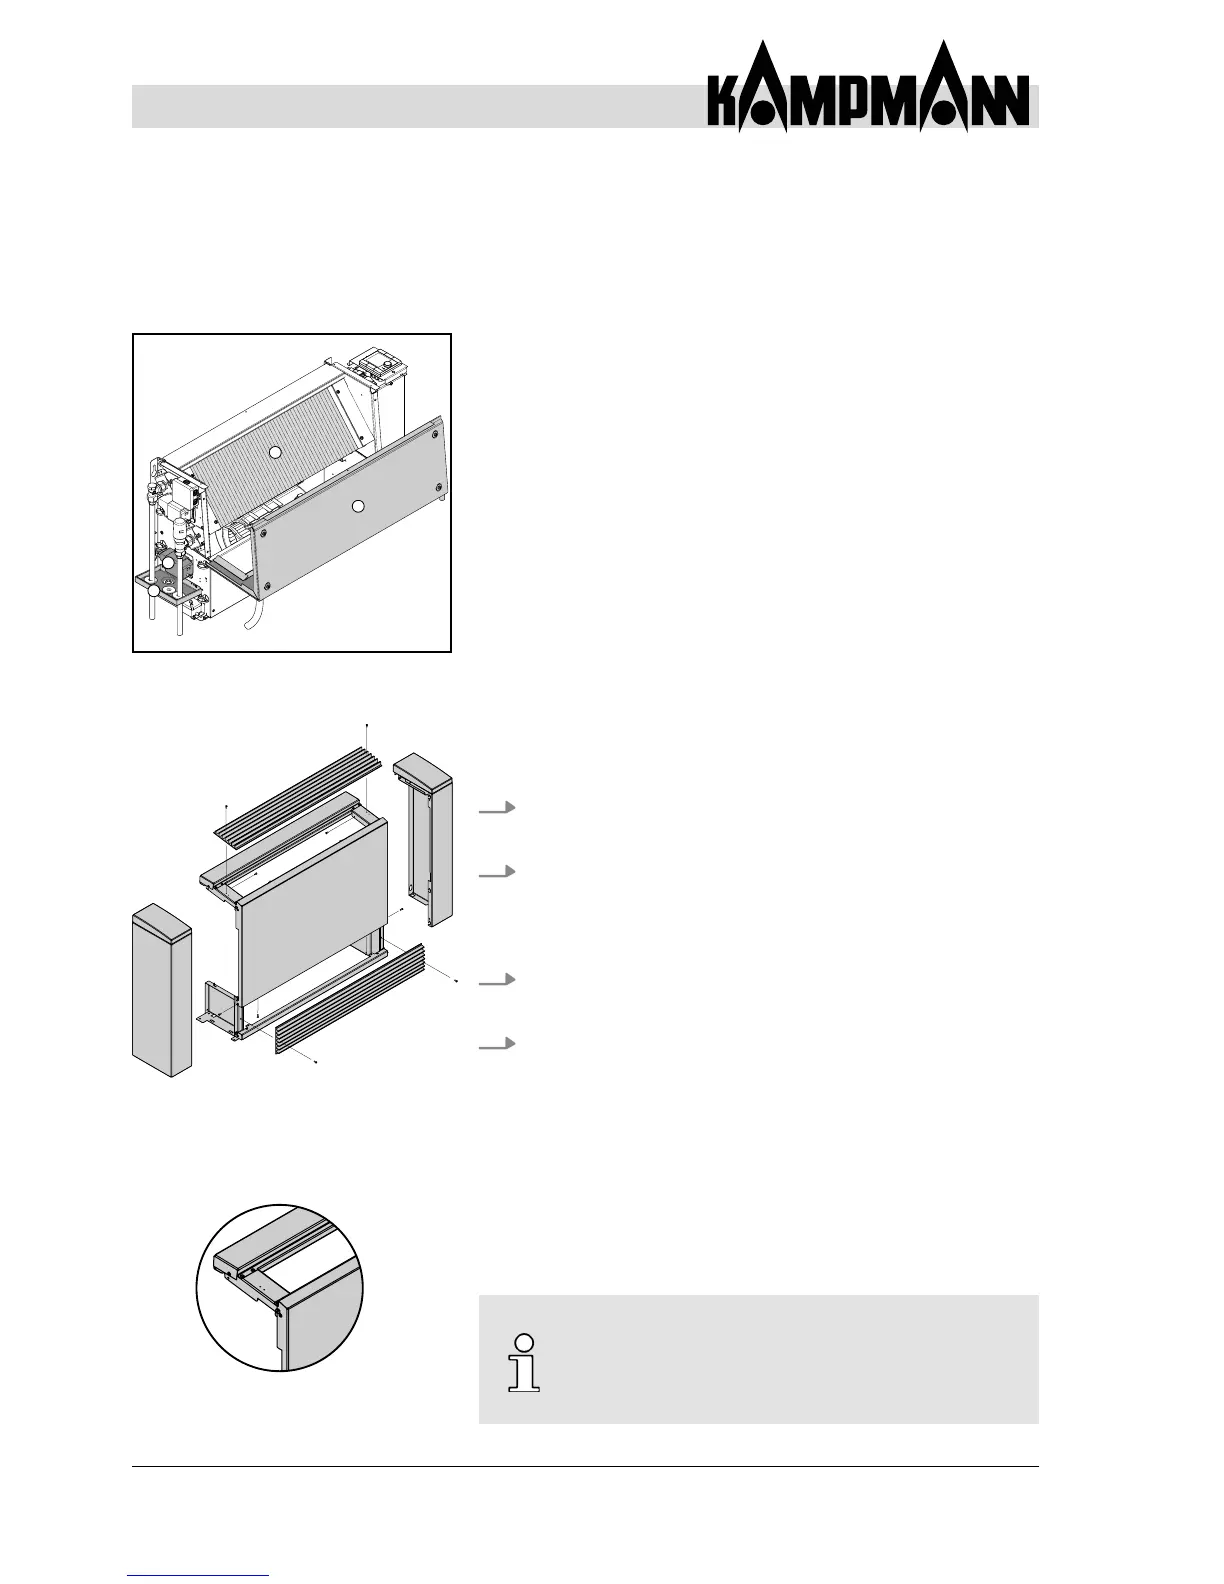
Thefollowingcomponentsttedtothebasicunitmustbe
cleaned:
1
Main condensate tray
2
Heat exchanger
3
Valve condensate tray
4
Condensate pump
The casing has to be removed to access the individual
components to clean the above.
1. Remove side panels (see Chapter 8.3.2. „Visual
Inspections“).
2. Remove outlet grille; use a Phillips screwdriver to unscrew
the tapping screws on the left and right in the middle of
the outlet grille and remove the outlet grille.
3. Remove air intake grille (see Chapter 8.3.1. „Replacing
Filter“).
4. Unscrew all the relevant screws (Fig. 61). After these
screws have been loosened, the front panel is still
connected to the window sill by two gusset plates
(Fig. 62). Manually remove these metal joining plates
upwards.
Important note: On the ceiling model, a rear panel is
located on the underside of the casing, which does not
have to be touched when removing the casing sections..
The components to be cleaned are now freely accessible.
Fig. 60: Components to be cleaned
Fig. 61: Dismantling the casing
Fig. 62: Front panel connected to
window sill
3
1
2
4
1
These instructions relate to all casing
congurations. Once you have cleaned the various
components, t the casing panels in the reverse
order to the above instructions.