73
Maintenance
Cleaning - Cleaning the heat exchanger
Fig. 63: Loosen the main
condensate tray
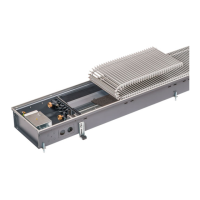
Fig. 64: Heat exchanger
Fig. 65: Sealing prole on the main
condensate tray
The cleaning work on the main condensate tray and
heat exchanger applies to all models of the unit.
Once you have cleaned the various components, t
the main condensate tray in reverse order to the
above instructions.
When inserting the main condensate tray,
make sure that the sealing prole is ush with
the left and right of each main bracket and
is not damaged! Check that water is draining
away freely after tting!
1. Use a suitable screwdriver to loosen the screws and
remove screws and washers.
2. Use both hands to evenly pull out the main condensate
tray towards the room.
3. Remove the drain hose.
4. Use a cloth or rag that will absorb moisture and dirt to
clean the condensate tray and outlet, if needed.
The heat exchanger can be cleaned once the condensate tray
hasbeendismantled.Dustyandoilydepositsonthensofthe
heatexchangerrestricttheairowandheattransfer.Onlya
clean heat exchanger will produce its full heat output in the
long term. Therefore, check the heat exchanger at regular
intervals (at least every six months) before the start of the hea-
ting and cooling season. If there are signs of increased dirt du-
ring regular checks, adjust the required maintenance intervals
to the actual wear and tear.
1. Carefully use compressed air to blow the heat exchanger
until all deposits of dust and dirt have been removed
fromthens.
Caution: Fins bend easily!
Cleaning the main condensate tray
Cleaning the heat exchanger
IMPORTANT NOTE!
Do not use agents that can damage the protective
layer on the condensate tray!
IMPORTANT NOTE!
When draining, some water can remain in the heat
exchanger. Therefore, protect the heat exchanger
from frost once used!