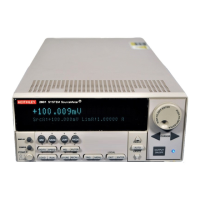
F-12 Contact Check Function 2400 Series SourceMeter
®
User’s Manual
Using contact check
1. Make connections to the DUT (Figure F-3).
2. Press the MENU key, select A/D CTRL, then choose CONT CHK, and press
ENTER.
3. Select ENABLE, then press ENTER.
4. At the CONT-CHK RESISTANCE prompt, select the desired contact check thresh-
old resistance (2Ω, 15Ω, or 50Ω), then press ENTER. (See Table F-1 for
recommendations.)
5. Use EXIT to back out of the menu structure.
6. Press CONFIG then Ω, then select SENSE MODE, and press ENTER.
Menu item* Description
MENU Main menu.
MAIN MENU
A/D CTRL A/D control selection.
AUTO ZERO
LINE FREQ
NPLC CACHE Control NPLC caching.
CONT CHK Enable/disable contact check.
DISABLE Disable contact check.
ENABLE Enable contact check, select 2Ω, 15Ω, or 50Ω resistance.
CONFIG TRIG Configure triggering.
CONFIGURE TRIGGER
ARM LAYER Configure arm layer.
TRIG LAYER Configure trigger layer.
HALT Return to idle.
CONTACT CHECK Configure contact check event detection.
DISABLE Disable contact check event detection.
ENABLE Enable contact check event detection, program contact
check timeout (0.00000 to 999.99990).
CONFIG SOURCE V or CONFIG MEAS Ω Configure 4-wire sense mode for contact check.
SENSE MODE Select sense mode.
2 WIRE 2-wire sensing.
4 WIRE 4-wire sensing (use for contact check).
*See Section 1 for complete menu listings, and Section 11 and Section 12 for triggering and limit tests. Factory defaults shown in
boldface.
Table F-2 (continued)
Contact check menu selections
Artisan Technology Group - Quality Instrumentation ... Guaranteed | (888) 88-SOURCE | www.artisantg.com
 Loading...
